Archive for June, 2017
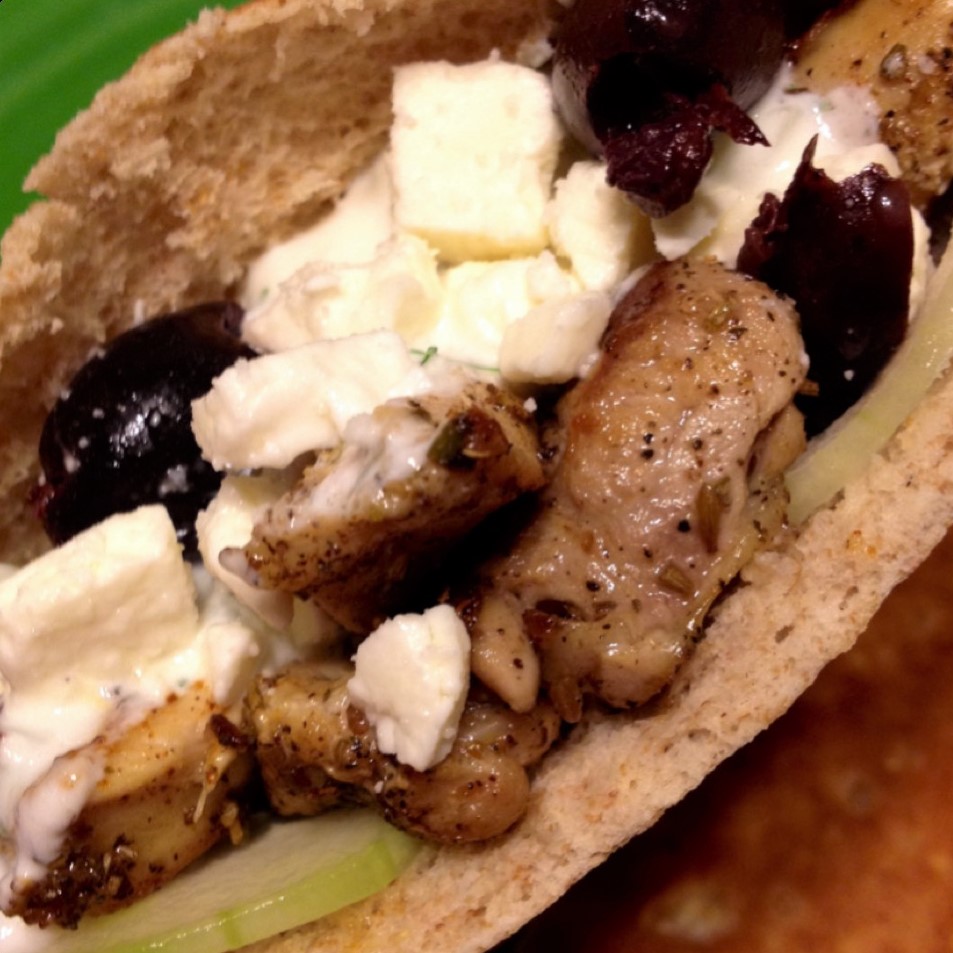
I have been craving a Chicken Gyro. Although, I am not sure if I am really just craving the Changing Seasonings Greek Isle seasoning blend I use, or perhaps the fresh Tzatziki sauce. Probably both.
 I ate a ton of Greek last summer, but took a little break once my garden stopped giving me cucumbers. This spring, I planted two cucumber plants in my little garden. One, was a plant that was withered at the greenhouse so the owner just tossed it in for free to see if I could salvage the poor little thing. Both plants are growing like crazy though, in what is best described as an attempt to take over the world. I don’t even think I will get a good harvest of green beans before the cucumber plants sprawl out with their tiny but strong little tentacles that grab onto whatever they can and take over an entire corner of my garden. I have a ton of blossoms, and in turn, will have bunches of cucumbers again this year.
Tzatziki is a Greek sauce that is used to top meats, on gyros, and as a dip. A local to me restaurant uses it as a dip for a tasty little potato wedge appetizer. The wedges are coated in a Bay Seasoning, like Changing Seasonings Calypso blend. The two compliment each other perfectly. Let’s just say, the ratio of Tzatziki to wedge is not balanced when I am eating this appetizer. The wedges become more of a utensil to scoop the dip into my mouth.
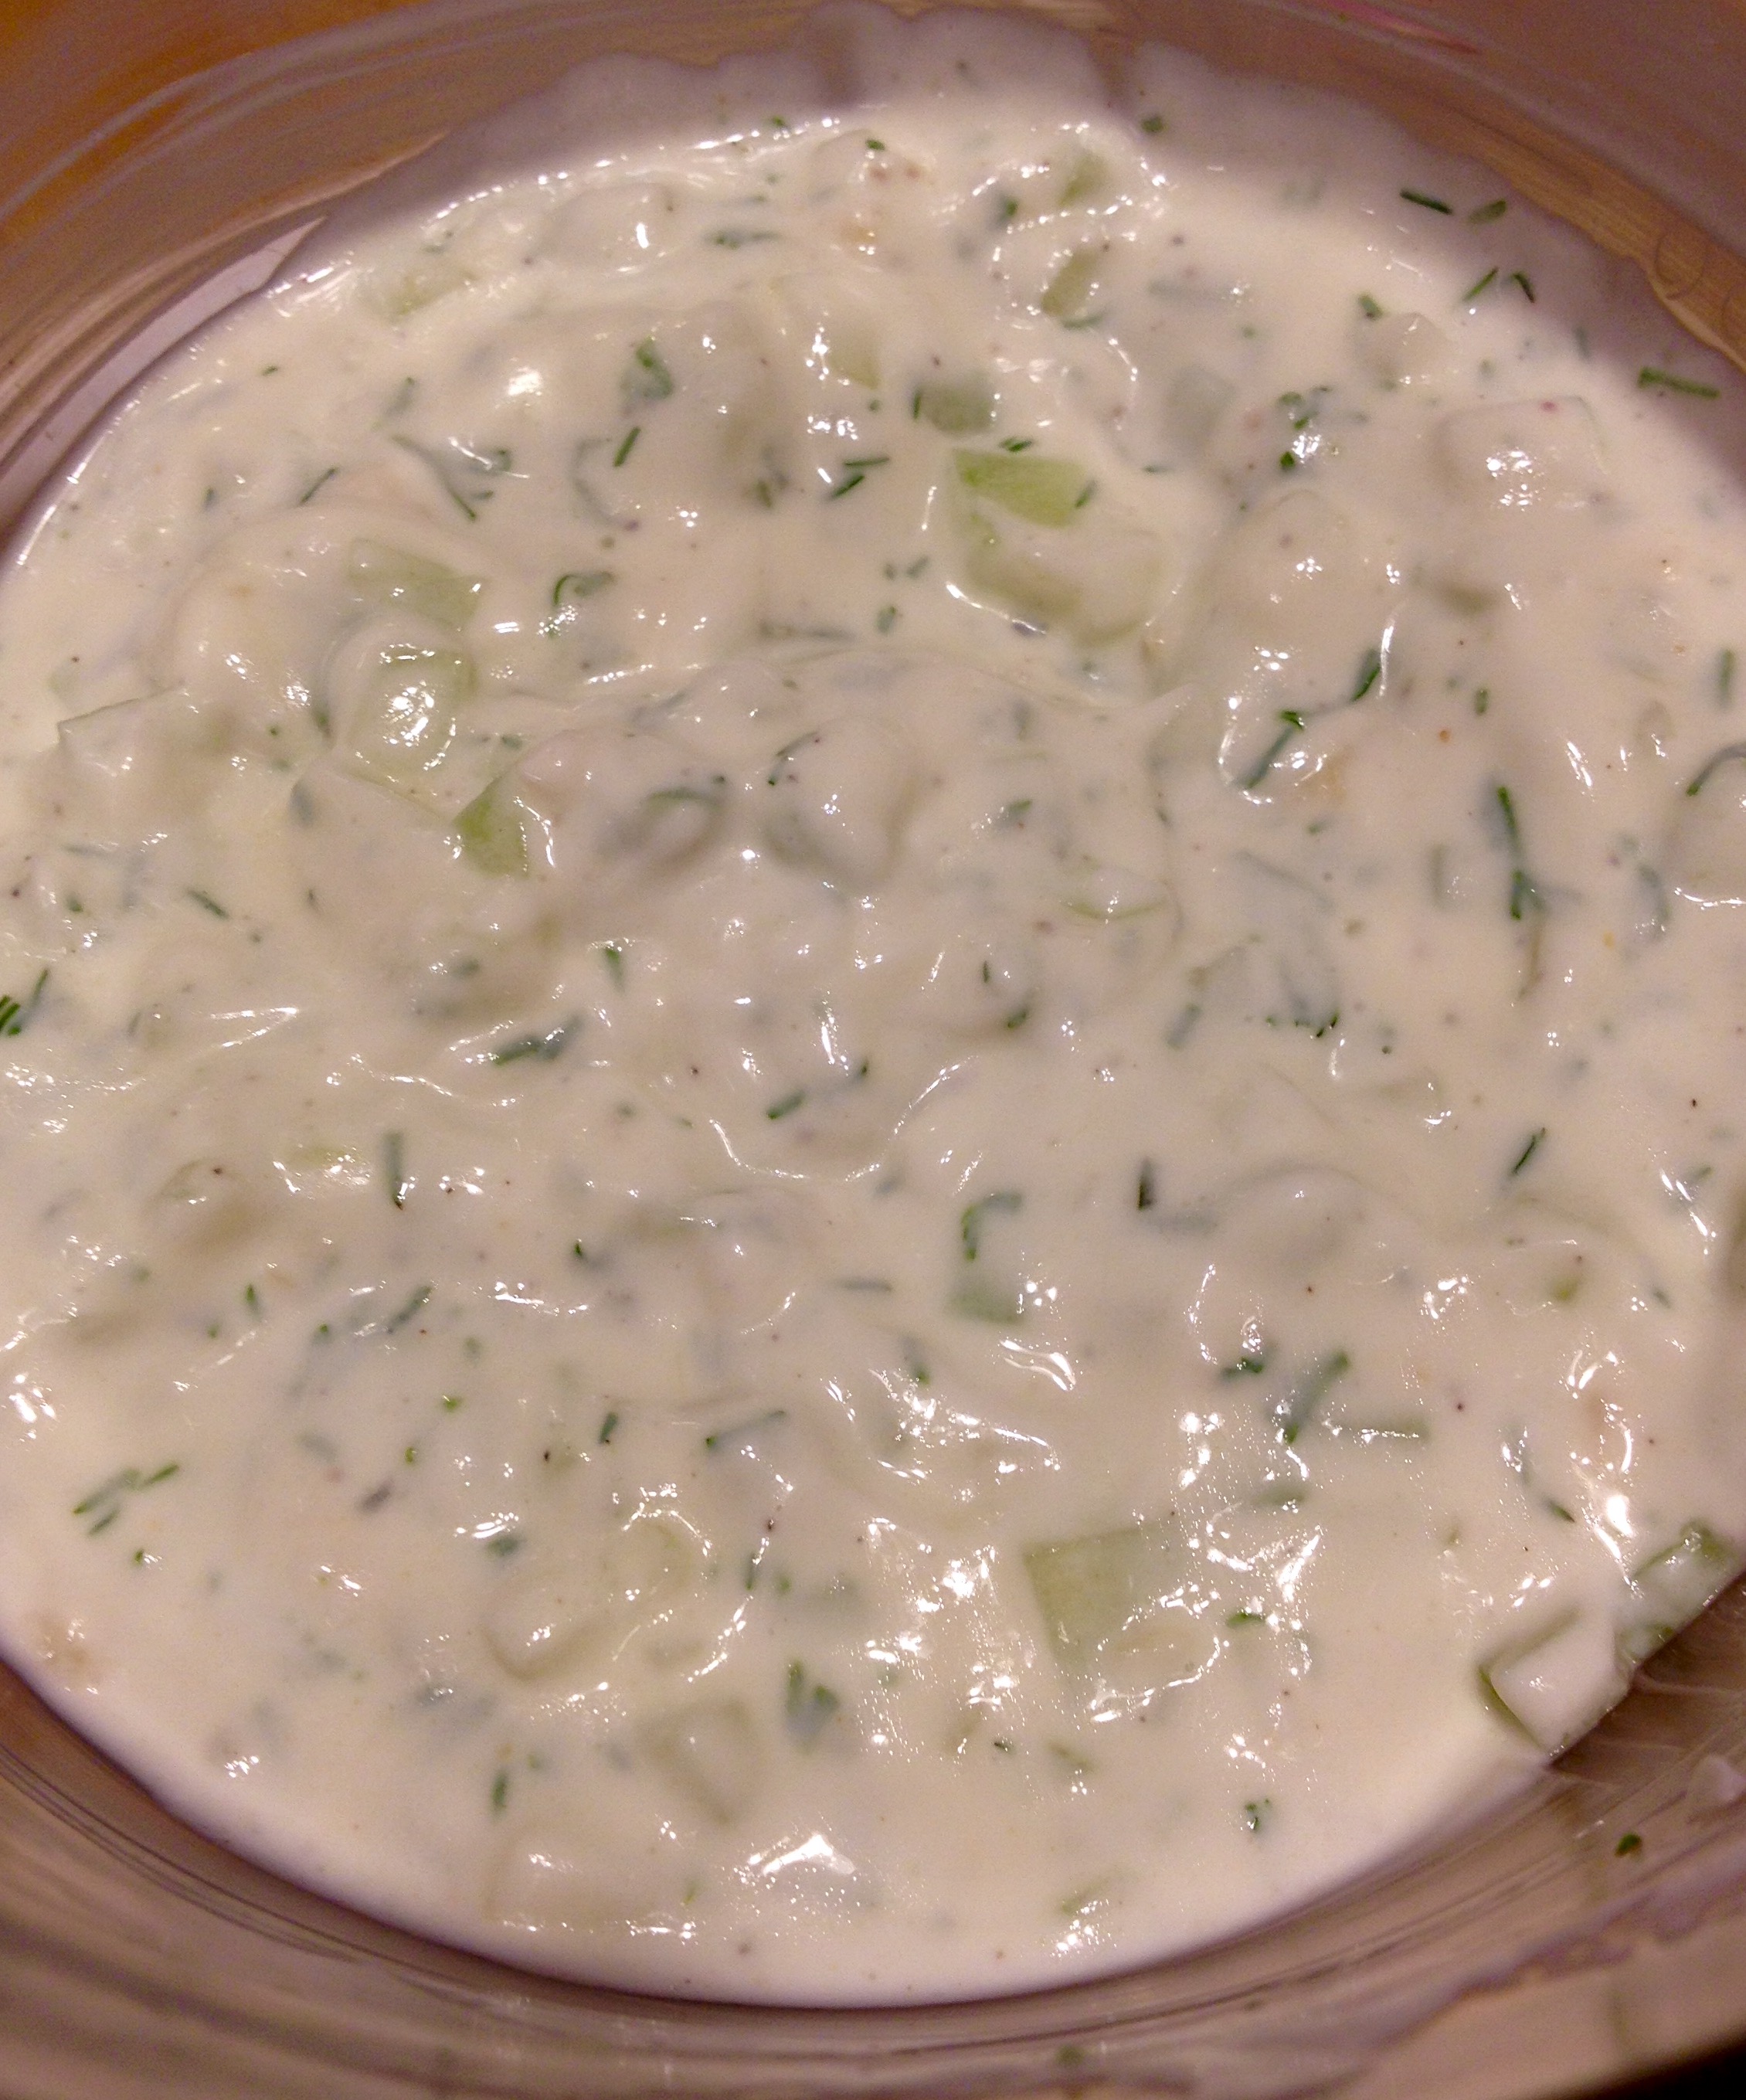
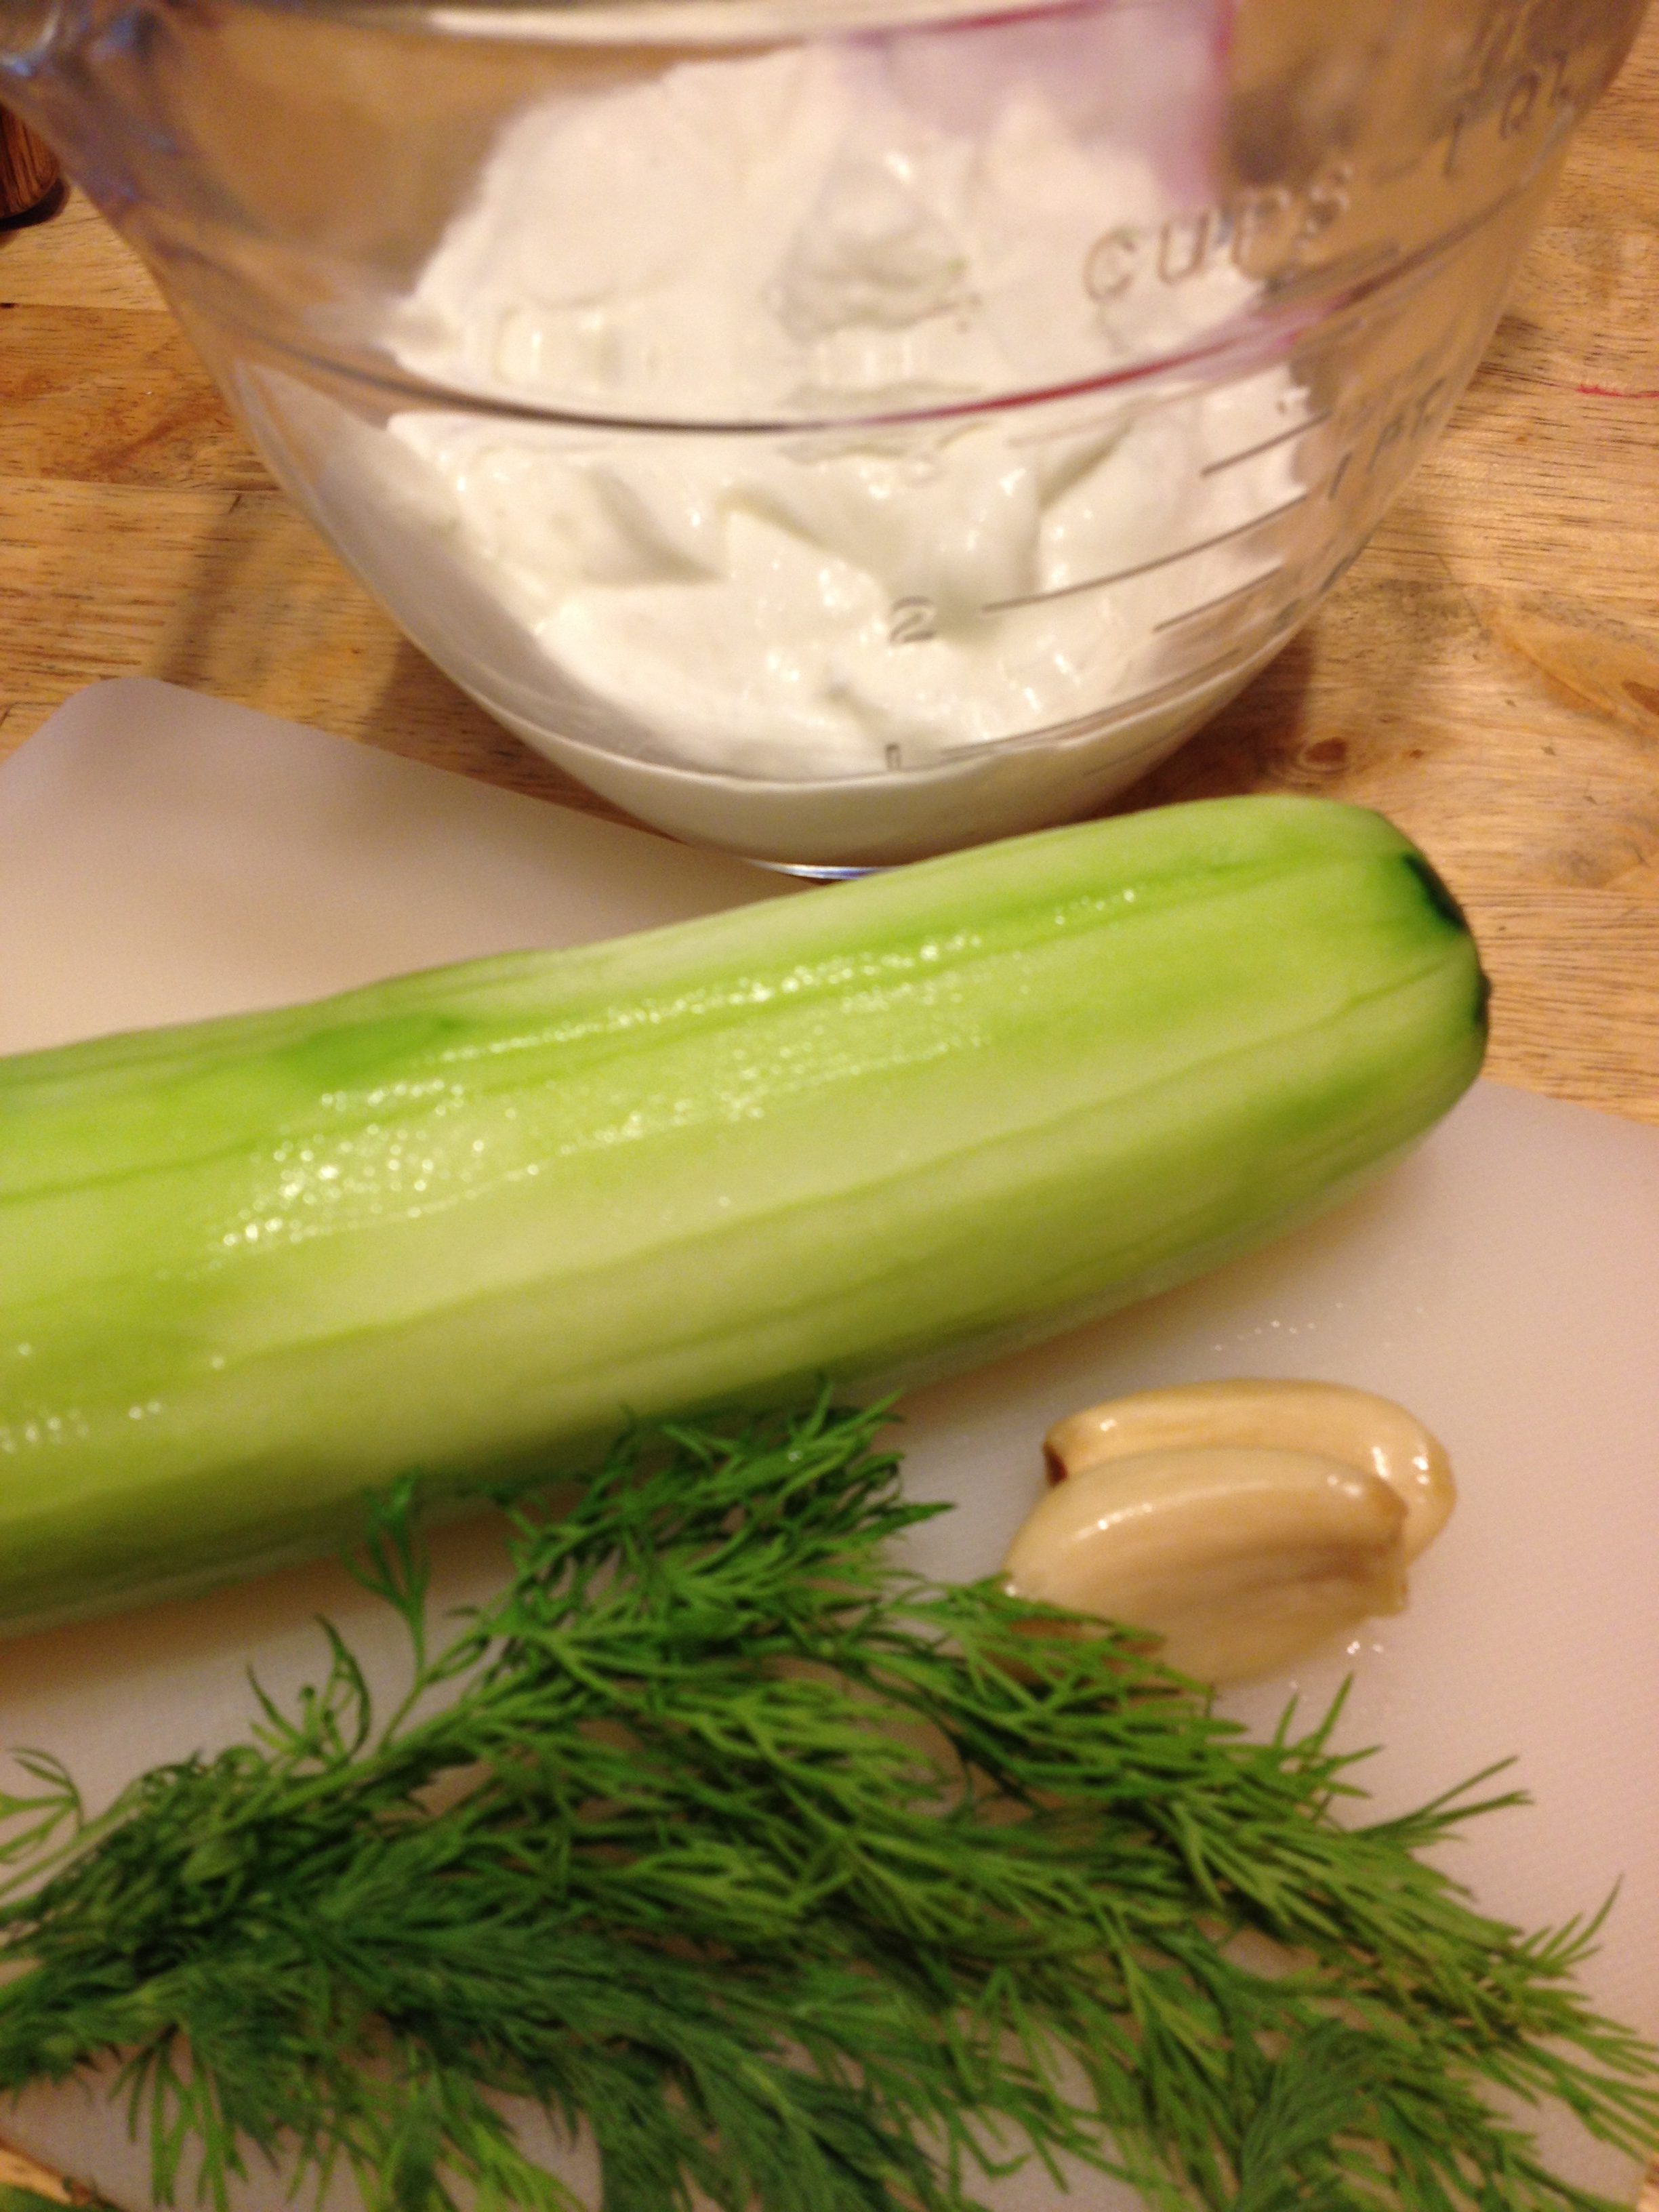 Tzatziki is pretty simple to prepare. There are a few different variations out there, but the basic ingredients are the same: Greek yogurt, cucumber, lemon juice, garlic, olive oil and dill. Some people shred the cucumber and some chop it. Either is acceptable. Some also blend or use a food processor to mix the Tzatziki to a smooth sauce or dressing consistency. I prepare it differently based on what I am going to use it for, but I think shredding the cucumber is my general go-to way.
This is a good place for a reminder of the rule of thumb when trying to decide how much of a dry spice to use in place of fresh herbs. The typical equation is three times the amount of fresh than dry. Dried spices are more potent than fresh. Since a tablespoon is the equivalent of 3 teaspoons, if the recipe calls for 1 tablespoon of fresh dill, in this case, then you could substitute with 1 teaspoon dried dill weed.
Also, remember that there is a difference in dill weed and dill seed, and they are not interchangeable in this recipe. Dill weed is the fresh leaves of the plant. Often used in Mediterranean dishes, dill weed compliments carrots, cucumber, eggs, fish and seafood, basil, garlic, mustard and parsley. Dill weed is more flavorful fresh or frozen, not as much when dried. If used in cooking, add the dill weed at the end of cooking so it doesn’t lose potency. Dill seed is used mostly is slow cooked foods and compliments cabbage, onions, potatoes, cumin, garlic, and ginger. Both are used in pickling.
Most recently, I have topped both Chicken Gyros and Shrimp Gyros with Tzatziki. Just season the chicken or shrimp with Greek spice before cooking (both are great on the grill!). Put on pita bread with thin sliced sweet onion, feta cheese, thin sliced tomato, thin sliced cucumber (optional), and Tzatziki. Top with pitted kalamata olives. Yum!
Fresh Tzatziki
Author: Changing Seasonings
Recipe type: Condiment or dip
Cuisine: Greek
Prep time:
Total time:
Serves: 2+ Cups
A cool, fresh Greek dip or condiment that is made with cucumber.
Ingredients
- 16 oz Plain Greek Yogurt
- 2 medium Cucumbers - peeled, seeded and chopped or shredded
- 2-3 cloves Garlic - minced
- ½ Lemon - juiced
- 2 T Olive Oil
- Dill Weed - fresh or dry (use 1 T fresh or 1 t dry)
- Salt - to taste
- Pepper - to taste
Instructions
- Mix the ingredients
- Chill until serving
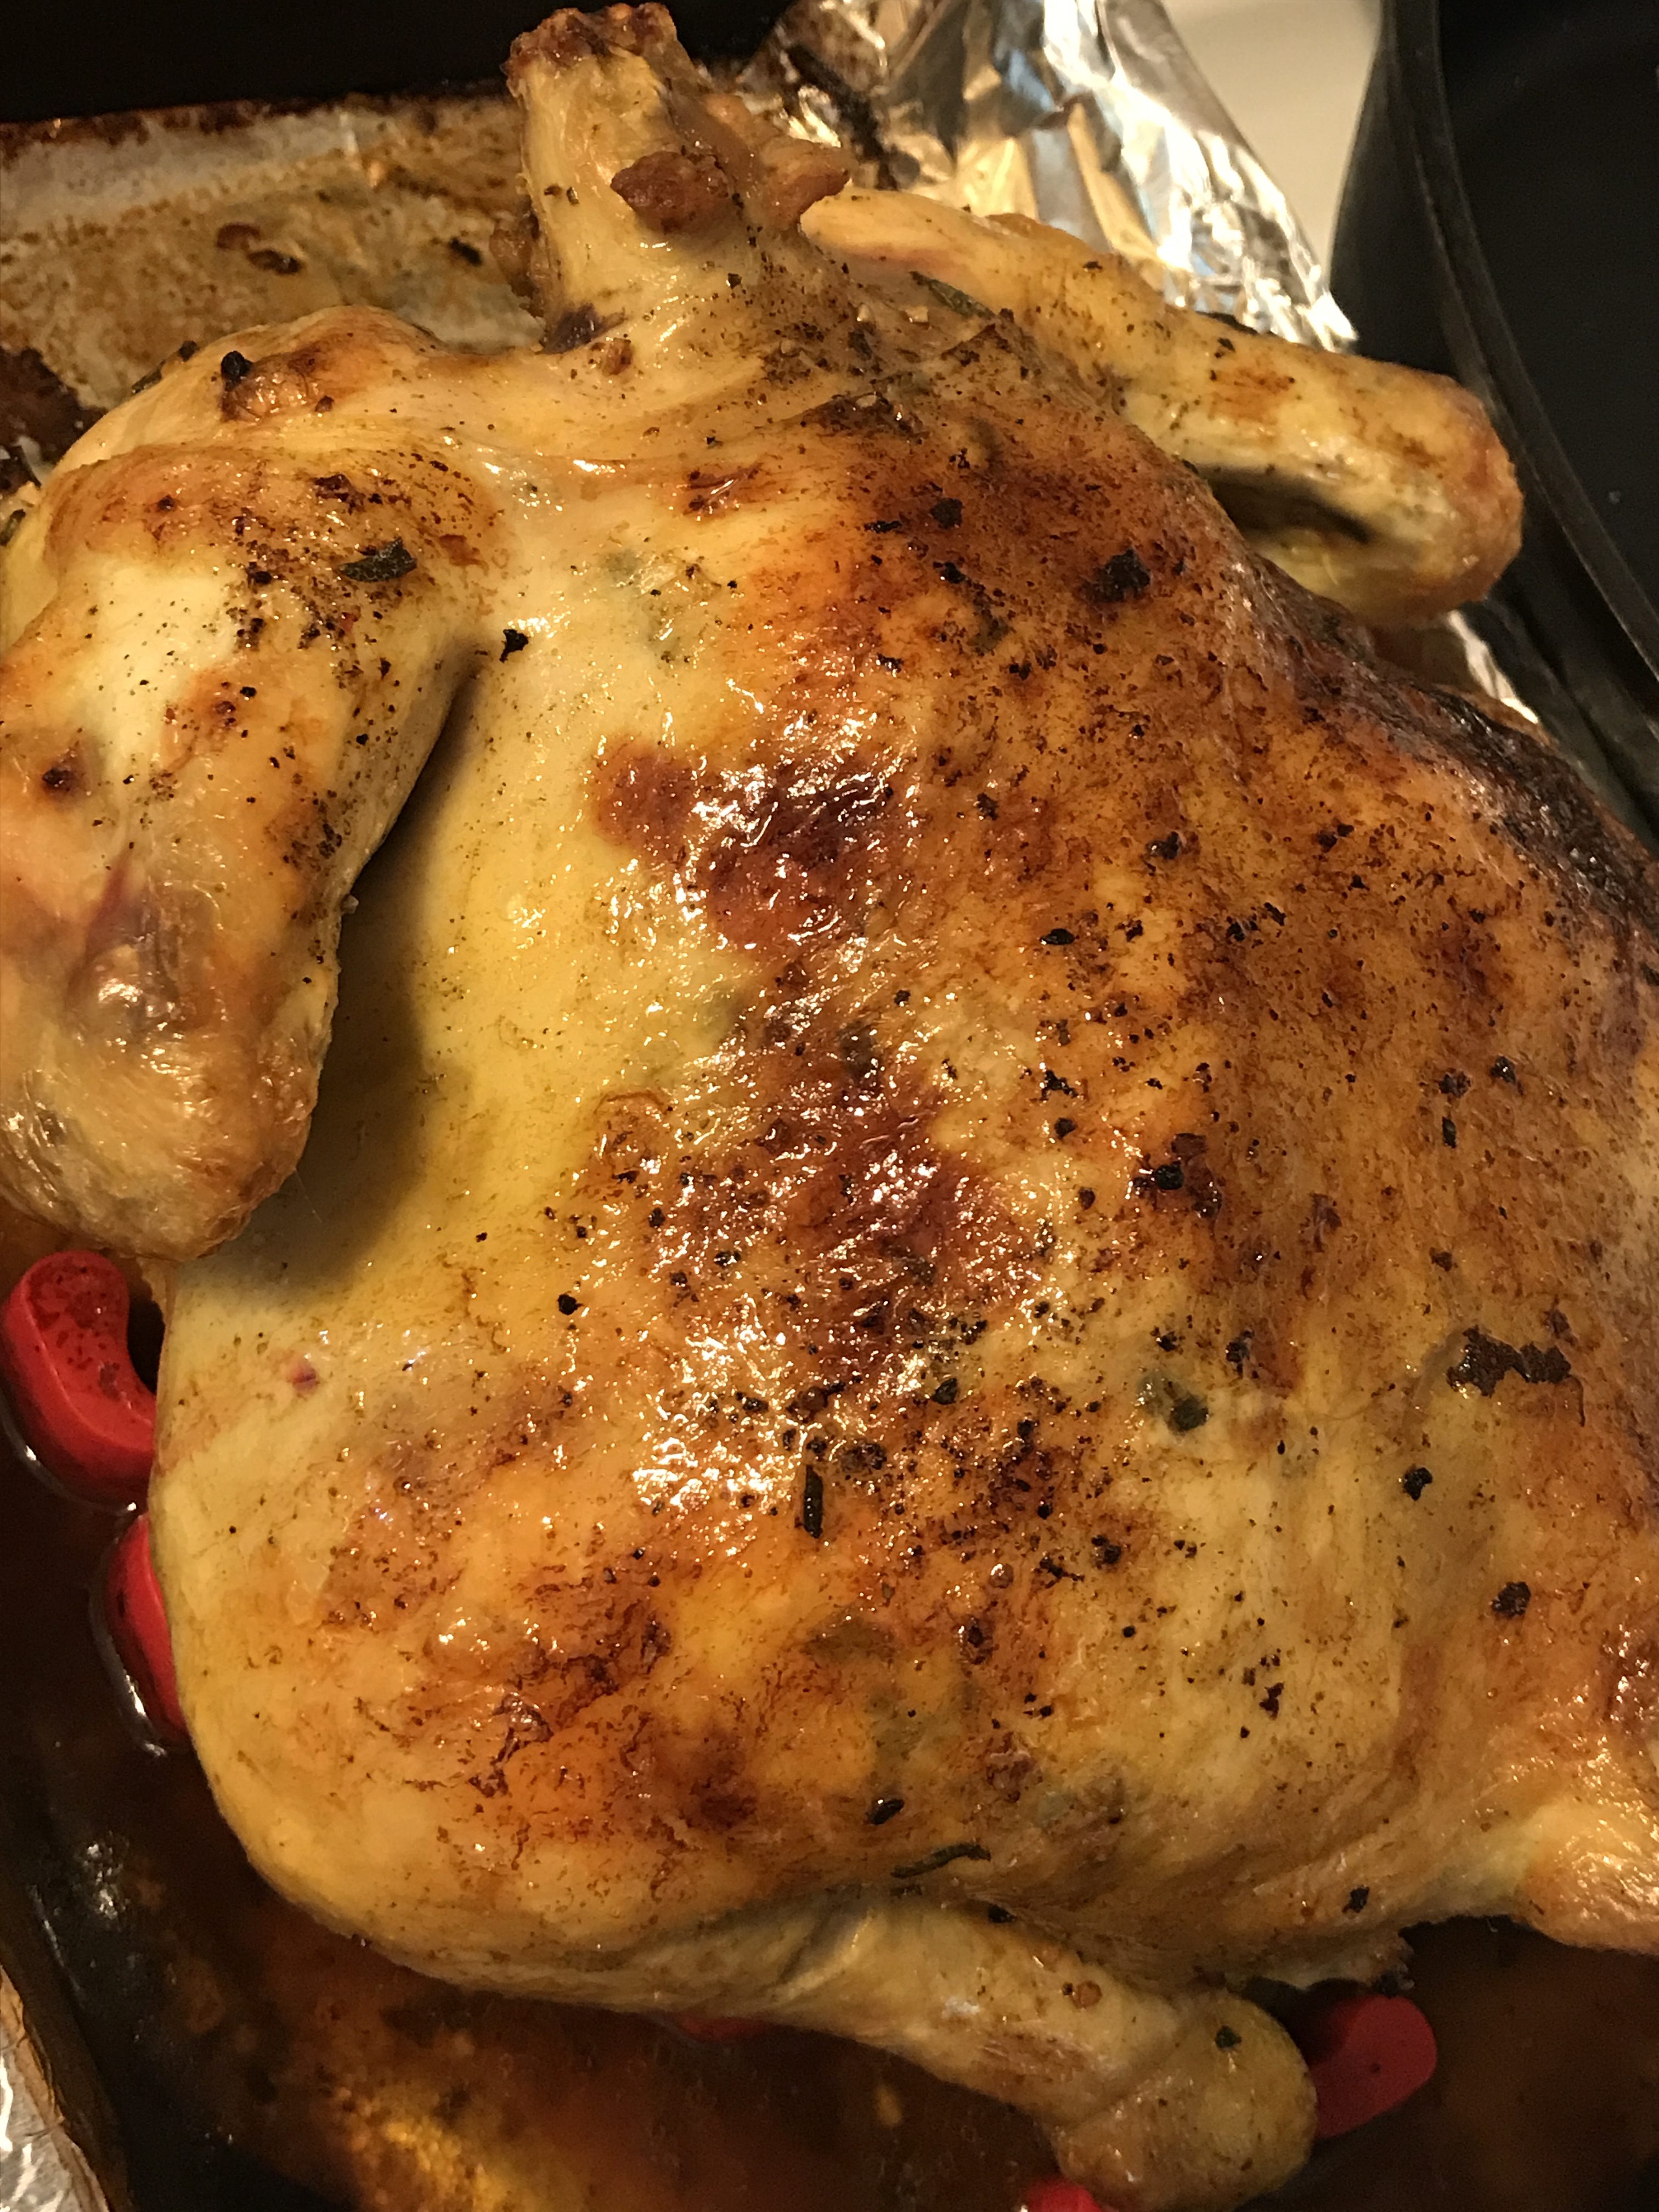
Whole chickens are inexpensive. I buy them when they are on sale for about $4 for a 3-5 pound chicken. Cooking chicken with the bone and skin will be tender and have the most flavor. The best part, cooking a whole chicken is simple, and they can look quite elegant when you serve them. I have written previously about preparing chicken “rotisserie” style on the grill in my Beer Butt Chicken post. But, the evening I wrote this, I was dodging thunderstorms so I decided to just roast the chicken in the oven.
This post isn’t so much about the flavors because you can use whatever sounds good. I’m doing my go-to favorite: Lemon Garlic Rosemary Roast Chicken. I am rubbing the chicken beneath and on top of the skin with a compound butter made by mixing softened butter with minced fresh garlic and chopped fresh rosemary. I squeezed the juice of a lemon over the chicken and stuffed the cavity with the lemon and sprigs of fresh rosemary. This post is more about the technique. Once you know how to roast a chicken, you can get creative. Some other ideas include lemon or orange, thyme, Cajun spices, paprika, and …
Okay, to roast a chicken you need to have some kind of a roasting pan. The higher the sides, the less splatter and the more brown the sides of the chicken will get. Many roasting pans come with a rack to elevate the meat, another reason you want the sides to be a bit higher. If you don’t have a rack, you can form one out of aluminum foil. I use a silicone roasting rack that can be used in any pan. By elevating the meat, it browns more evenly and doesn’t sit in the grease or juices that come off of the meat. A lid isn’t necessary. If the top of the roast is browning too quickly, lay a piece of foil over it. Foil can be your friend when roasting. I also line the roasting pan with it to make clean up easier.
It is good to have a meat thermometer so that you will know when the meat has reached the desired internal temperature. For chicken, 155-160 degrees. Remember that the meat will continue to cook in the ten minutes after you remove it from the oven and allow the juices to redistribute. A 3-5 pound chicken that is fully defrosted will take about 80-90 minutes at 425 degrees.
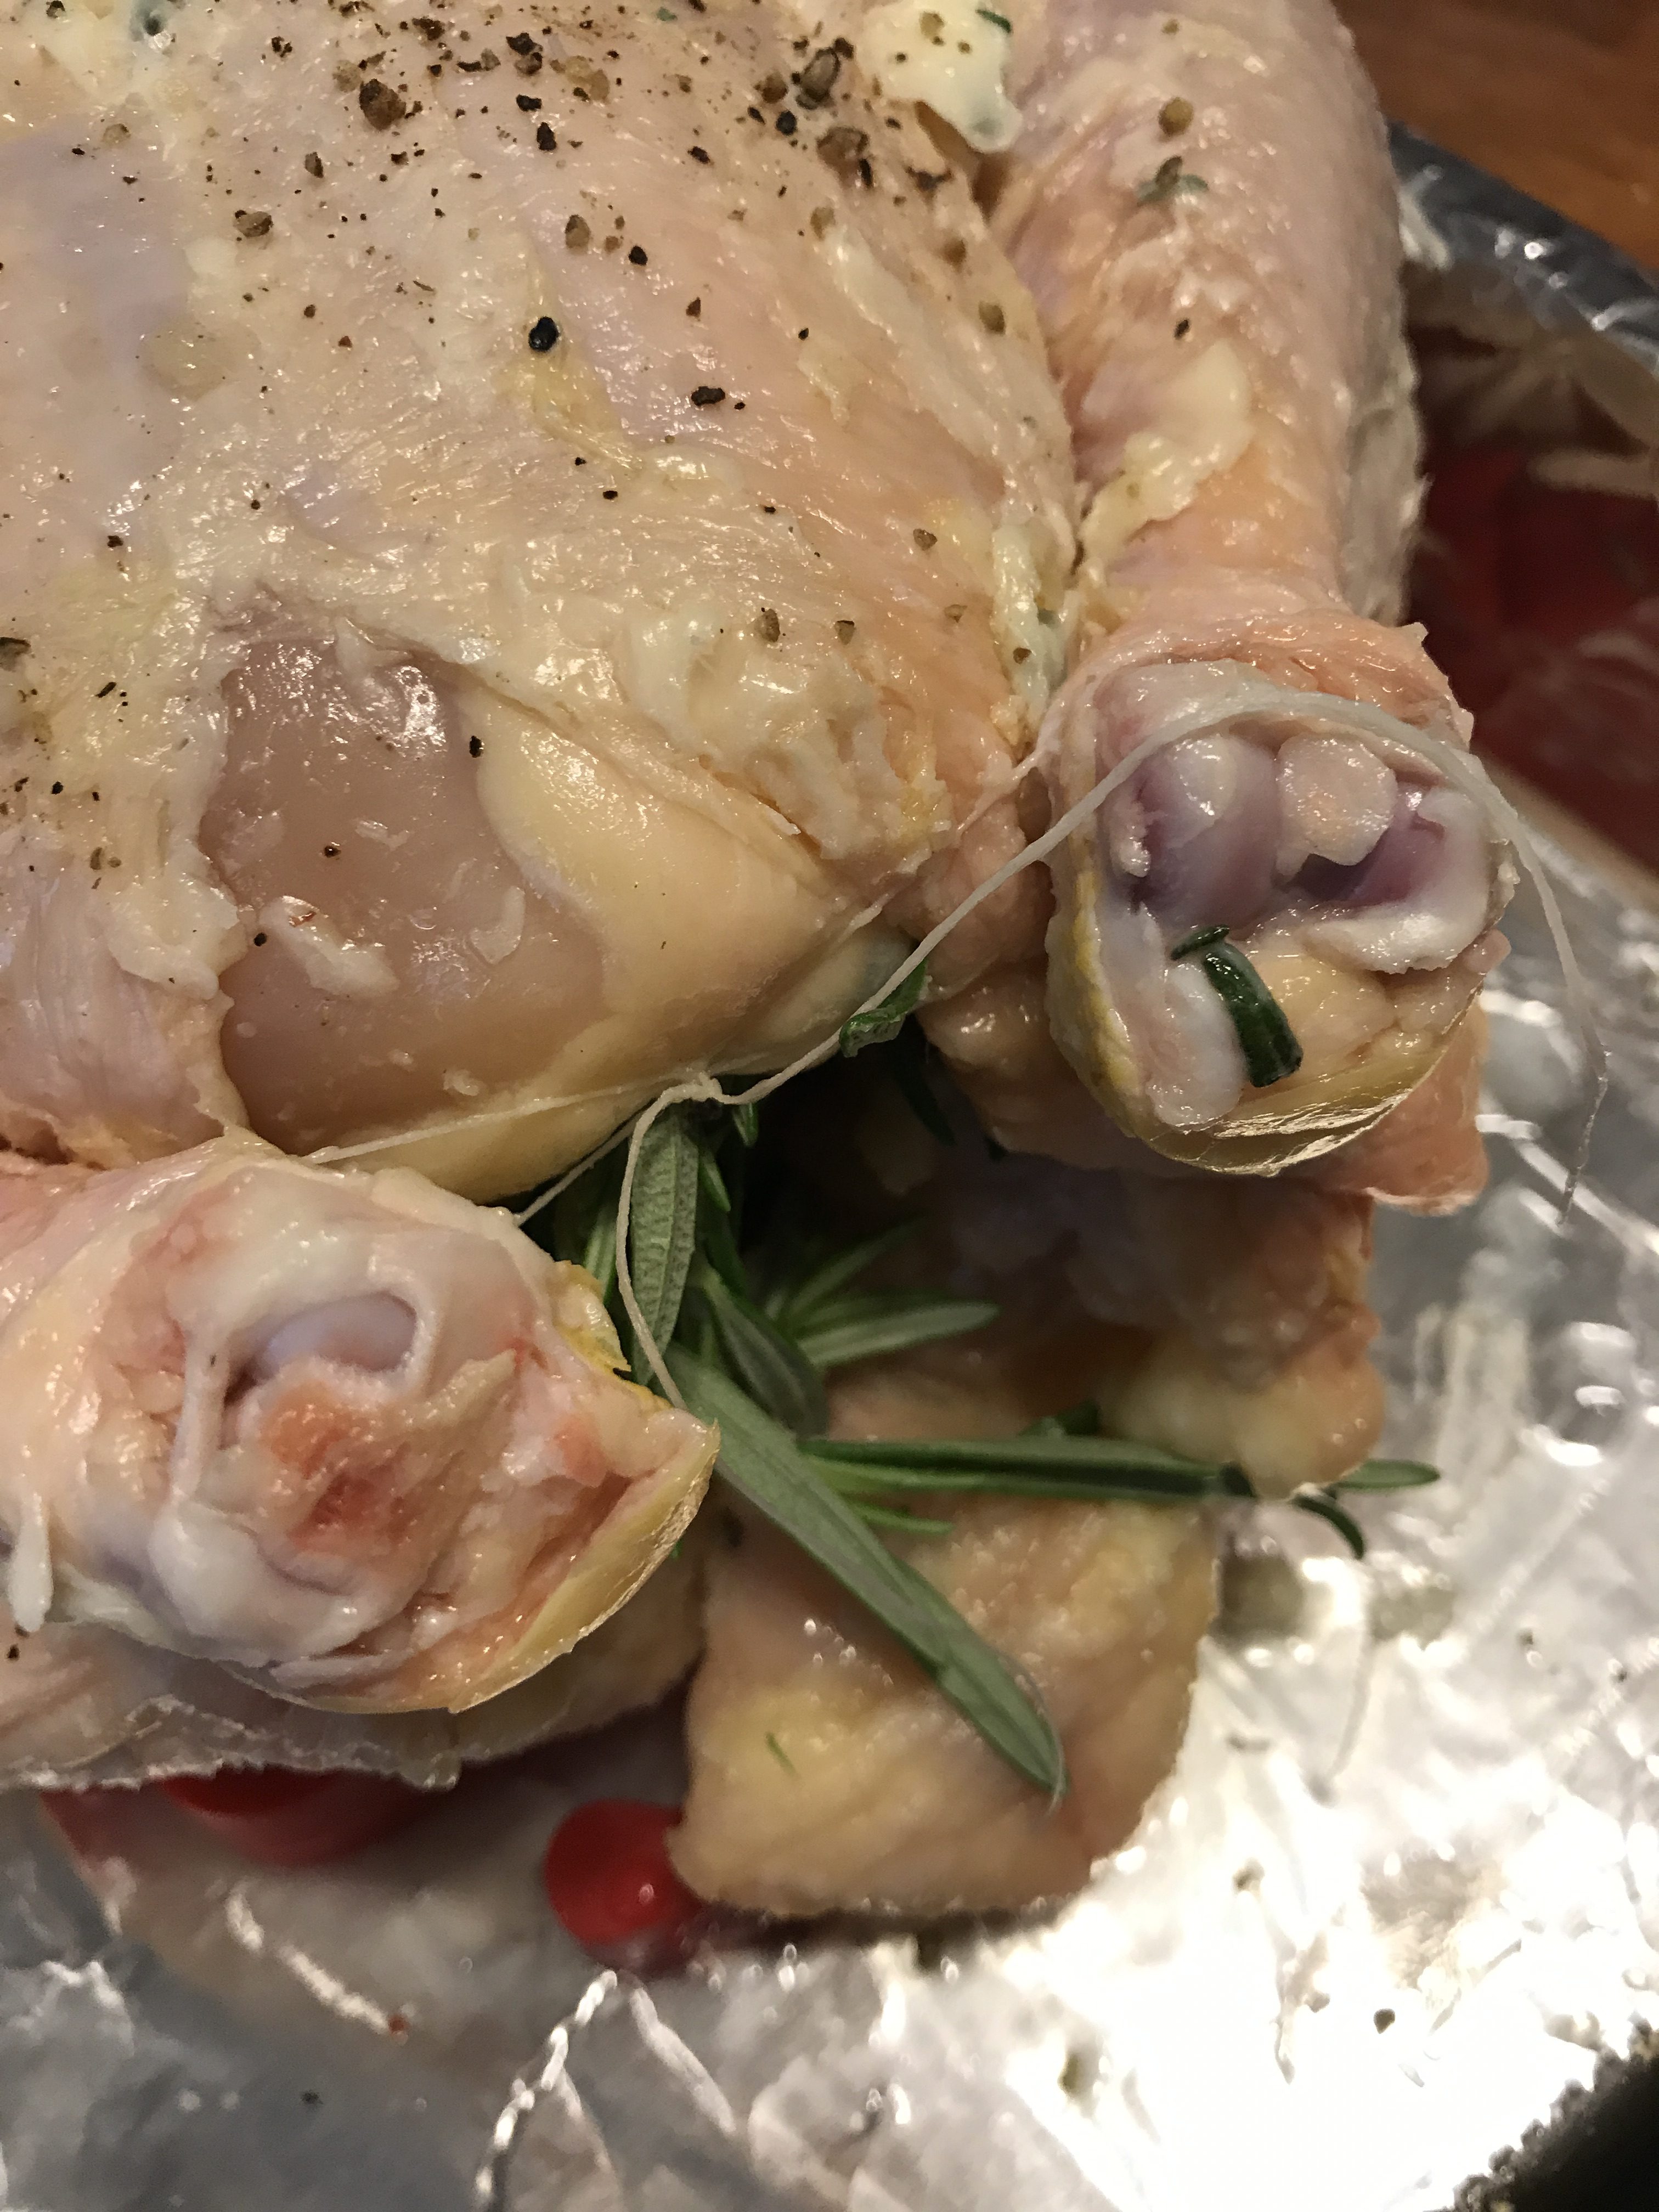 Preheat the oven to 425 degrees. Prepare the chicken by making sure the giblets are removed from the cavity, dry the skin so you can season it, and secure the wings and legs. You can tie them in technique called trussing by tucking the wings behind the back and securing with twine over the legs, around the back, and then down around the feet. Or, you can simply cut little pockets to tuck the wings in to and tie the feet together. If you do not have twine, you can use dental floss. Just don’t use mint flavored unless it compliments the seasonings you are using, haha!
Now, here is a part of the process that can be a bit controversial. Breast up or breast down?? I say breast up for the first 20-30 minutes to crisp the skin and seal in the juices. Then, flip the chicken over for the remaining cooking time to keep the breast meat tender as the juices flow downward. Pour a half cup or so of liquid in the bottom of the pan. Water, juice, wine or a combination will work. Add more if needed as the liquid evaporates. The juices from the meat will mix with the liquid and can be used to baste the chicken periodically.
That’s it! Other than the initial flipping of the bird, and the periodic basting and watching for over-browning of the skin, the chicken becomes a beautiful, juicy, flavorful meal practically on its own. If you want to get really fancy, toss some cut up vegetables such a carrots, onions, and potatoes in the bottom of the pan for the last 30-40 minutes of the cooking and you have a pretty  side dish. Simple.
Click here for your chance to WIN a FREE Silicone Roasting Rack. You must be 18+ to enter, live in the 50 United States or District of Columbia, and answer a poll question (hint: it’s about this post). The winner will be randomly selected after July 2, 2017. The prize will be shipped directly to the winner from Amazon, and the winner must have an Amazon.com account. No purchase necessary to be entered or win.

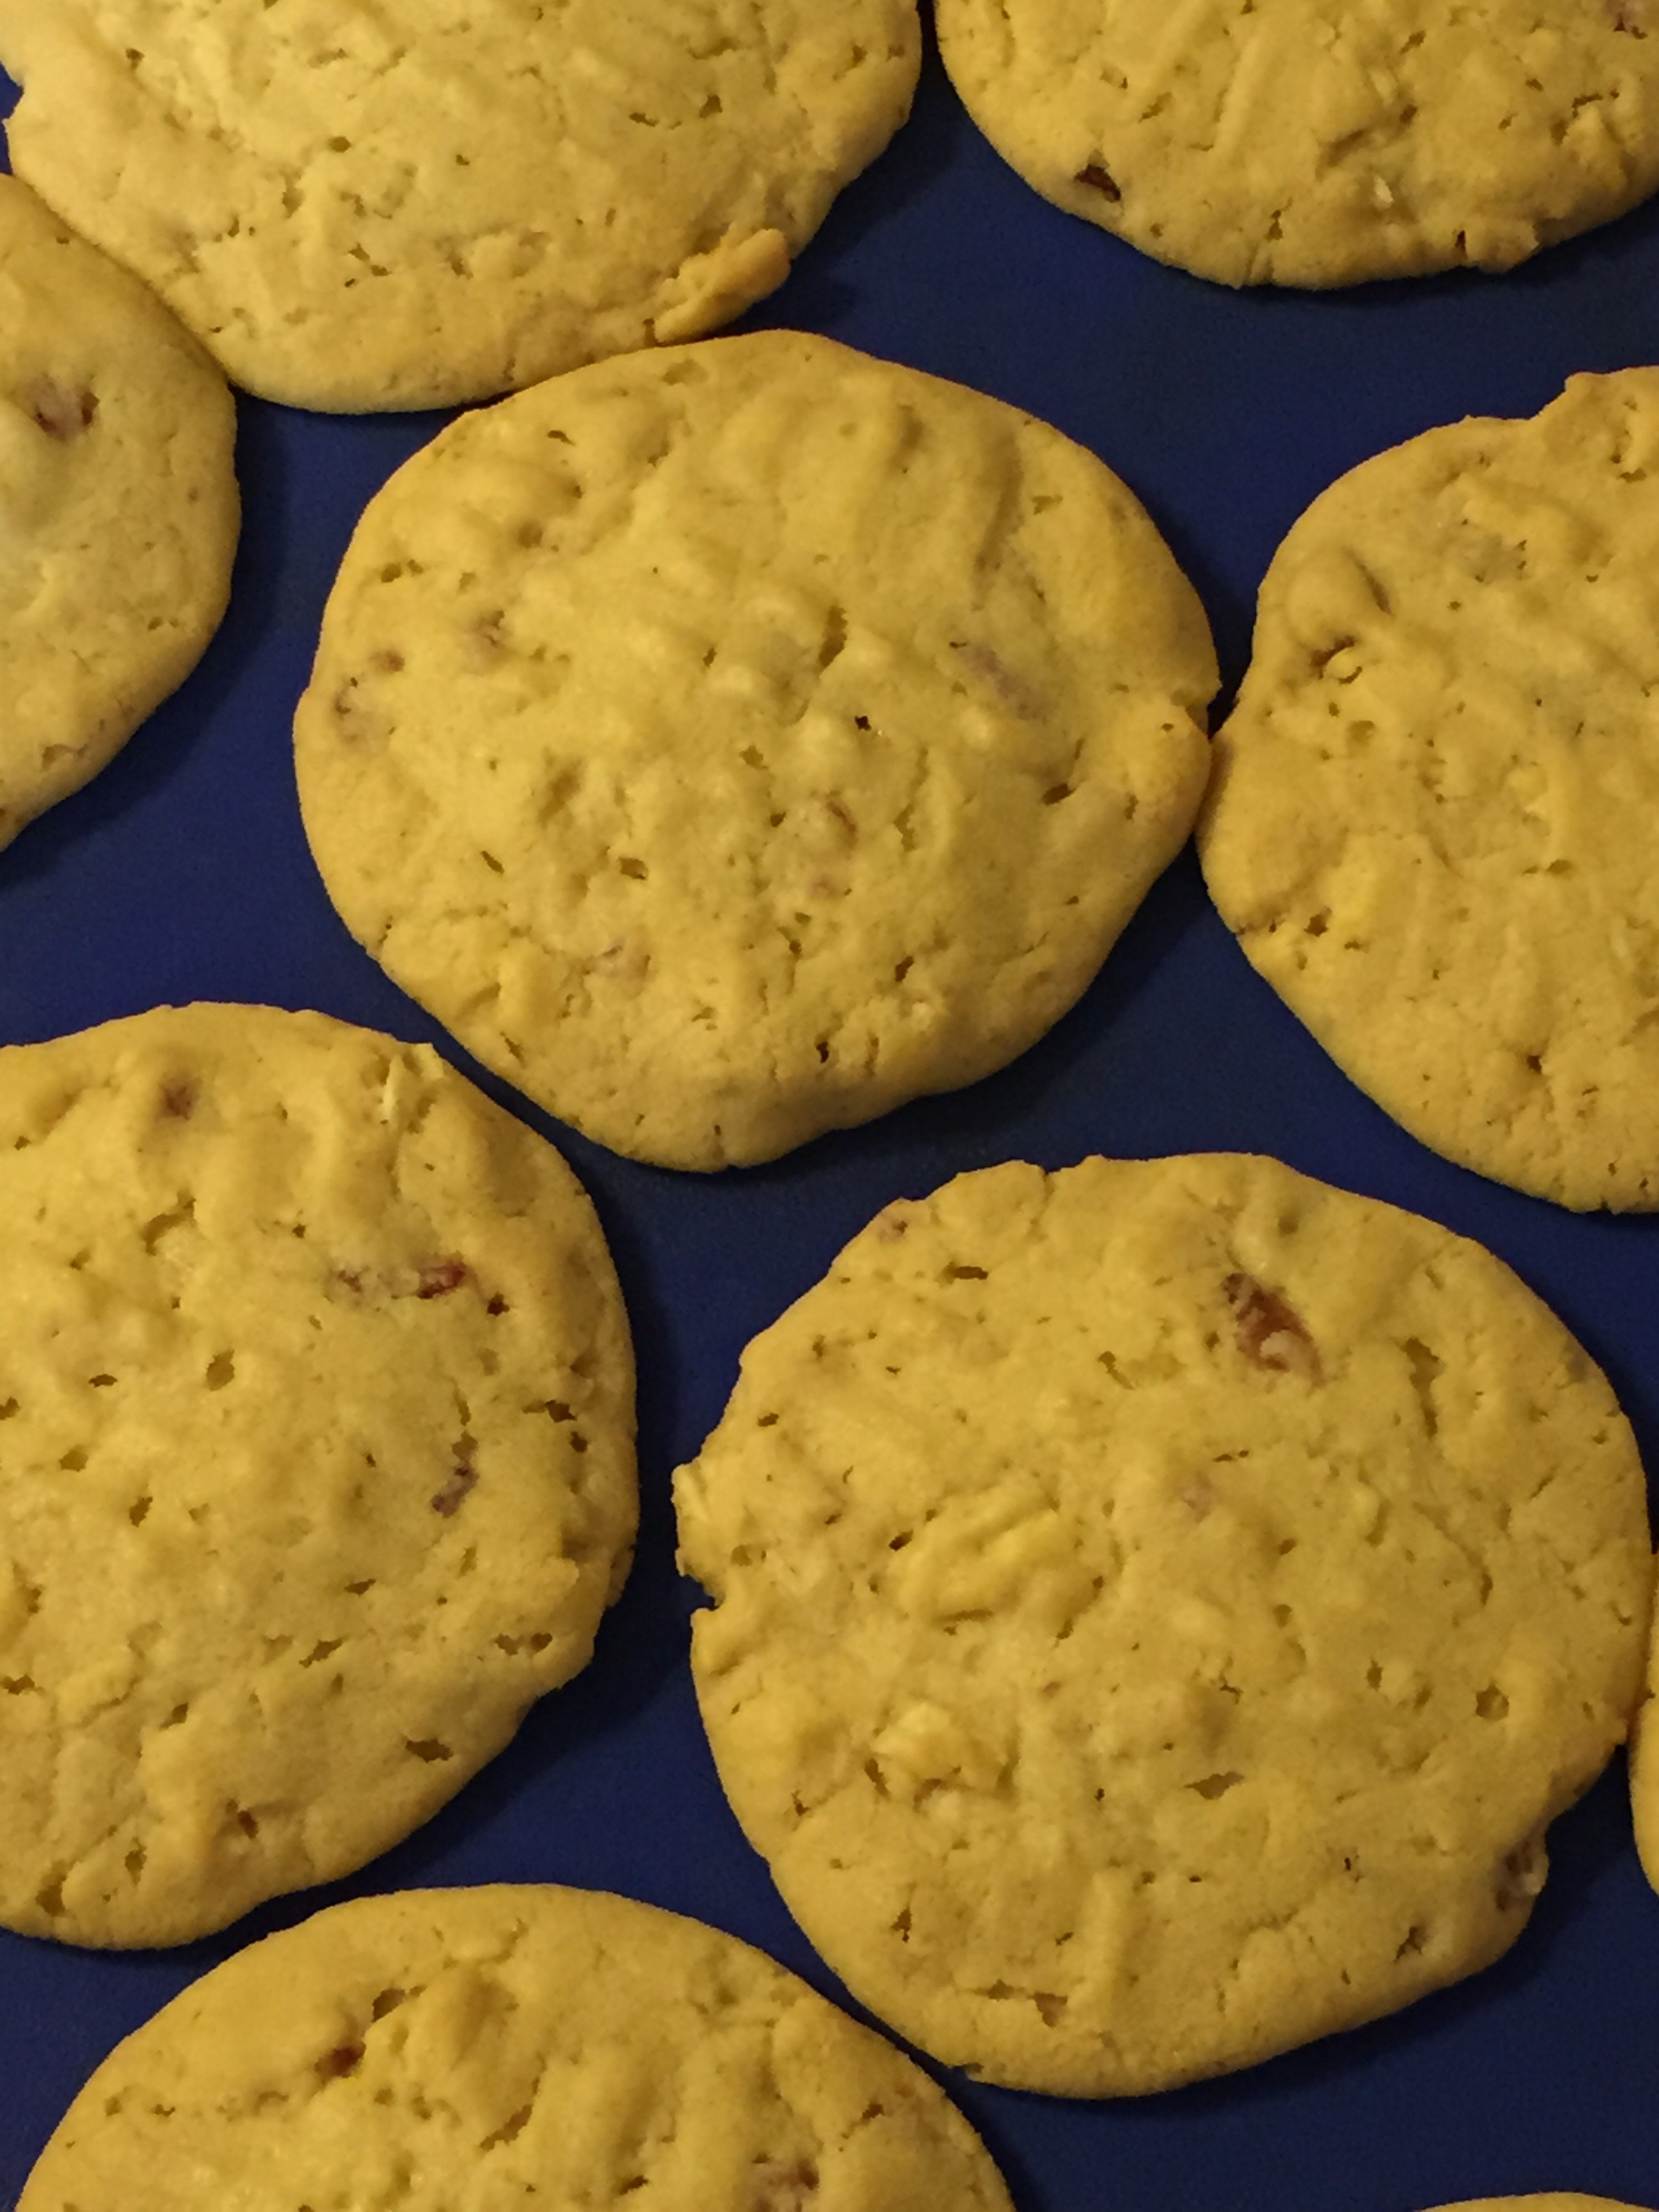
I am always looking for new ways to incorporate bacon into recipes. I wanted to come up with a unique and fun recipe. I think this one is that and more! These chewy cookies have the perfect blend of sweet and salty.
They are also super simple and take about 20 minutes from start to finish (well, if you already have the bacon cooked). I planned ahead and reserved a few slices of bacon from what I prepared for breakfast.
If you have never had Potato Chip Cookies, you are missing out! Adding the bacon is just a bonus. I recommend that you use your favorite brand of ruffled or wavy chips.

Cream together sugars and butter. Add eggs and vanilla.
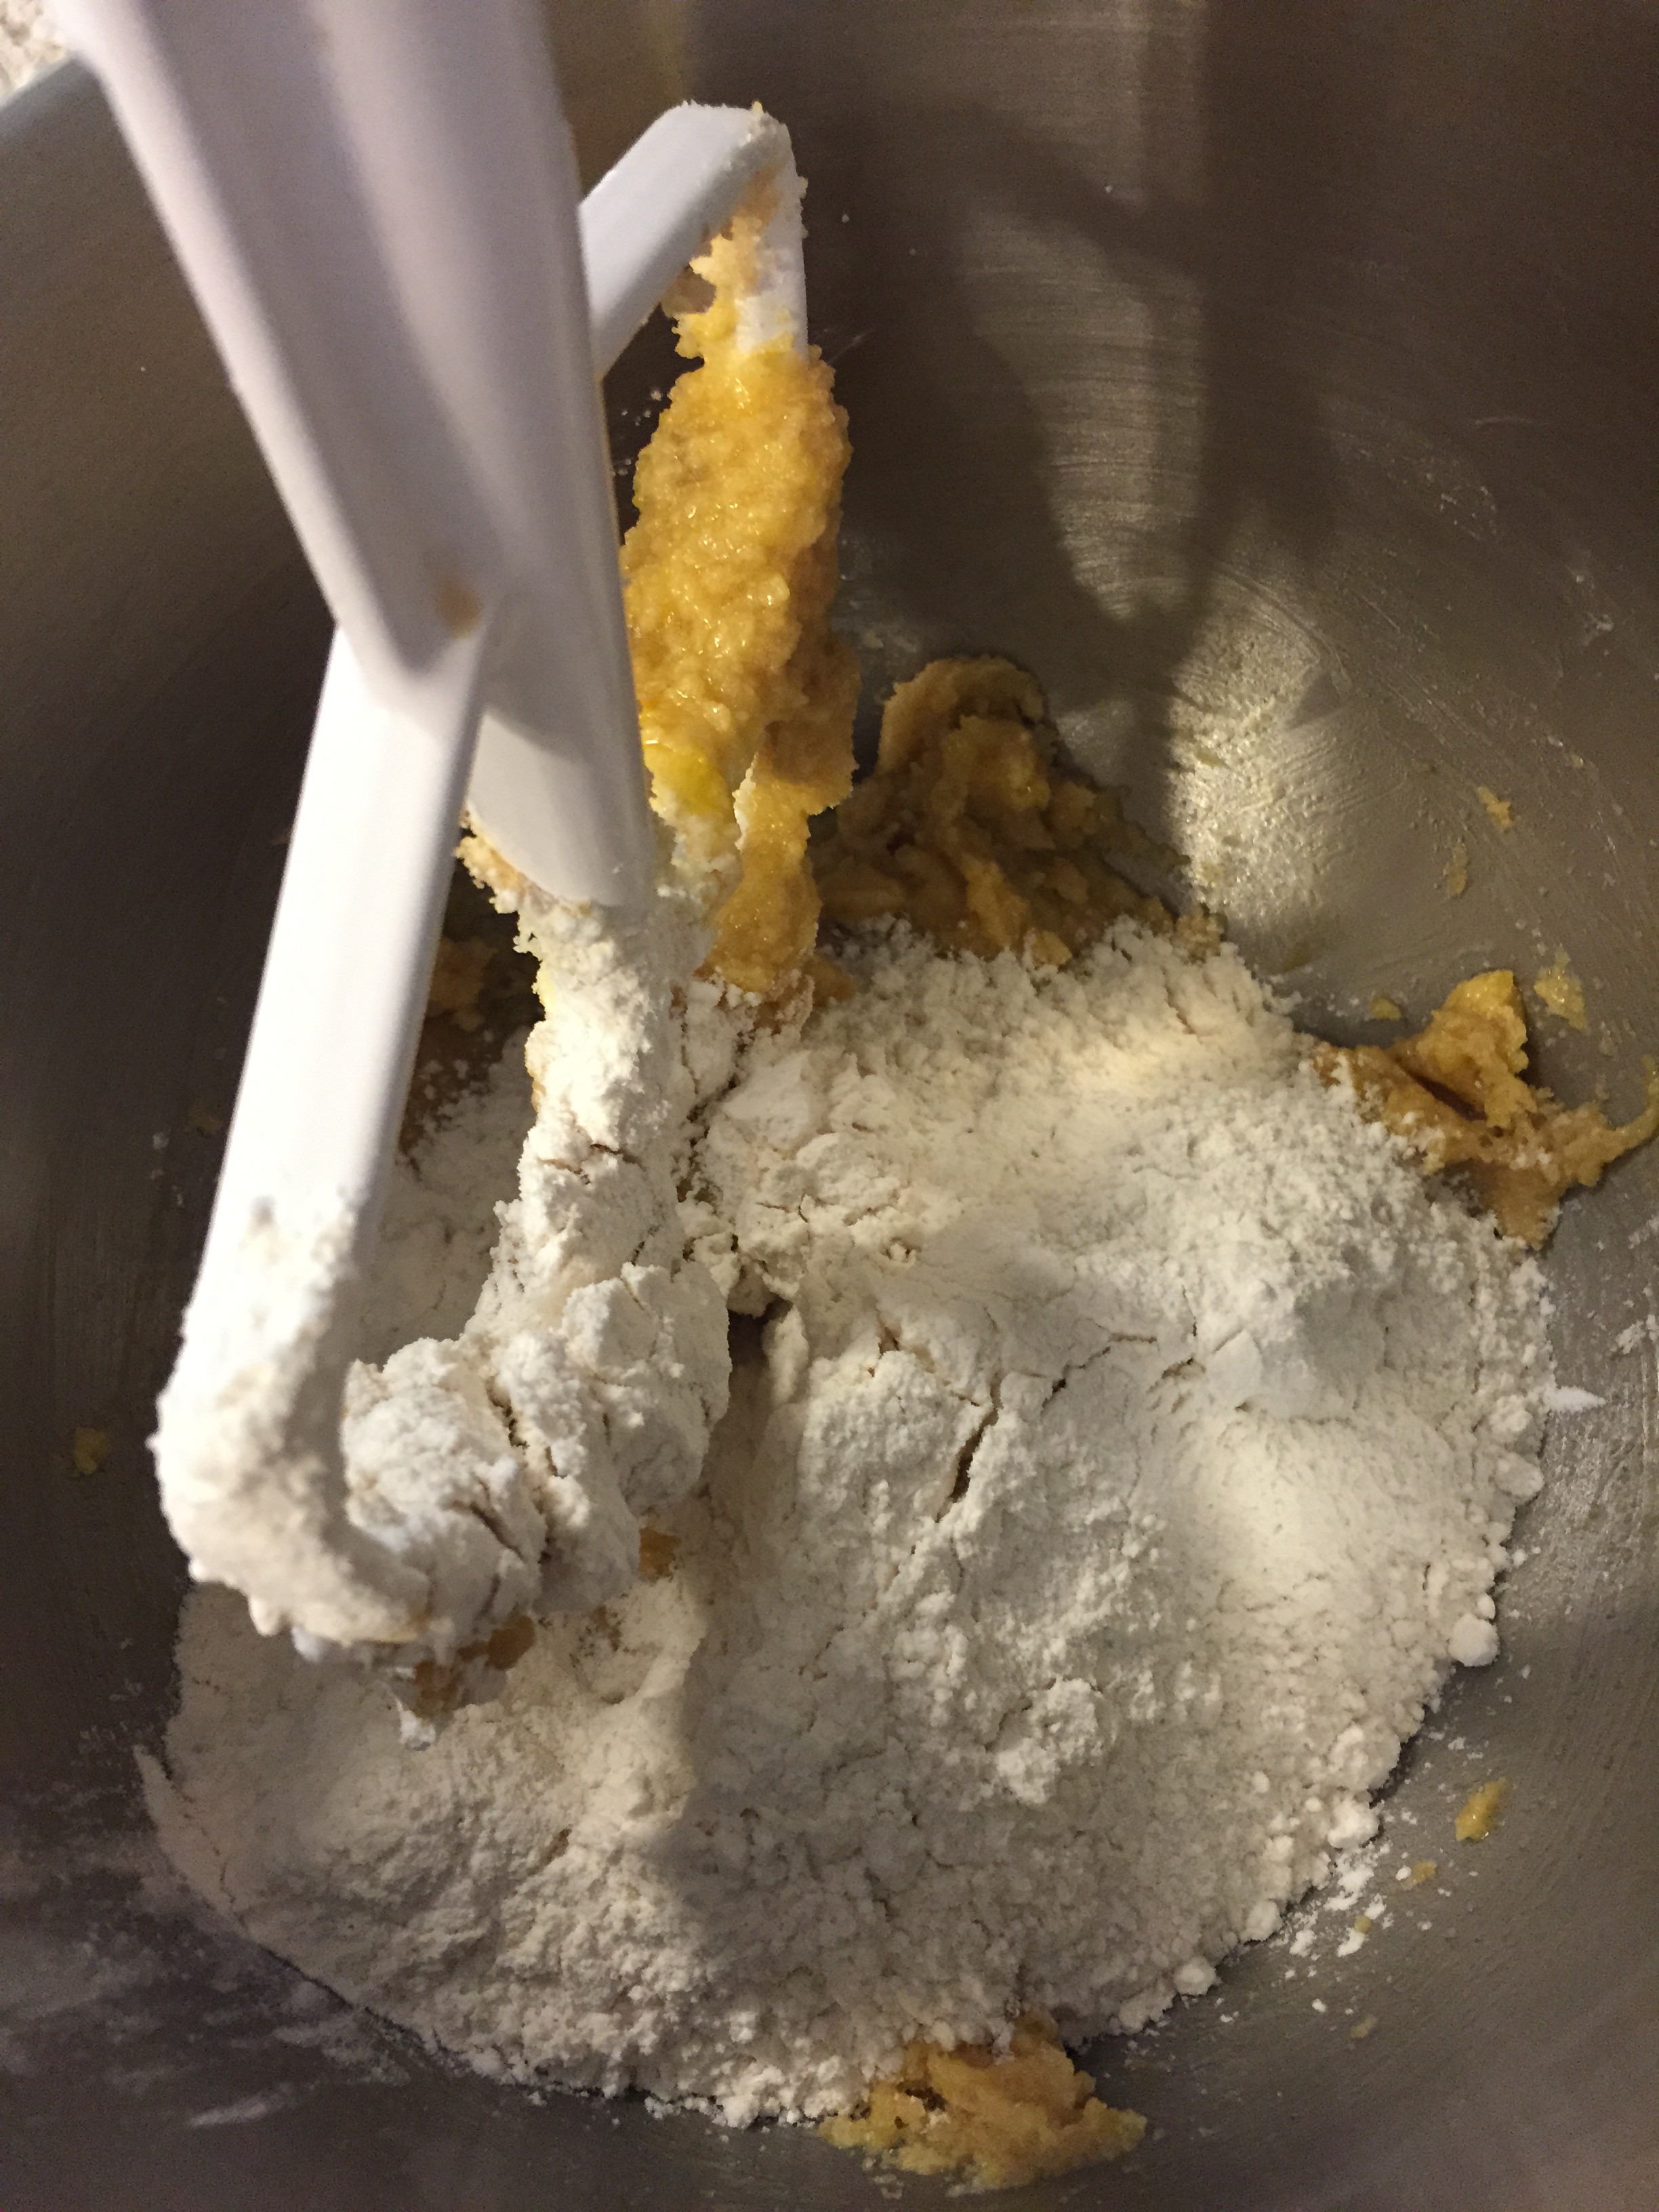
Add flour, baking soda and salt.

Add bacon.
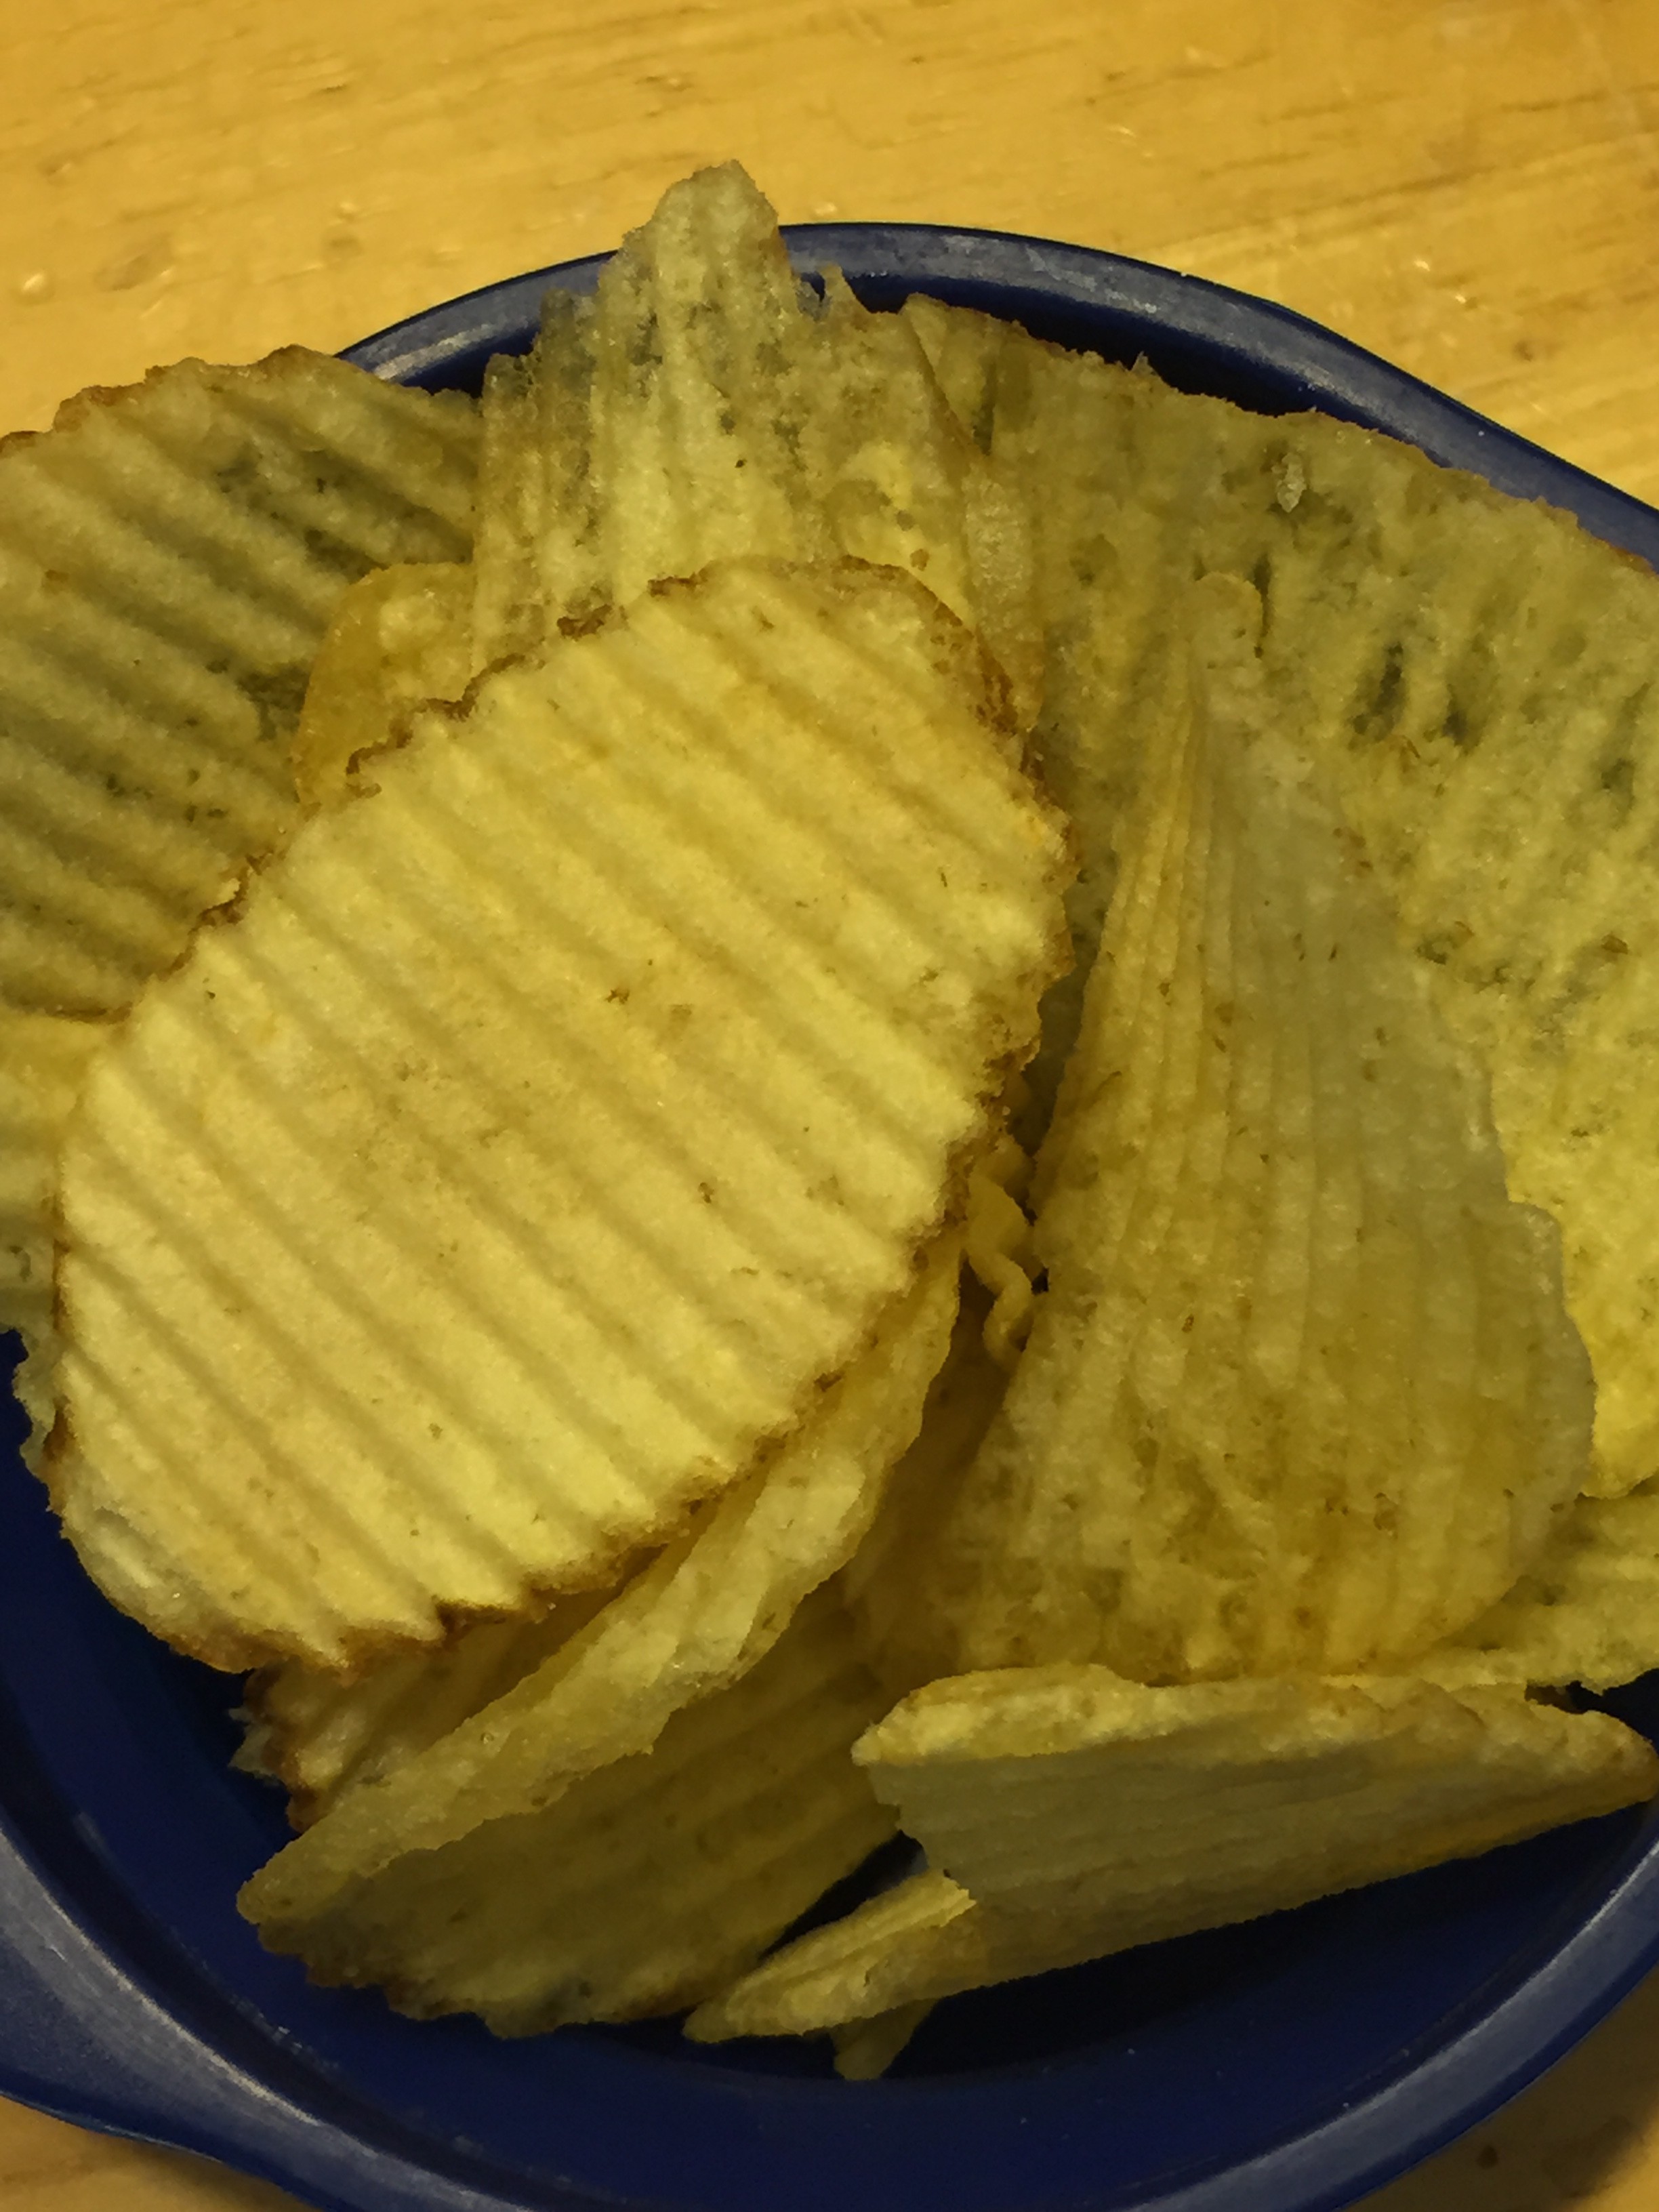
Add crushed chips.
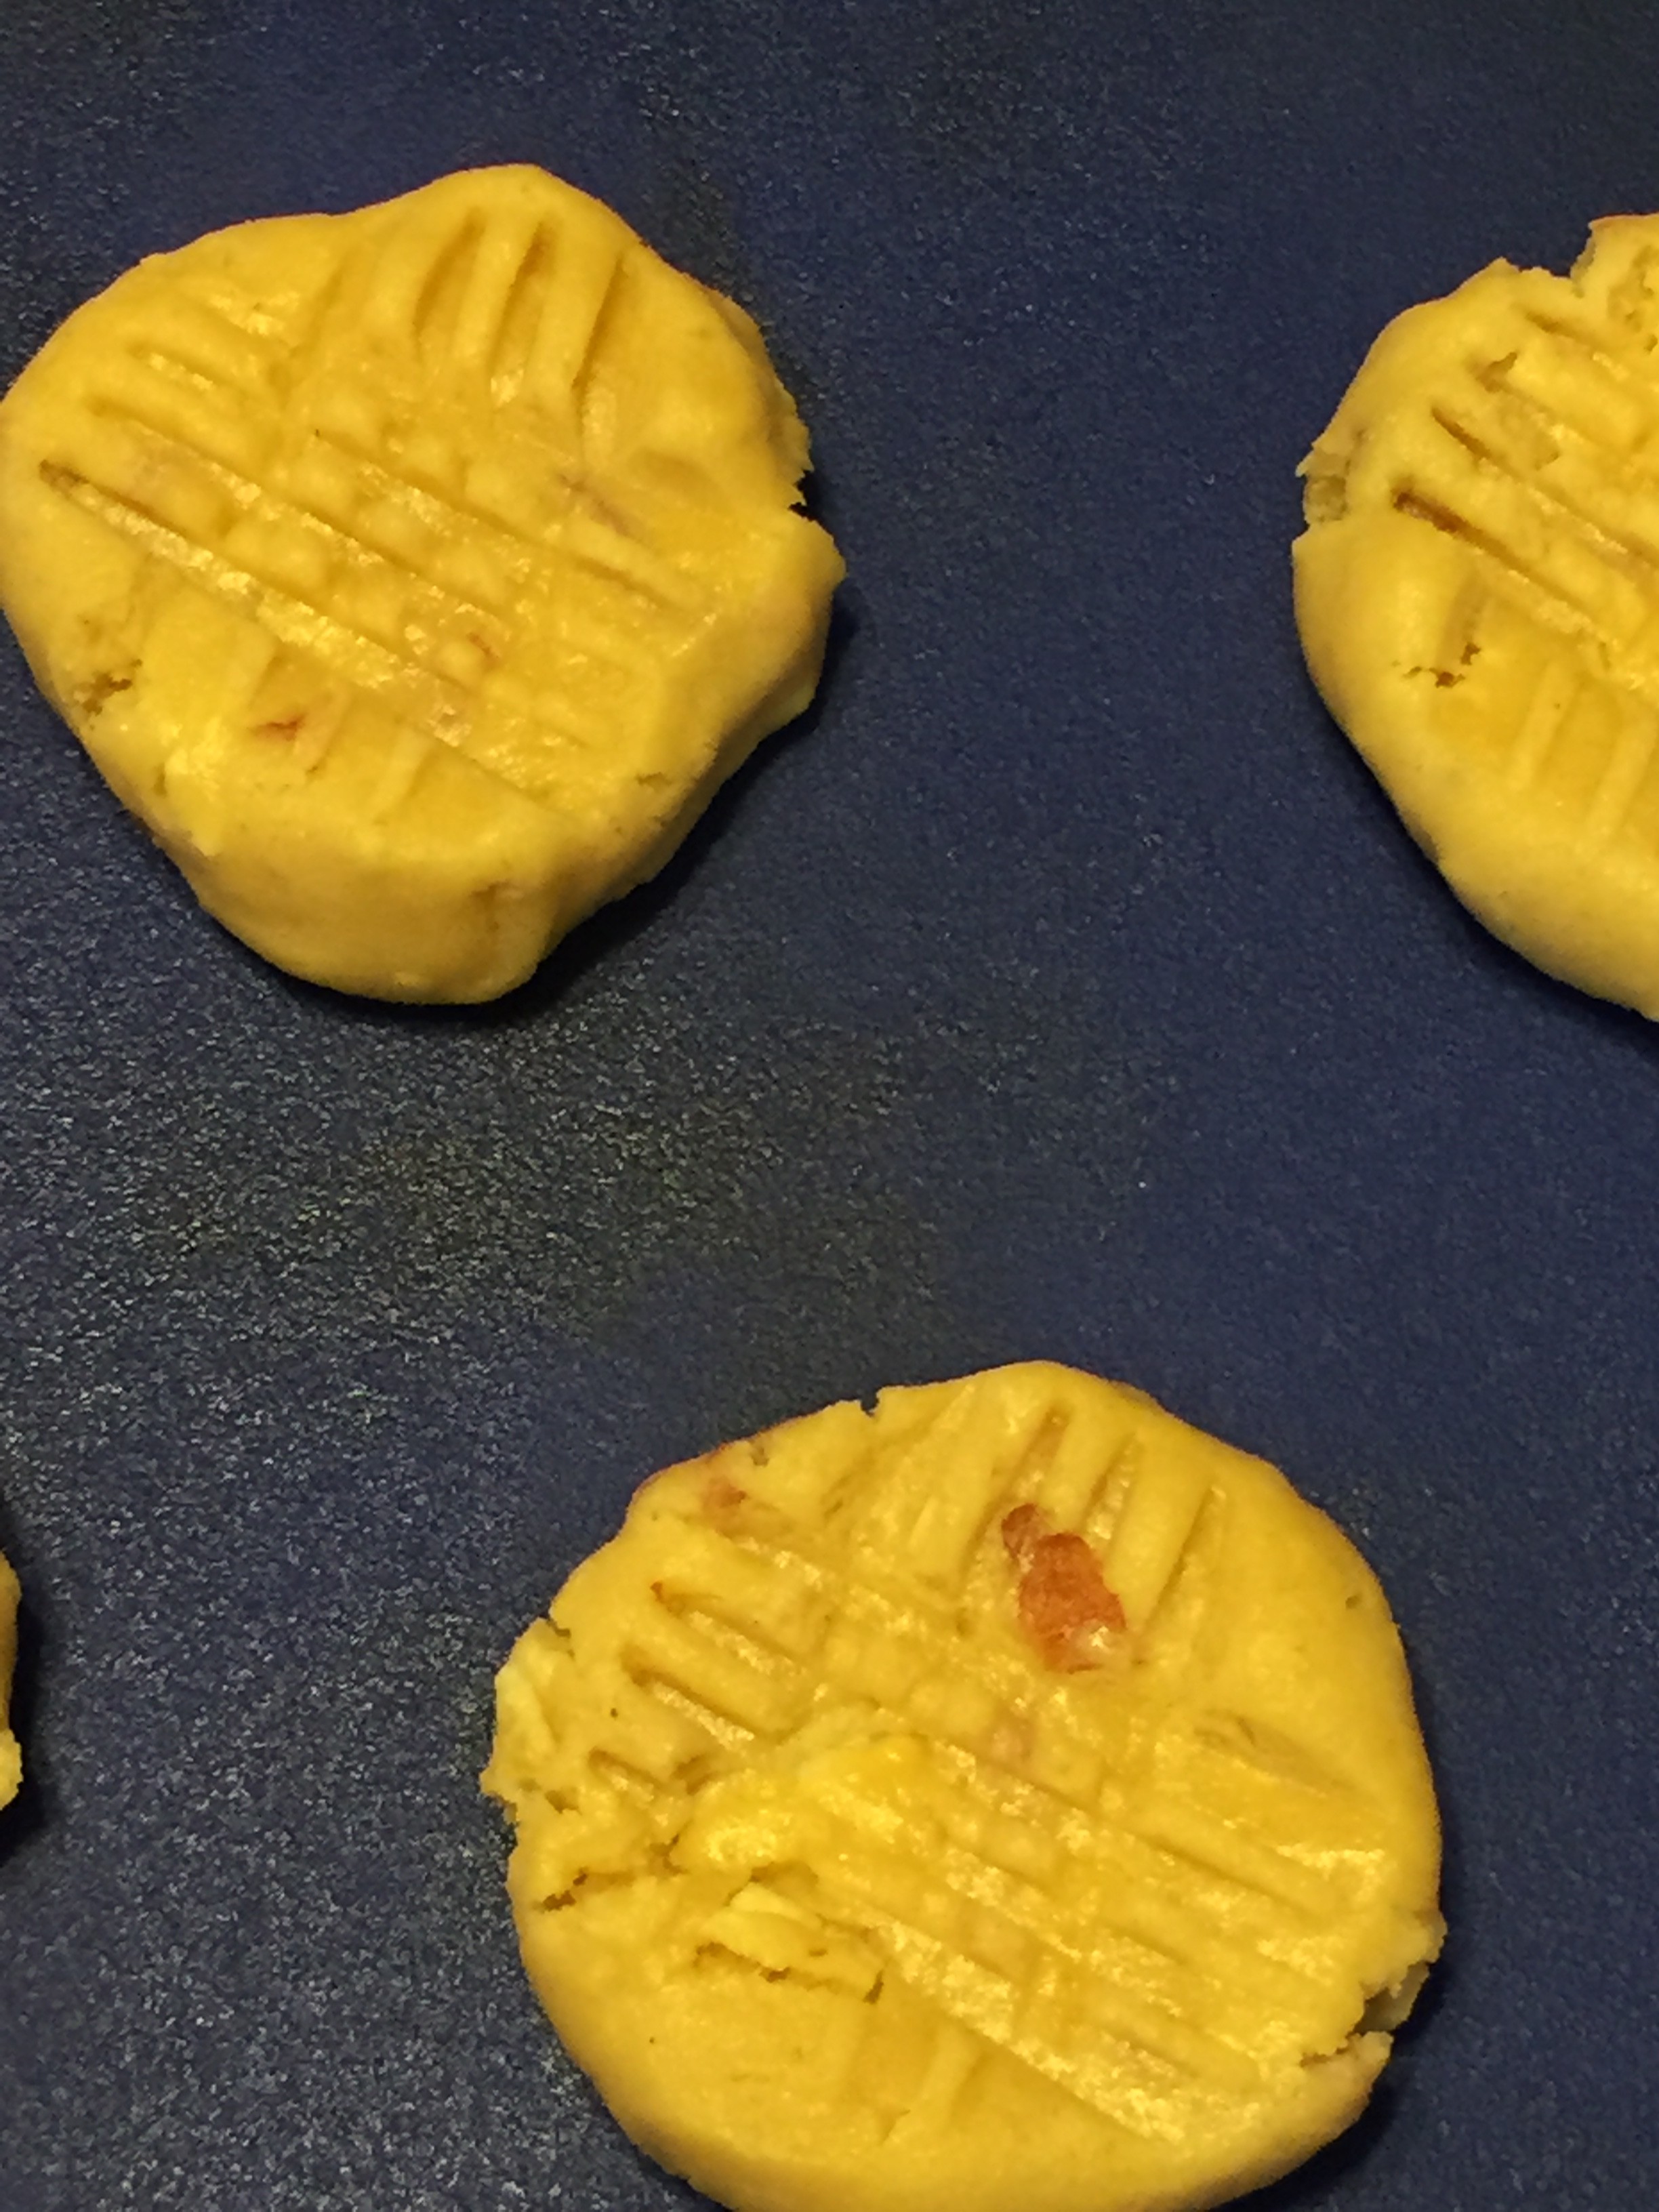
Roll 1 1/2 in balls and flatten on cookie sheet with a fork.
Bake for 10 minutes. Do not over bake so cookies remain soft & chewy.
I guarantee that you will crave these after trying them. If you bake cookies for a bake sale, class party, or holiday cookie swap, add these to your repertoire and you will have a unique cookie that people will LOVE. There is BACON in them for goodness sake!
Bacon Potato Chip Cookies
Bacon Potato Chip Cookies
Author: Changing Seasonings
Recipe type: Dessert
Prep time:
Cook time:
Total time:
Serves: 2 dozen
A chewy cookie with the perfect blend of sweet and salty.
Ingredients
- 1 C Butter Flavored Shortening
- 1 C Granulated Sugar
- 1 C Light Brown Sugar (packed)
- 2 Large Eggs
- 1 t Vanilla
- 2½ C All-purpose Flour
- 1 t Baking Soda
- 1 t Salt
- 2 C Potato Chips (crushed)
- ½ C Bacon (chopped) * about 4 slices
Instructions
- Preheat oven to 350 degrees
- Cream together shortening and sugars
- Add eggs and vanilla
- Mix on low until creamy
- Mix together the flour, baking soda and salt
- Add dry mixture a little at a time until blended
- Add potato chips and bacon
- Shape into 1½ in balls
- Place on ungreased baking sheet (you can line with parchment paper or silicone sheet)
- Flatten slightly with a fork
- Bake for 10 minutes
- Allow to cool