Archive for the ‘Appetizer’ Category
Chopped: ECA Edition, big fun!
The organization that I work for had a fun team building activity a couple of weeks ago that was right up my alley. Right up my alley, that made me snicker. Where did that phrase come from anyway? You know I am going to find out. And, apparently, the origin of the phrase goes back as early as the 1600’s, with the word “alley” referring to something being part of one’s province. The exact phrase is also documented in a 1931 court case. In the 1930’s the slang term “up one’s street” was commonly used in the same reference. Okay, I digress, but now we know.
Our team building committee came up with their own version of the popular Food Network show, Chopped. The rules were slightly different. Employees received an envelope of six unique “mystery ingredients.” There were several different lists. The challenge was to come up with a dish using at least three of the ingredients for a staff carry-in. Dishes were judged and awarded very interesting prizes in four categories: Most Creative Use of the Ingredients, Presentation, Taste (featuring at least 3 ingredients), and Most Ingredients Used with Best Taste. We weren’t timed and didn’t have to cook onsite, thankfully. However, it was just a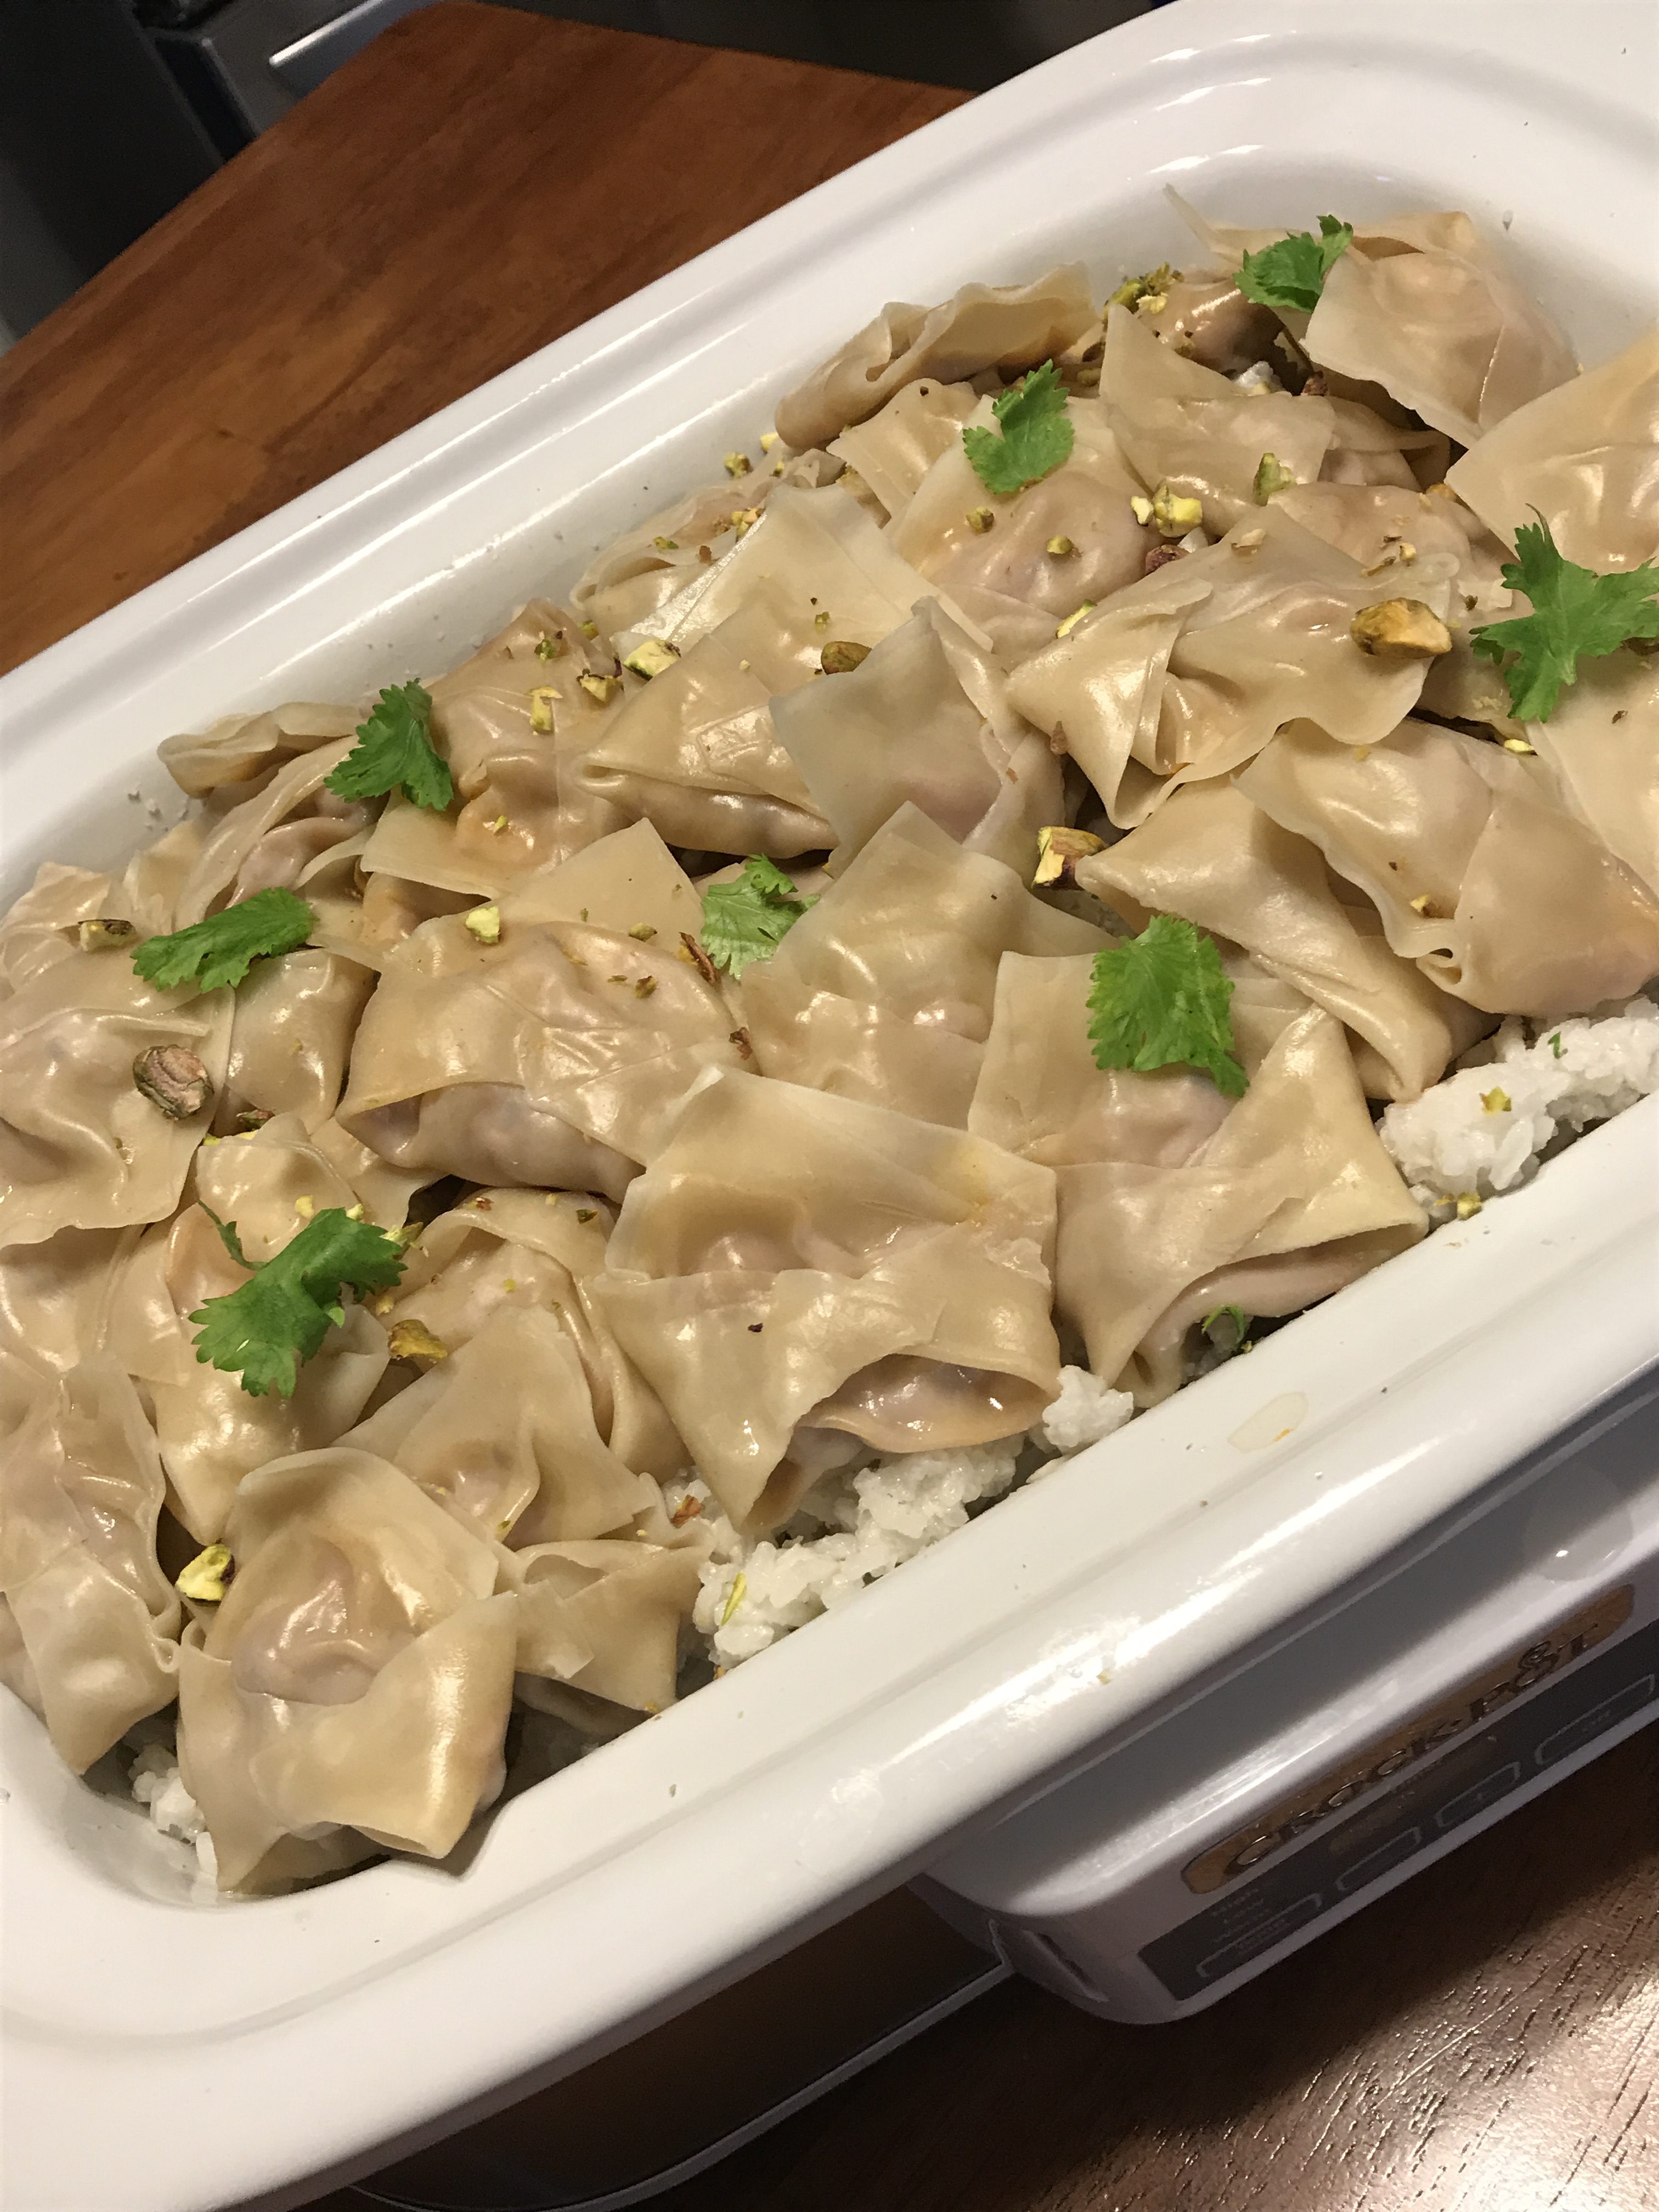 s challenging coming up with something that could be easily transported and re-heated. I am amazed we didn’t blow a fuse with all of the crockpots that were plugged in at the office that day!
I was challenged to produce something fairly creative and tasty, first, because many of my co-workers know I own a food business so I figured they would have high expectations, and second, because I am just highly competitive. 🙂 I had a strategy. I did what I thought others would do, and searched the world wide web for recipes that used many of the ingredients on the list. The list I was given screamed “dessert” to me, and sure enough those were the type of recipes that popped up. My list included Apricot Preserves, Star Fruit, Coconut Milk, Wonton Wrappers, Pistachios, and Nutella. See, sounds like dessert.
So, I went another direction. Several of my ingredients are used in Moroccan cooking, which I love, and pair well with my Ras el Hanout blend. Ras el Hanout is a blend of “top shelf” spices including Coriander, Ginger, Cumin, Black Peppercorn, Turmeric, Cinnamon, Orris Root, Cardamom, Rose Petal, Fennel Seed, and Star Anise. The spices for this blend are first toasted to release the oils, then put through the grinder. They smell unique but amazing. I came up with the dumpling recipe by writing a variation of an Asian wonton or dumpling. Several of my co-workers are vegetarian so I decided to make the dumplings without meat. I could have used tofu, but I had chickpeas in the pantry, and use them in other Moroccan dishes, so chickpeas became the protein in the dumplings. Since Star Fruit isn’t readily available in my rural grocery, I decided to use it similar to dried apricots, and ordered the dried version from Amazon.
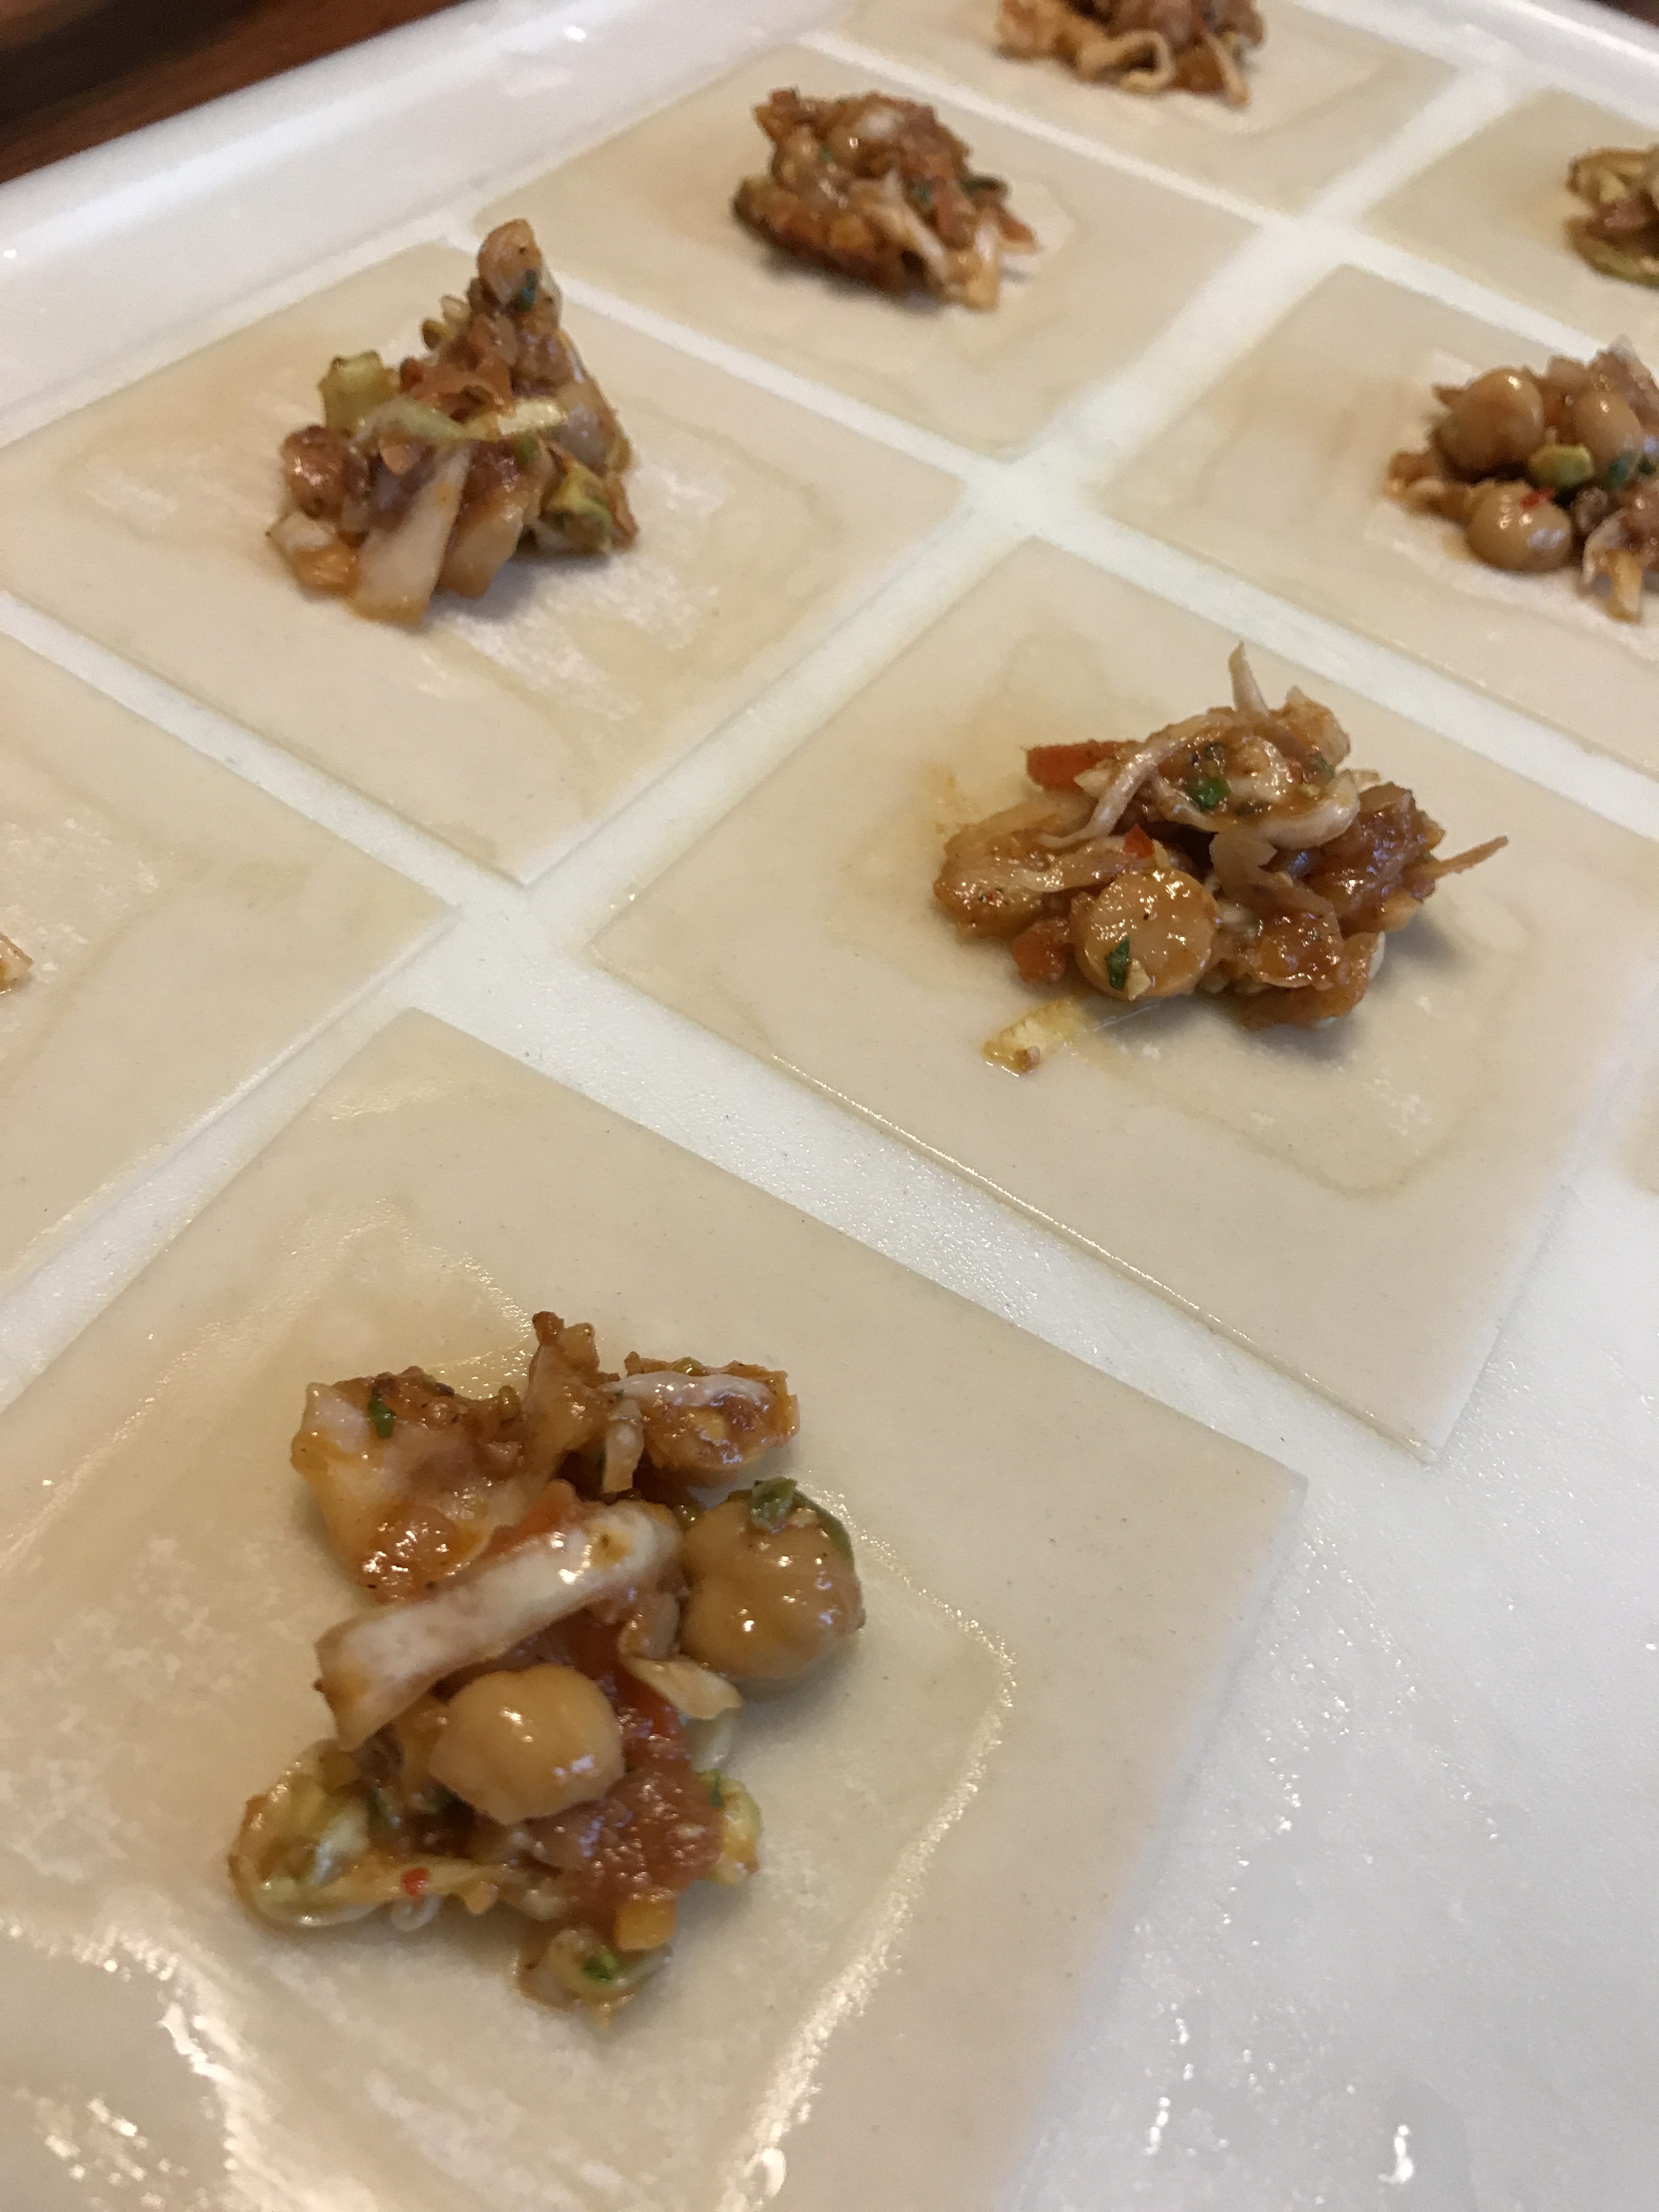 Now, let me just mention. Making dumplings takes skill. Skill that I apparently don’t have. It takes practice, lots of it! Folding them is time consuming. After you get the hang of it, the process goes a bit faster. But, plan on throwing a couple in the trash, and being okay if they aren’t even close to uniform. For the sake of space in the steamer and in the crockpot, I gave my dumplings an extra fold. I also folded and then steamed a
 few dumplings to sample before attempting origami with the fragile little squares.
I know you all are w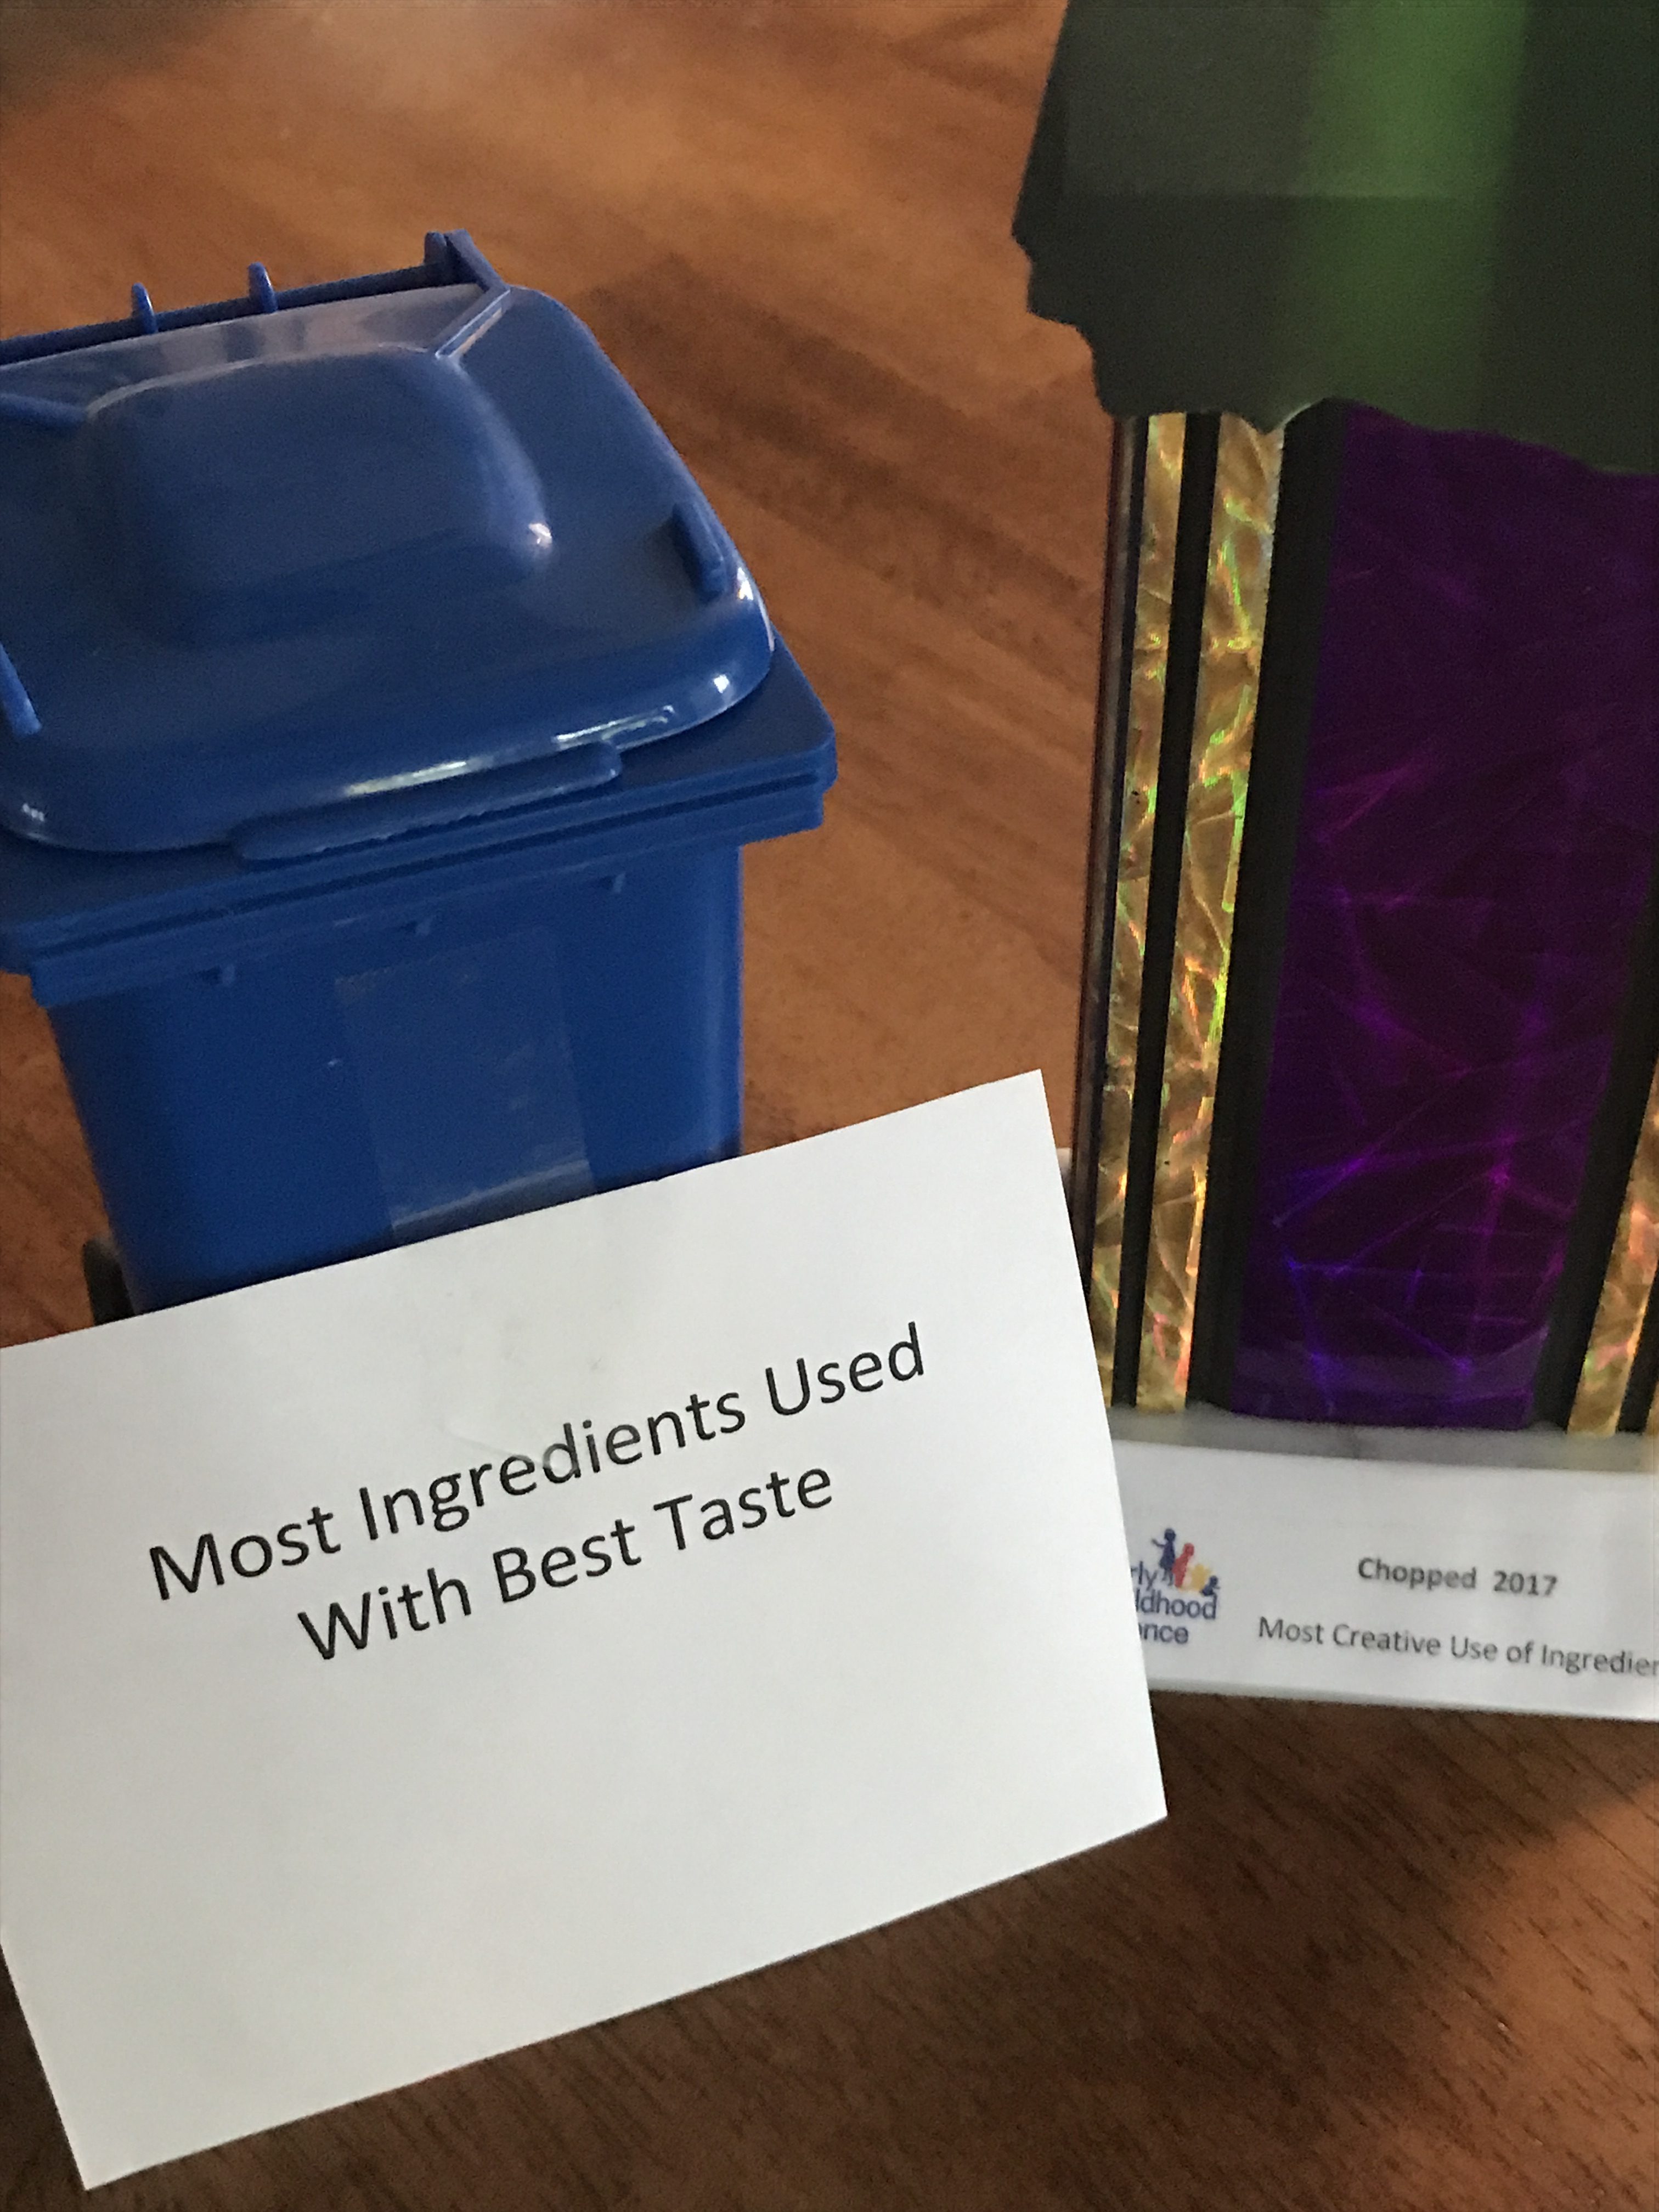 ondering. Yes, this tasty dish was the winner of not just one, but two of the categories. I was awarded a trophy for Most Creative Use of Ingredients, and a tiny garbage can full of candy for Most Ingredients with Best Taste. Kudos to the team building committee for their creative prizes! (Really guys, cash would have been just fine, haha!)
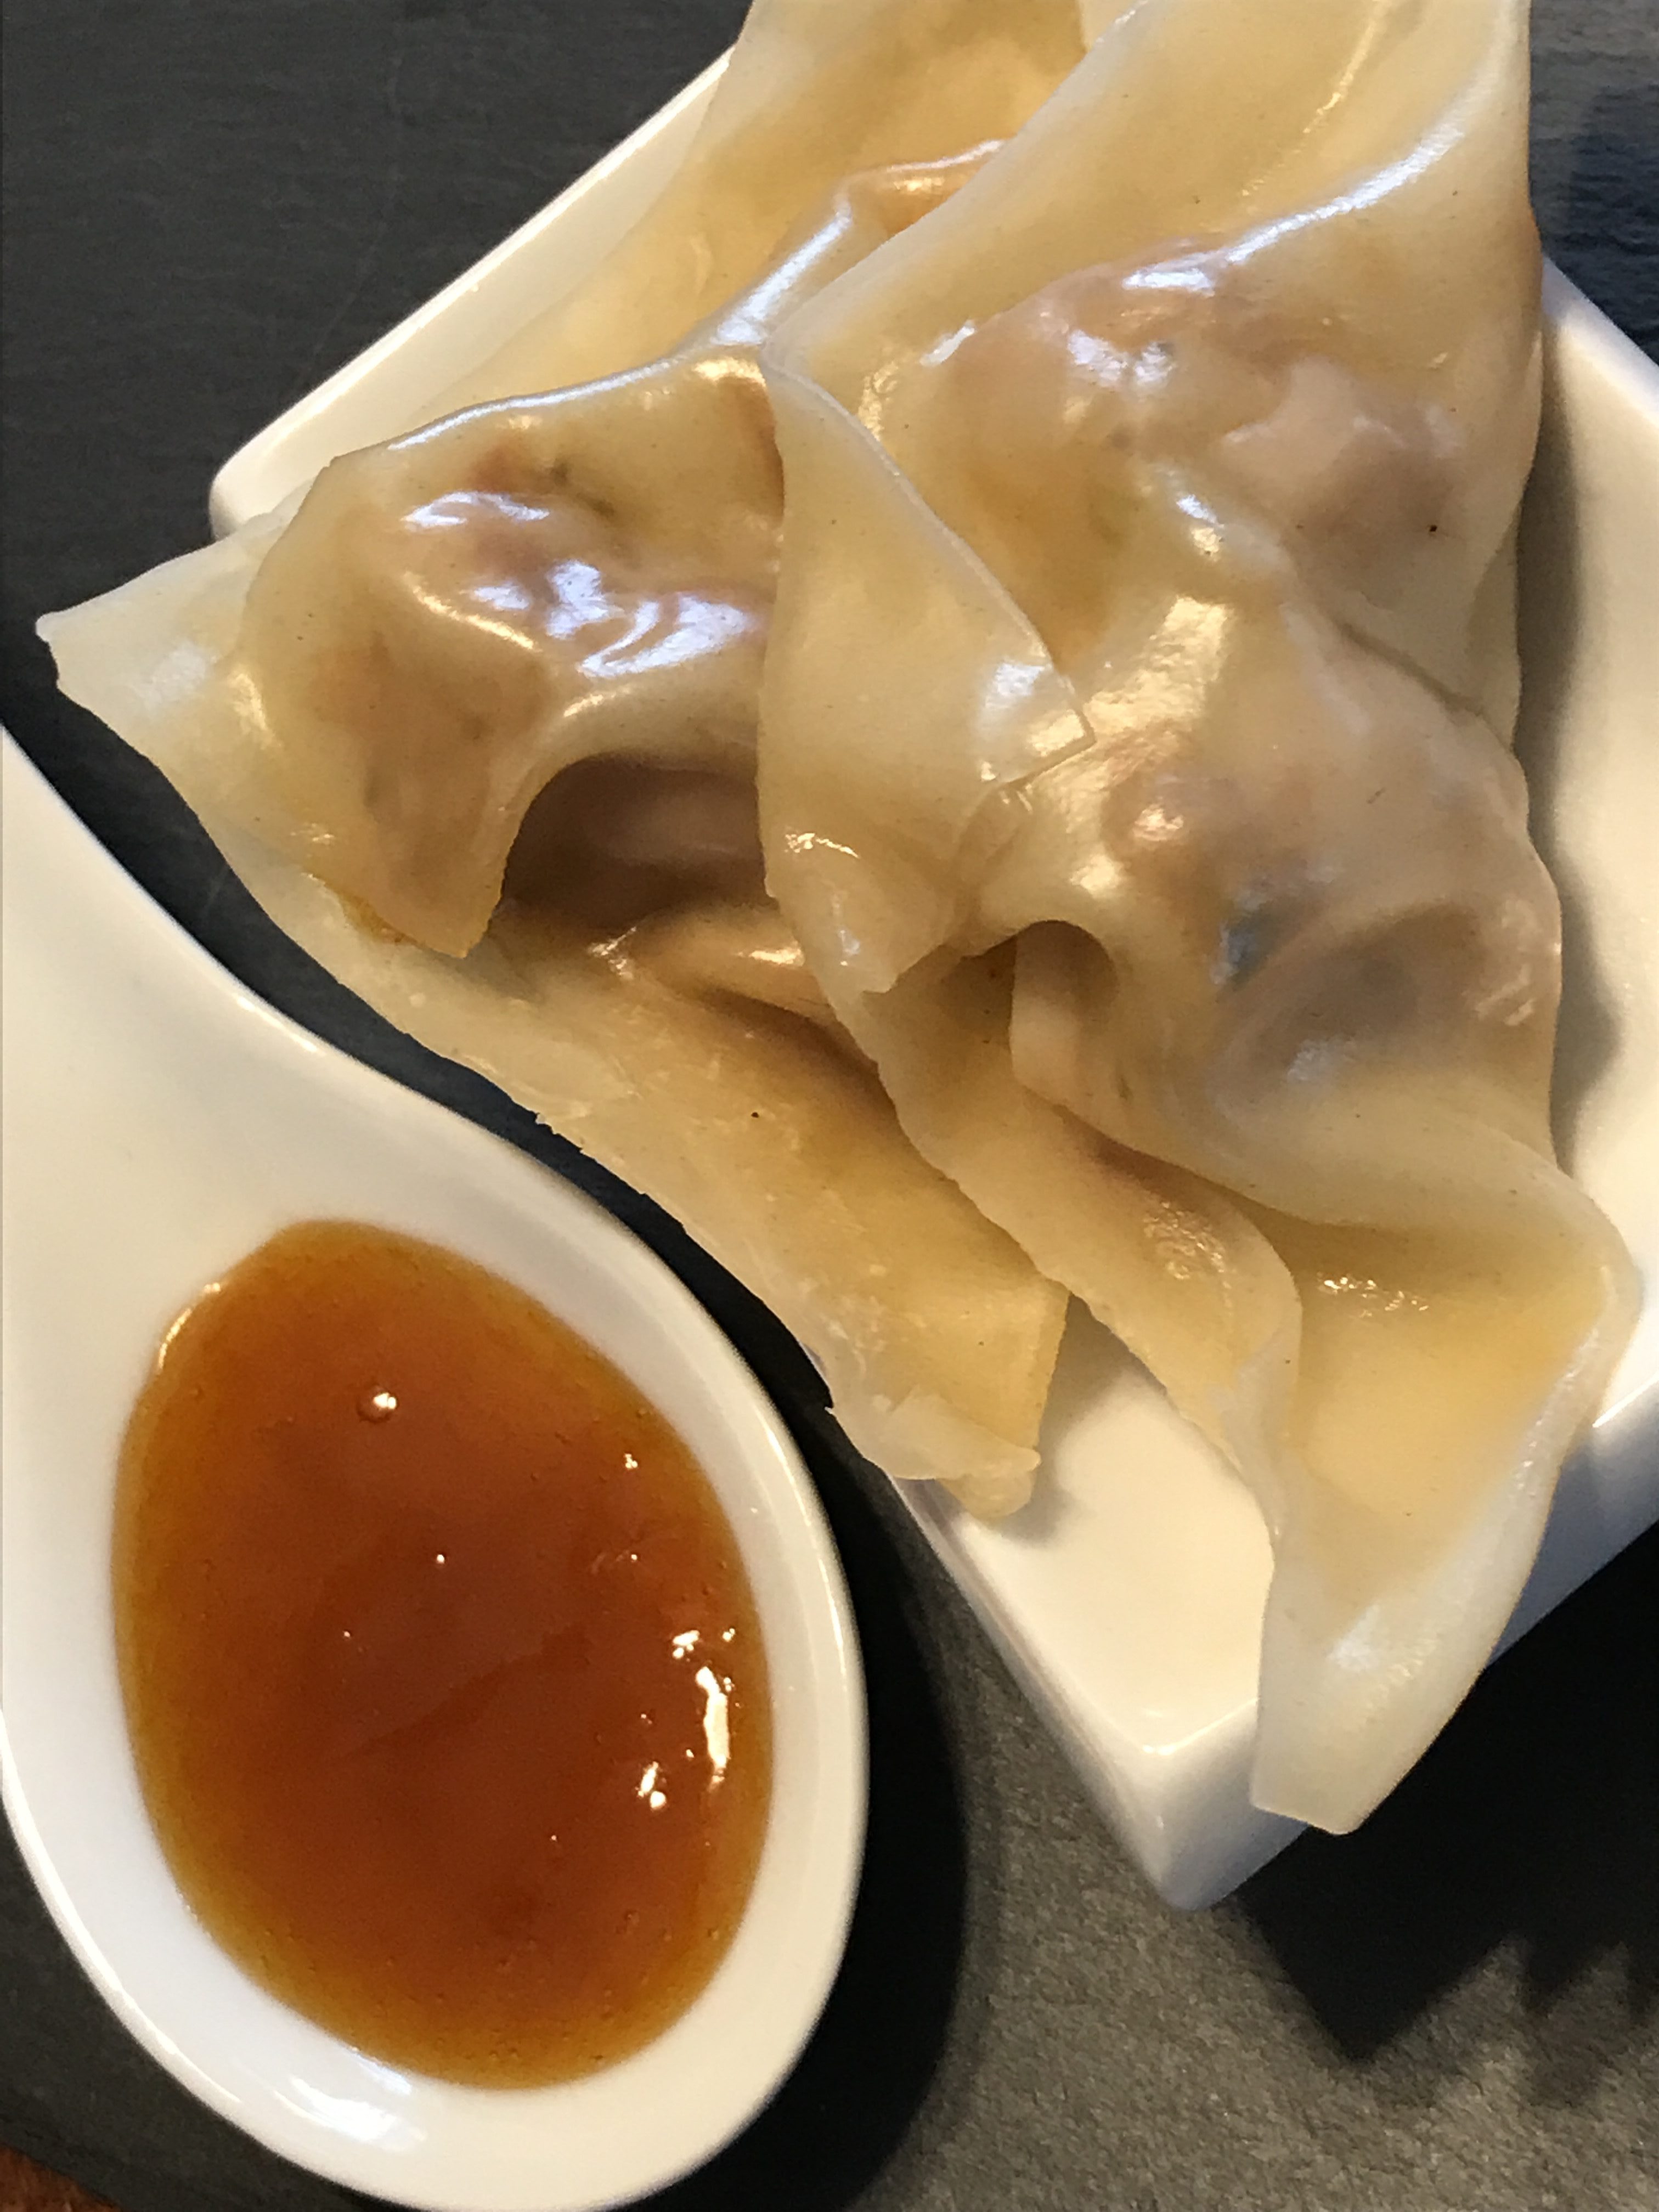
The dumplings would make a great appetizer. The rice can be served as a side dish to an entree such as Tangine Chicken Thighs. Or, you can serve the dumplings with the rice, as I did.
I would certainly suggest eating right away though both the rice and the dumplings did heat well in the crockpot. Another suggestion, prepare dumplings with children. Then you can put them to work on the tedious stuffing and folding. Win, win! They get a cooking lesson, and you don’t have to fold. Enjoy!
Moroccan Dumplings with Apricot Dipping Sauce & Sticky Coconut Lime Rice
Author: Changing Seasonings
Recipe type: Appetizer, Dinner
Cuisine: Moroccan
Prep time:
Cook time:
Total time:
Serves: 30-40 dumplings
Ingredients
- For Dumplings:
- 1 15oz can Chick Peas (can substitute ½lb firm Tofu or ground pork or turkey)
- 1 ½ C Slaw Mix (or chopped cabbage and carrots)
- 2T Scallions
- 2t grated fresh ginger
- 1T Harissa
- 2T chopped Pistachios
- 2T chopped dried Star Fruit
- 1T fresh Cilantro
- 1t (1clove) minced fresh Garlic
- 1T Soy Sauce
- 2t Sesame Oil
- 1 Egg
- 1t Kosher Salt
- ¼t ground Pepper
- ½t Ras el Hanout seasonings
- 35-40 Wonton Wrappers
- For Dipping Sauce:
- 1 12oz jar Apricot Preserves
- 1T Soy Sauce
- ¼ C Rice Vinegar
- For Rice:
- 1 C Jasmine Rice uncooked
- 2 ½ C Coconut Milk (can add water to make full amount)
- ½ t grated fresh Nutmeg
- ½ t grated fresh Ginger
- 1T chopped fresh Cilantro
- Juice of ½ fresh Lime
Instructions
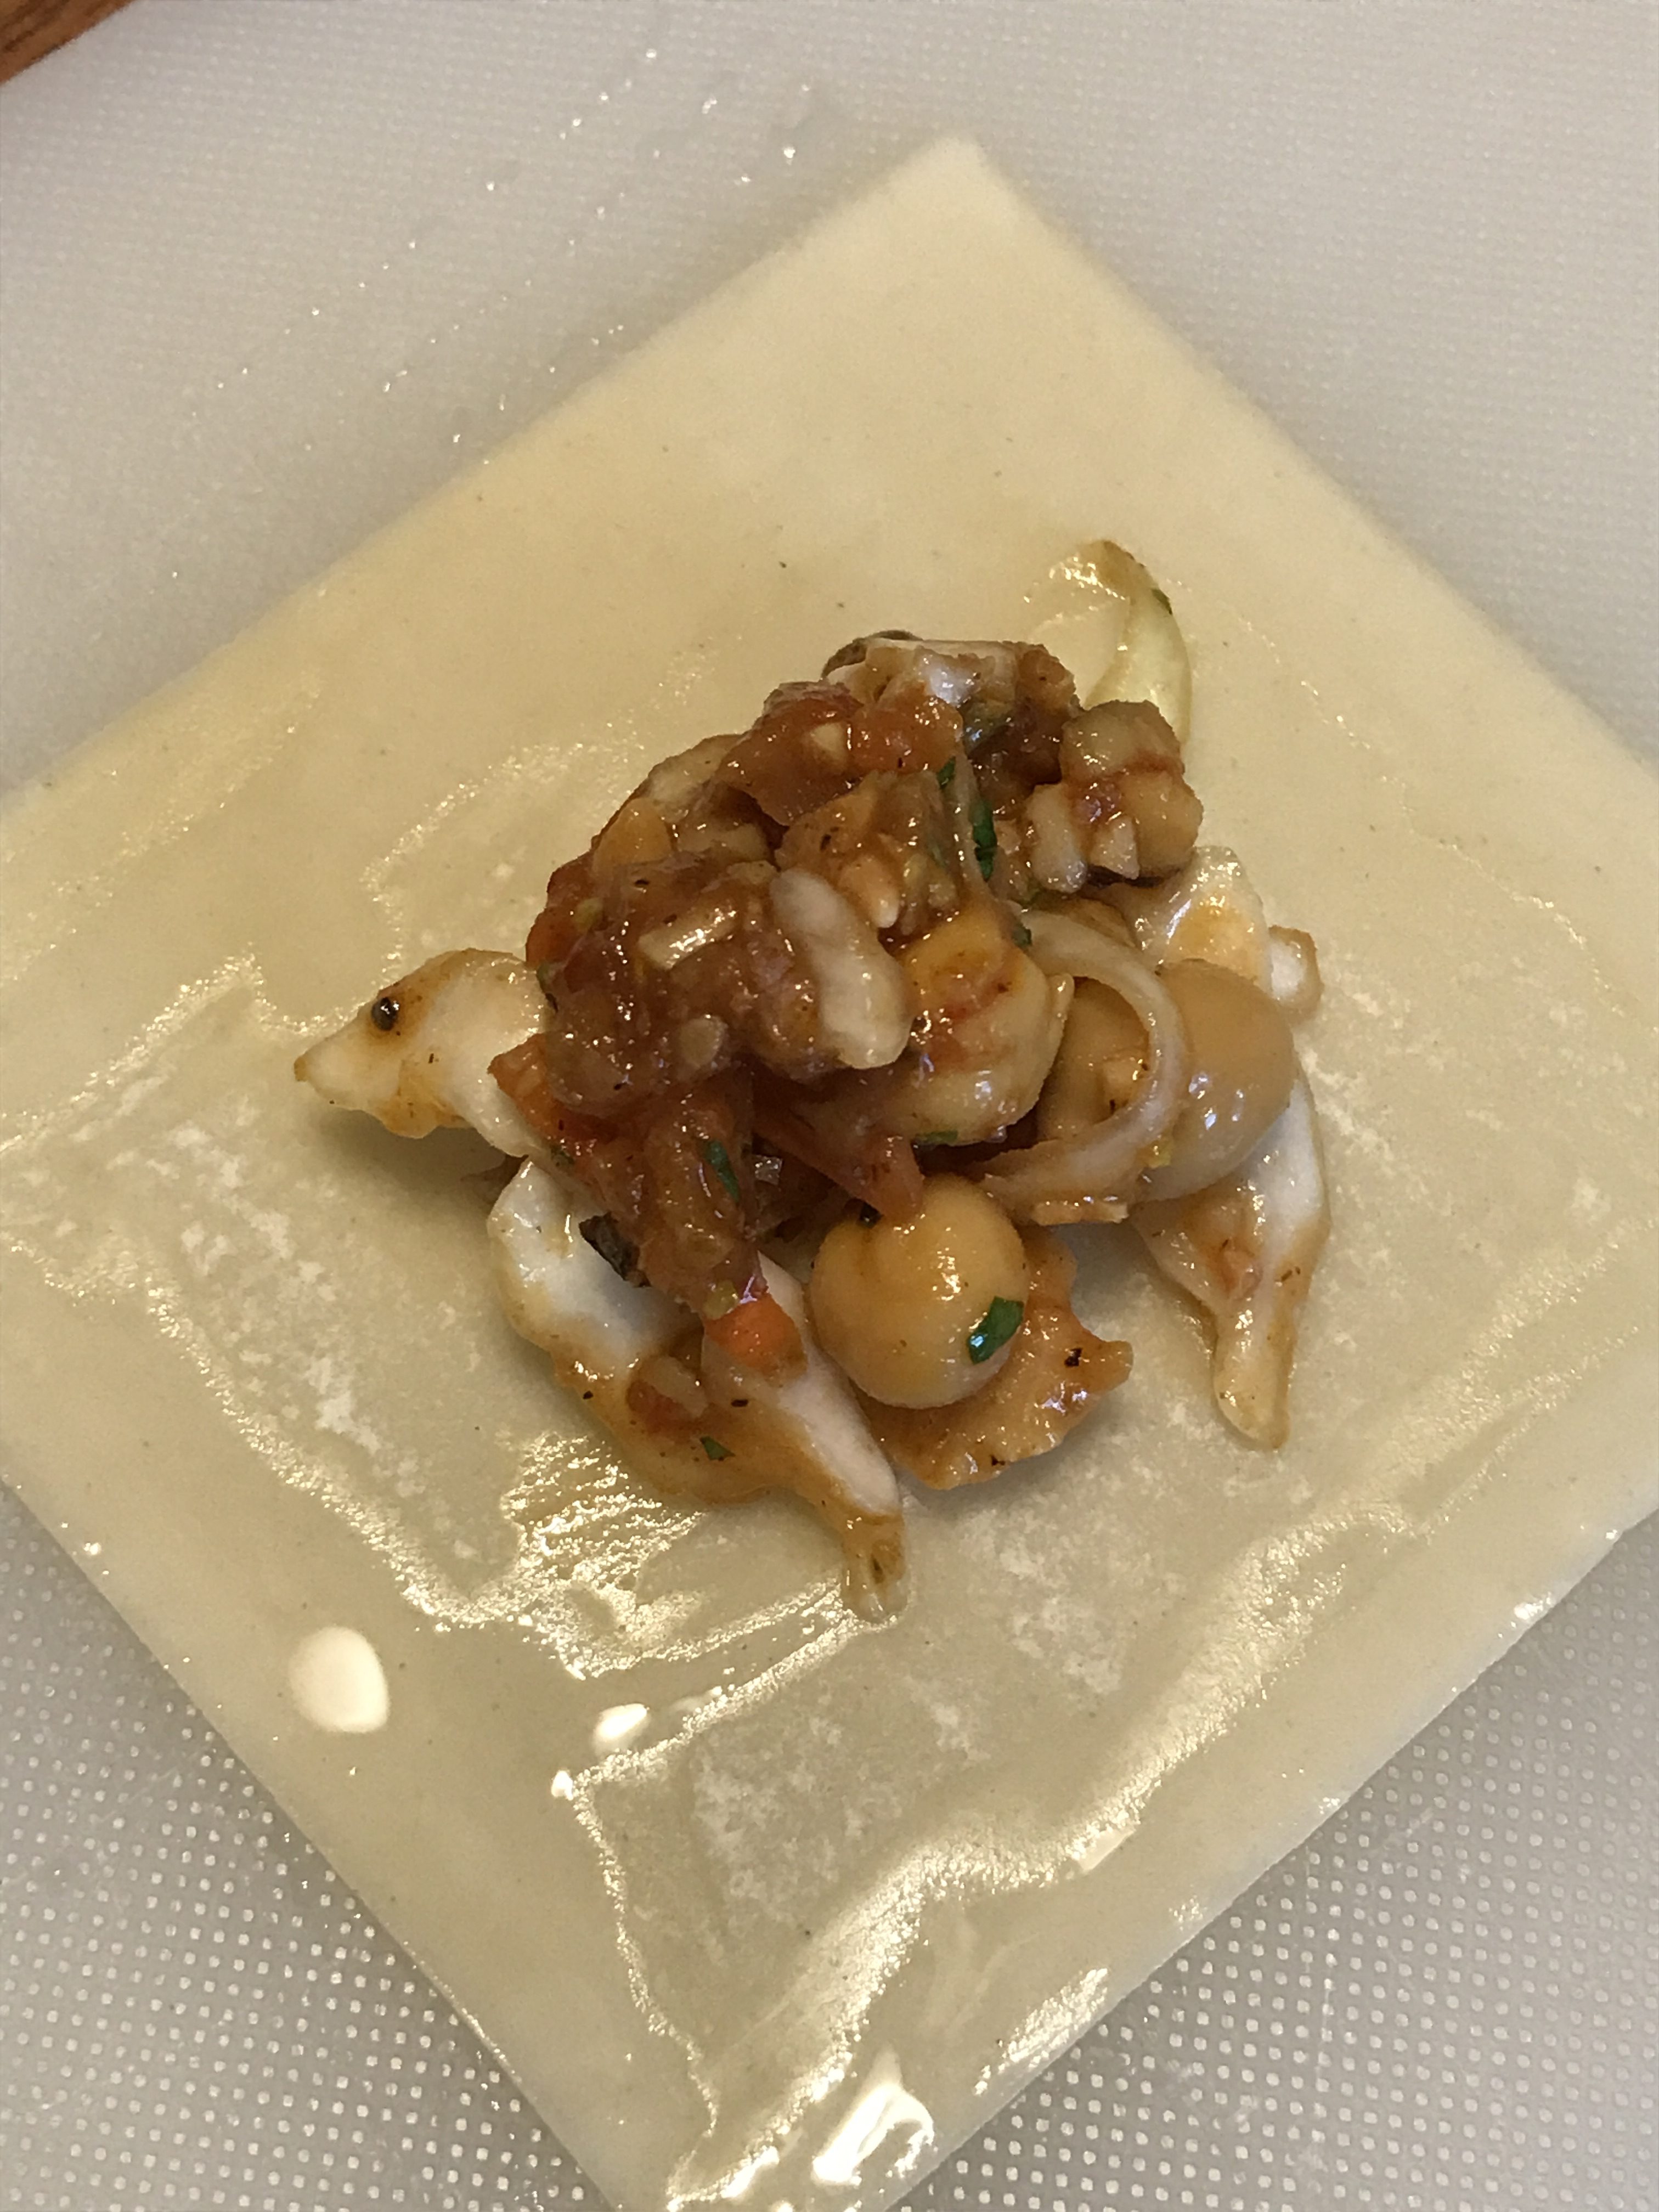
- Mix dumpling ingredients except wrappers.
- Use 1t filling for each wonton.
- Wet and seal edges.
- Steam for 10-12 minutes.
- Whisk together the sauce ingredients. Reserve for dumpling dipping.
- Cook rice to package instructions.
- Add nutmeg and ginger while cooking.
- Add lime juice and cilantro before serving.
- Garnish with chopped pistachios.
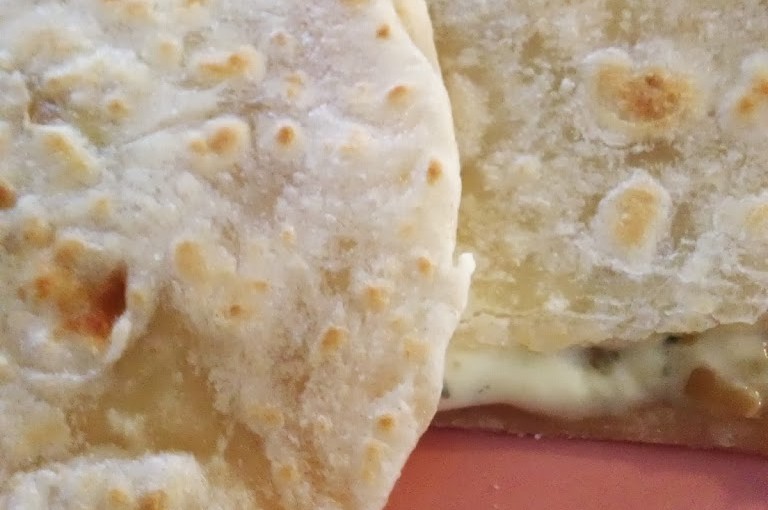
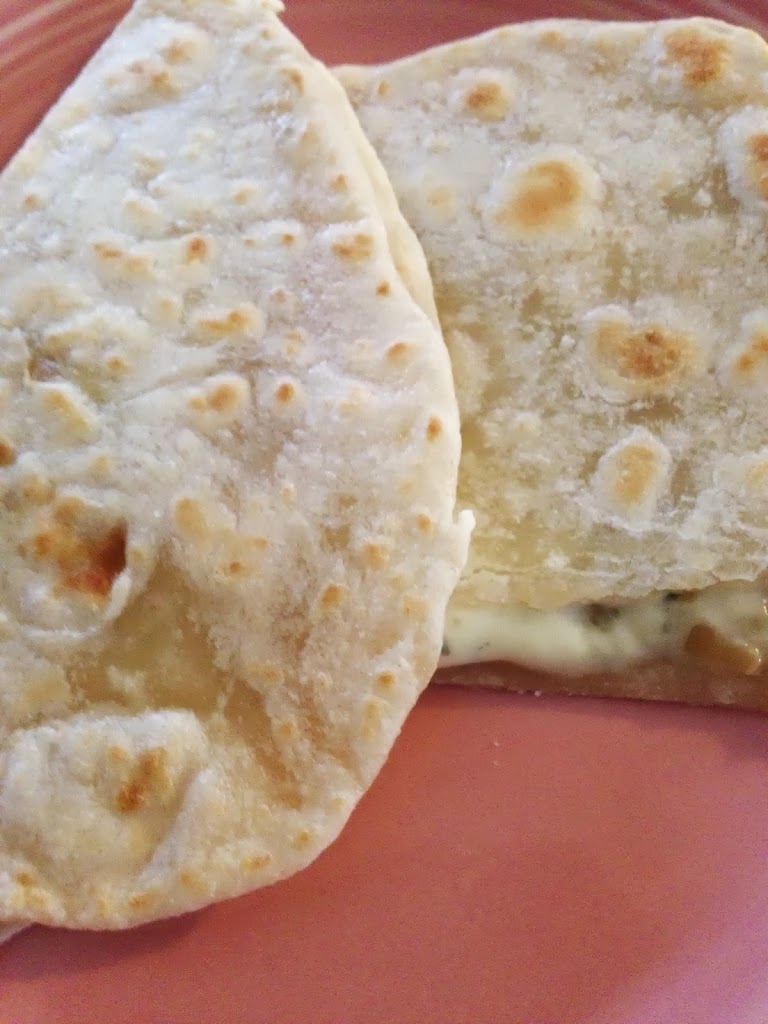
I first made these yesterday for myself as a quick dinner since I had the fresh tortillas on hand. They were so good, I had to fix them again for lunch today and am eating one as I type. Good thing none of you can see the fingerprints on the keyboard! By the way, if any of you know my son, do not share that his mother was eating while on the laptop because it is a forbidden activity…Shhhhh!
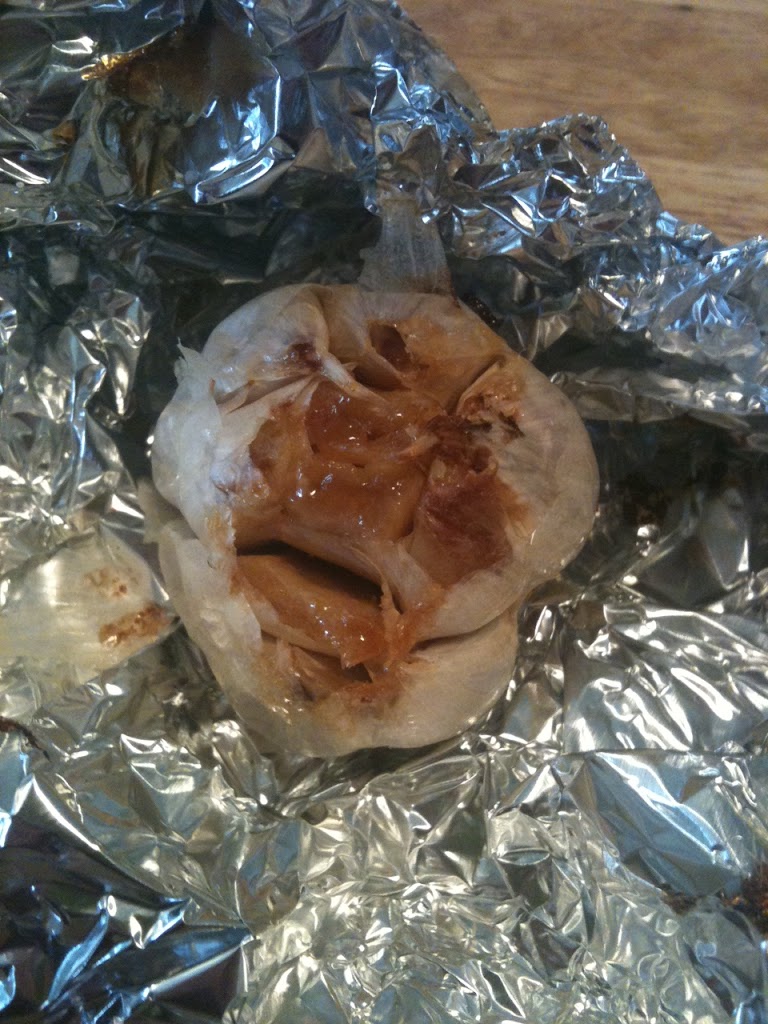
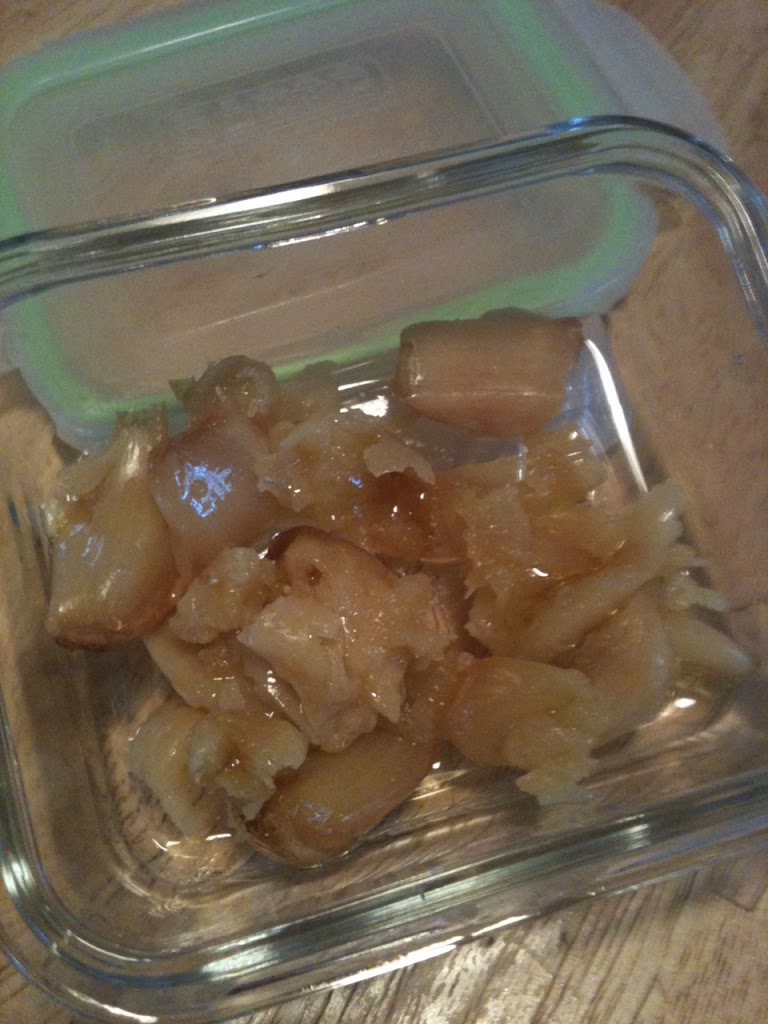
These quesadillas are a combo of three of my very favorite foods: garlic, cheese and bread. First, the garlic. Roasted garlic is easy to make and I keep it on hand in the fridge because it has so many uses. Click here to find out how to roast garlic.
Second, the cheese. I used Gorgonzola. Gorgonzola is a bleu cheese from Italy made from cow’s milk. It is salty and the strong flavor comes from the veins. It is an easy to crumble cheese and melts well. It is also a great pairing with the potent garlic flavor.
Lastly, the bread. In this case, fresh, soft, warm flour tortillas. Here is the link to the recipe for the flour tortillas. They are so simple to prepare and cost less than pre-packaged tortillas.
Okay, now you have your ingredients, time to put the quesadillas together.
 |
||||||
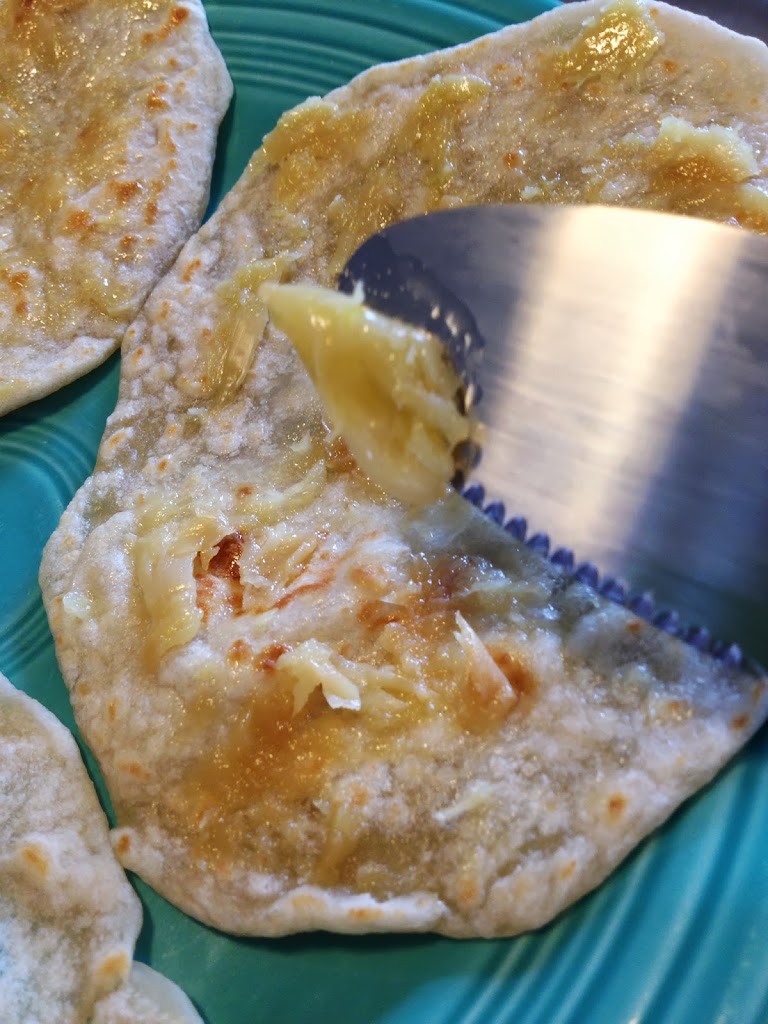
| Spread roasted garlic on one tortilla |
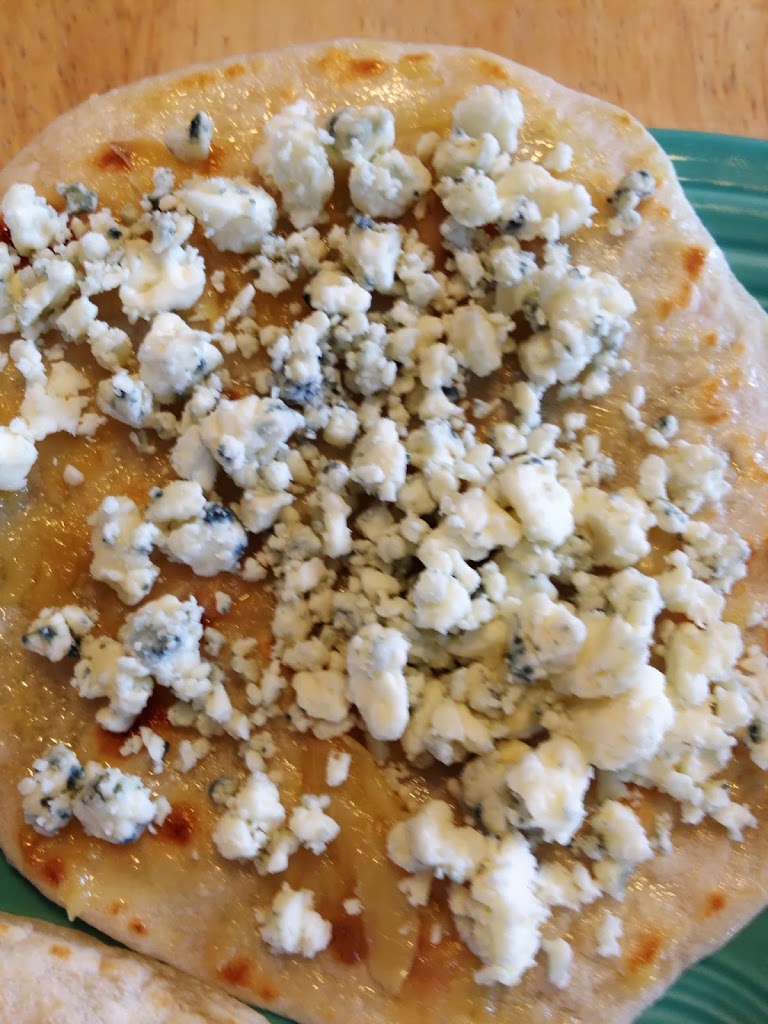 |
| Sprinkle cheese over the garlic |
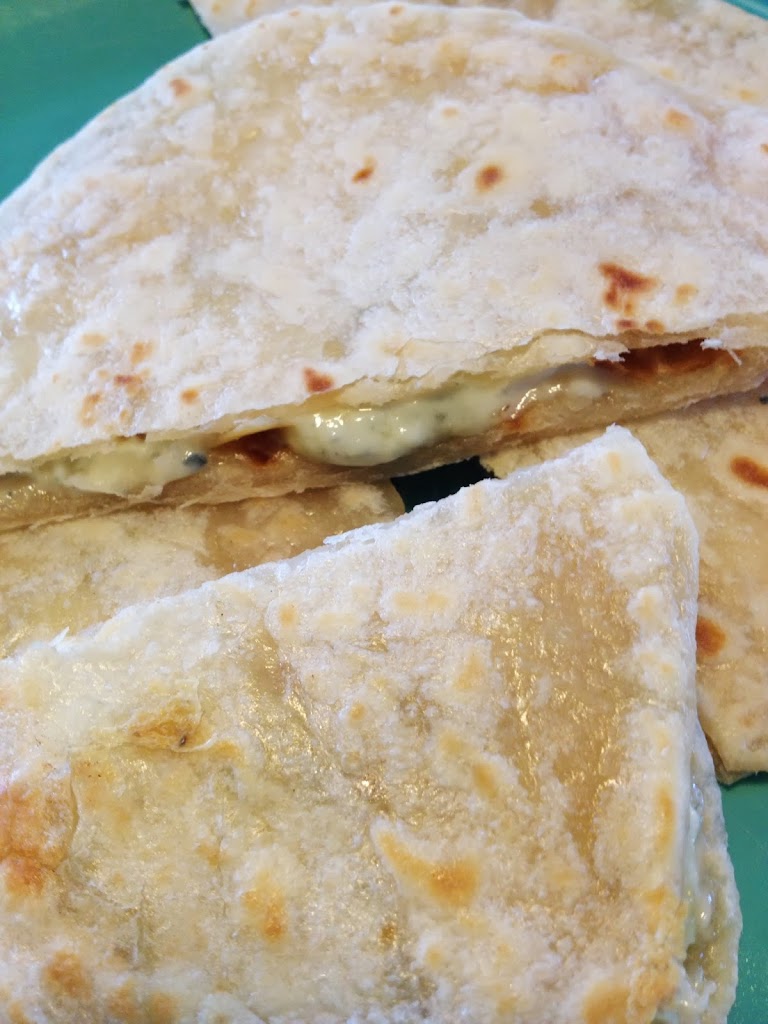 |
| Place a second tortilla on top and heat in a skillet over medium heat until the cheese melts, turning once. |
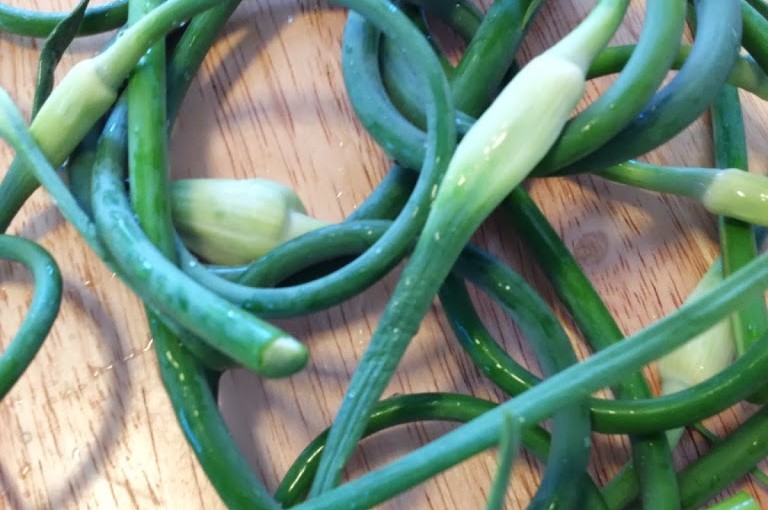
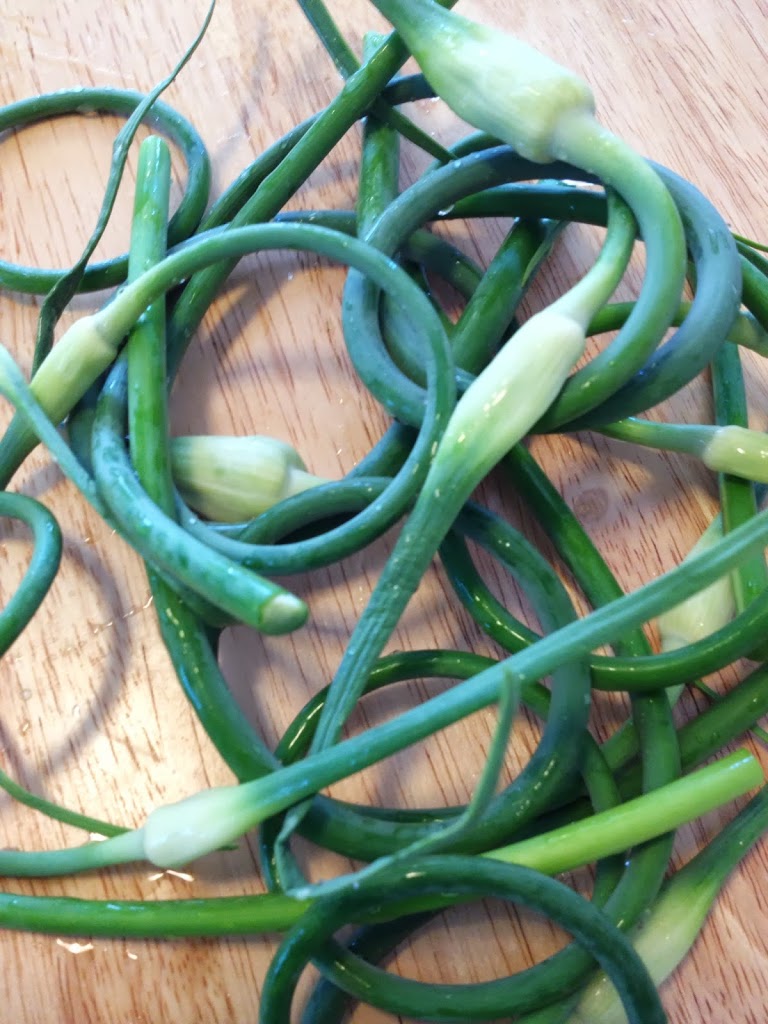
National Garlic Day is actually on April 19. However, for me, everyday is garlic day! If you have read many of my posts, you know that there is no chance that I will ever have to fend off or risk falling madly in love with a vampire because garlic is coursing through my veins. After a visit to the farmer’s market last weekend, I ended up with a huge bag of garlic scapes (purchased simply because I couldn’t resist the smell) that I had no idea what to do with. So after some researching, I decided to try my variations of pickled garlic scapes and garlic scape pesto. I also needed to replenish my roasted garlic supply, so my kitchen smells absolutely incredible this afternoon!!

If you haven’t roasted garlic before, check out my post on garlic. I always keep roasted garlic on hand by storing it in a little olive oil in the refrigerator. I use it in recipes, as a spread on crackers and croutons, or sometimes just eat it right out of the container!
Scapes, however, were new to me to use. The scape is the curling top of the garlic plant and is as edible as the bulb. They are similar to green onion, only they are solid all the way through on the lower portion and have a garlic flavor. They can be used raw or cooked in pasta, salads, dips, etc. I chopped one and used it in a salad and it was very flavorful. Because I knew I couldn’t eat the entire bag before they would go bad, I searched for ways to use them that would also preserve them so I didn’t have to include garlic scapes in every meal for the next couple weeks.
 Pickled Garlic Scapes
12-15 Garlic Scapes, washed and trimmed
1 C Cider Vinegar
4 t Kosher Salt
4 t Sugar
1/4 t crushed red pepper flakes
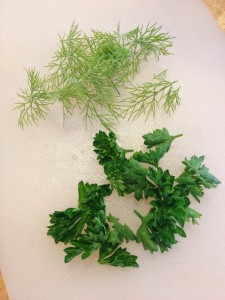
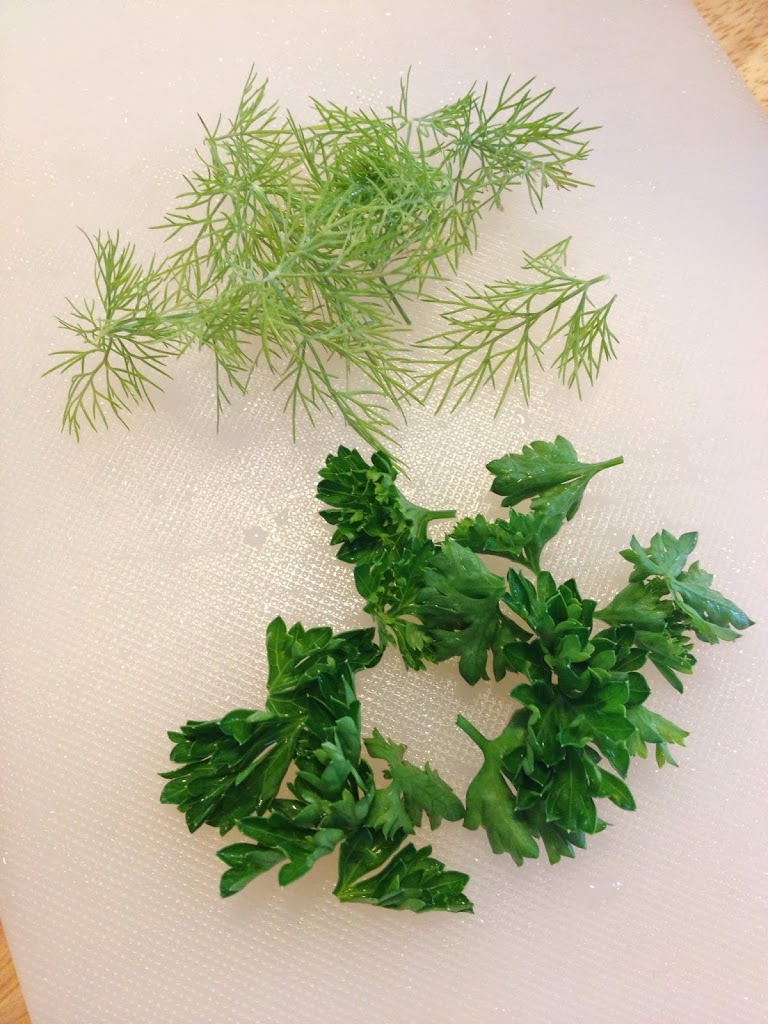
1 T chopped fresh parsley
1 T chopped fresh dill weed
Simmer the vinegar, salt and sugar over medium heat until the sugar and salt dissolve. Stir in the red pepper, parsley and dill.
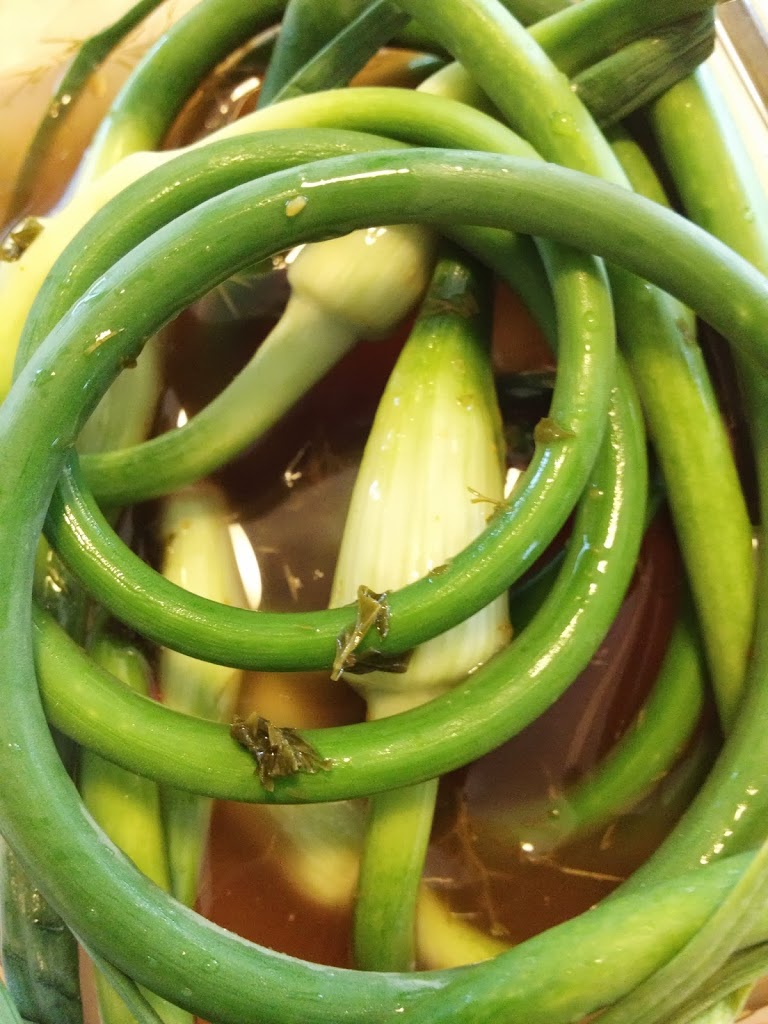
Place the scapes tightly in a glass container or mason jar. Pour the vinegar mixture over the scapes. Put on the lid and allow to cool. Store in the refrigerator. This is a refrigerator pickle recipe, so they must be kept refrigerated. It will take about a week to develop the flavor and they can be stored up to six months.
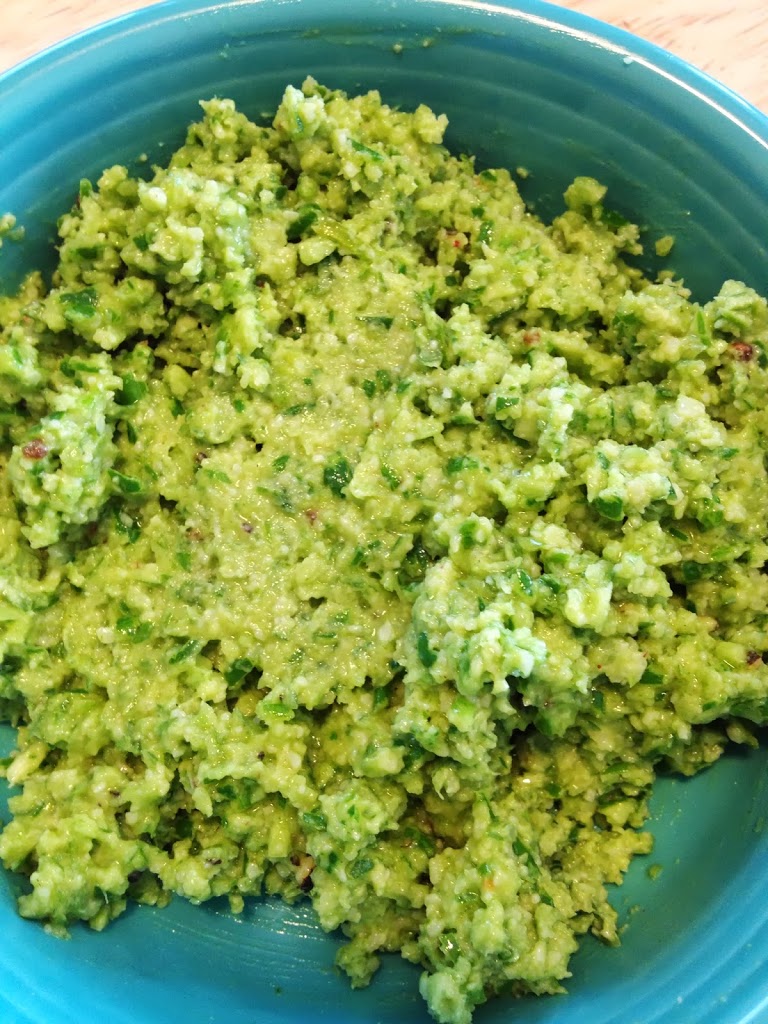
 Garlic Scape Pesto
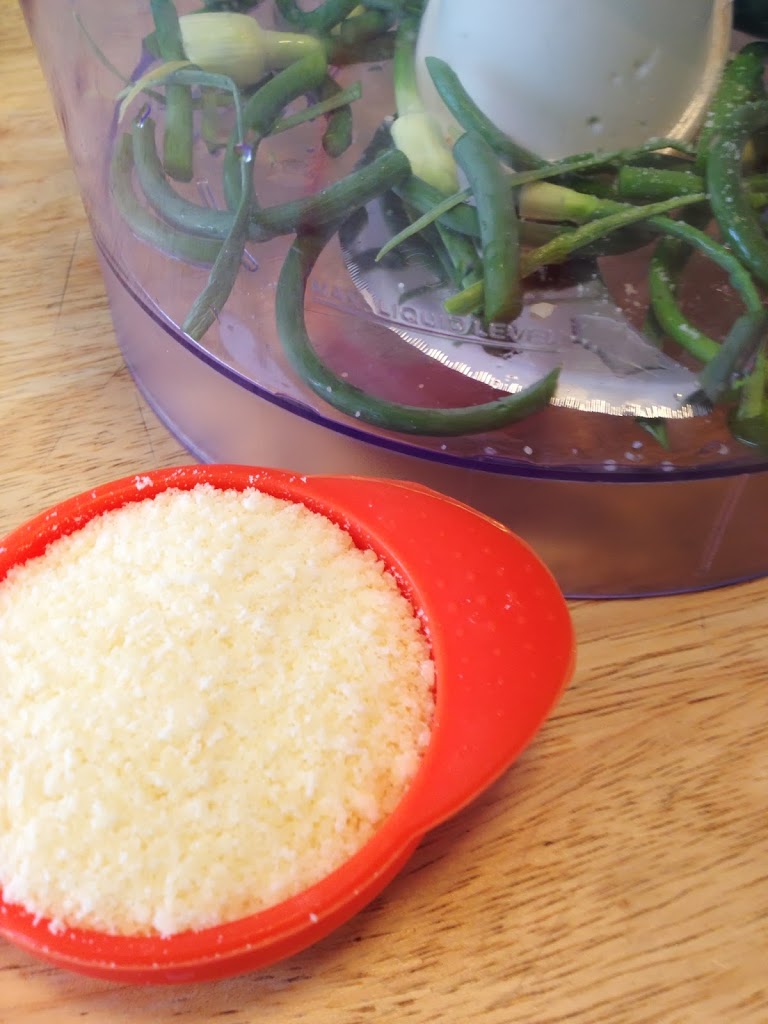
About 1 pound garlic scapes, cut into pieces
1 1/4 C grated Parmesan cheese
2-3 T pine nuts (optional)
1 T fresh lemon juice
Olive Oil
fresh ground pepper, kosher salt and sugar to taste
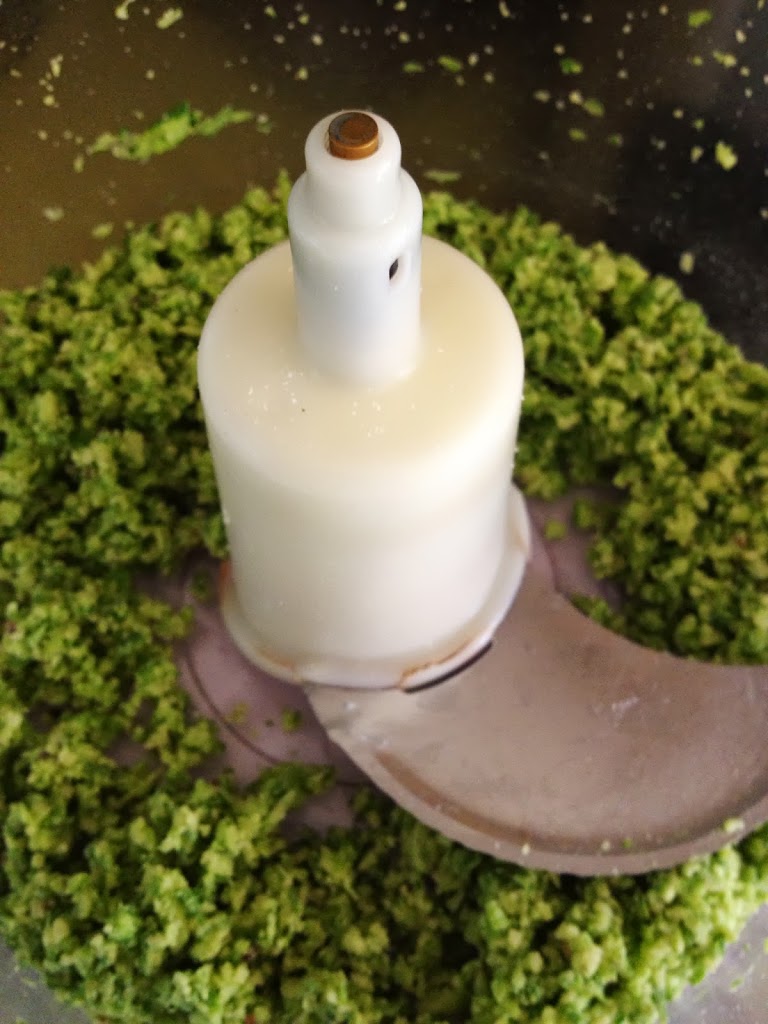 Cut the scapes into pieces and put into a food processor. Add the Parmesan cheese, lemon juice and pepper. Blend until finely chopped and mixed.
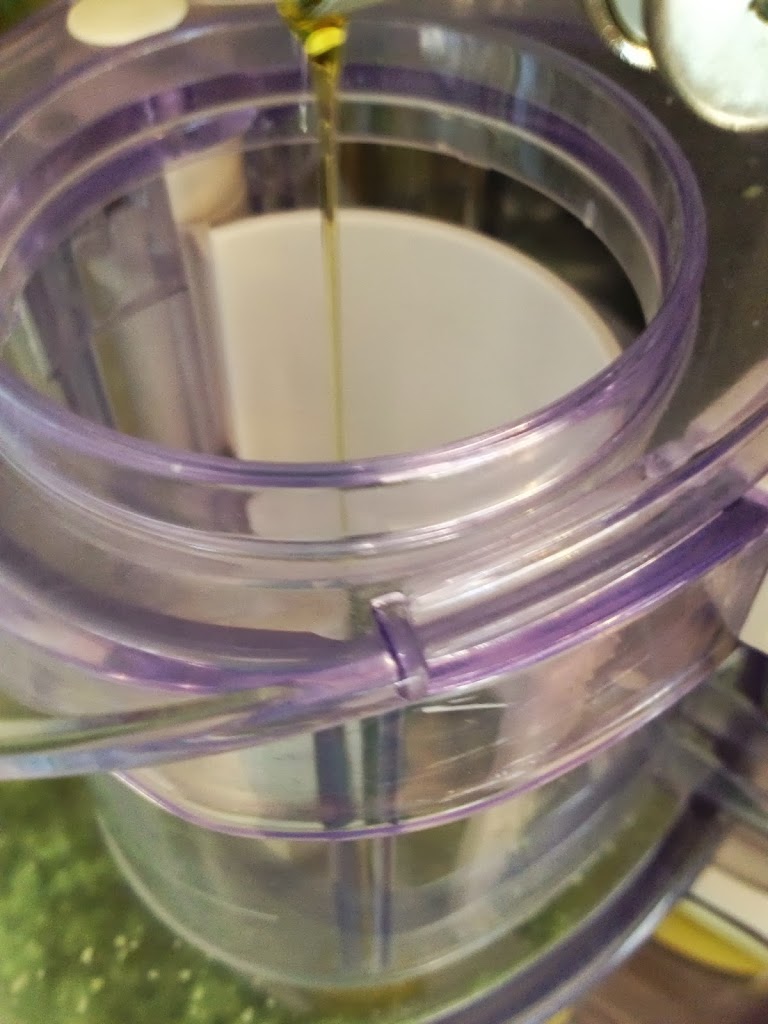
Slowly drizzle the olive oil into the processor while it is on low until the pesto becomes the consistency you desire. Taste and add more lemon juice or salt and sugar as needed, a small amount at a time.
Pesto can be used as an appetizer, on sandwiches, in pasta dishes and on meats. It also freezes well. I hope you enjoy this new use for garlic!
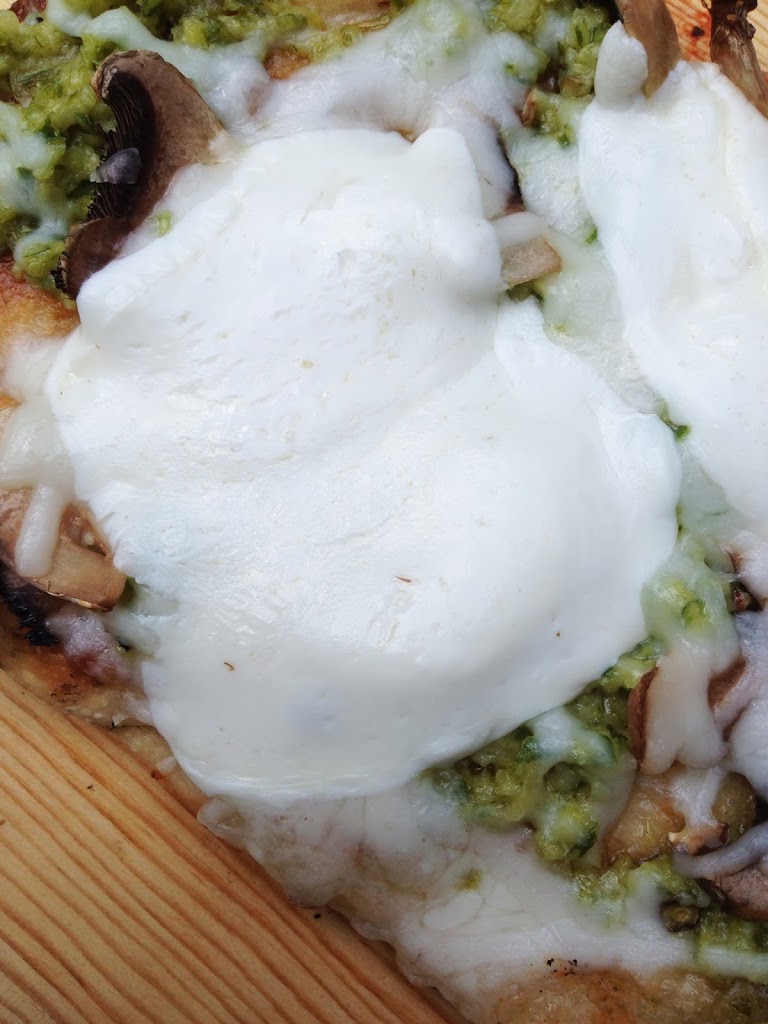
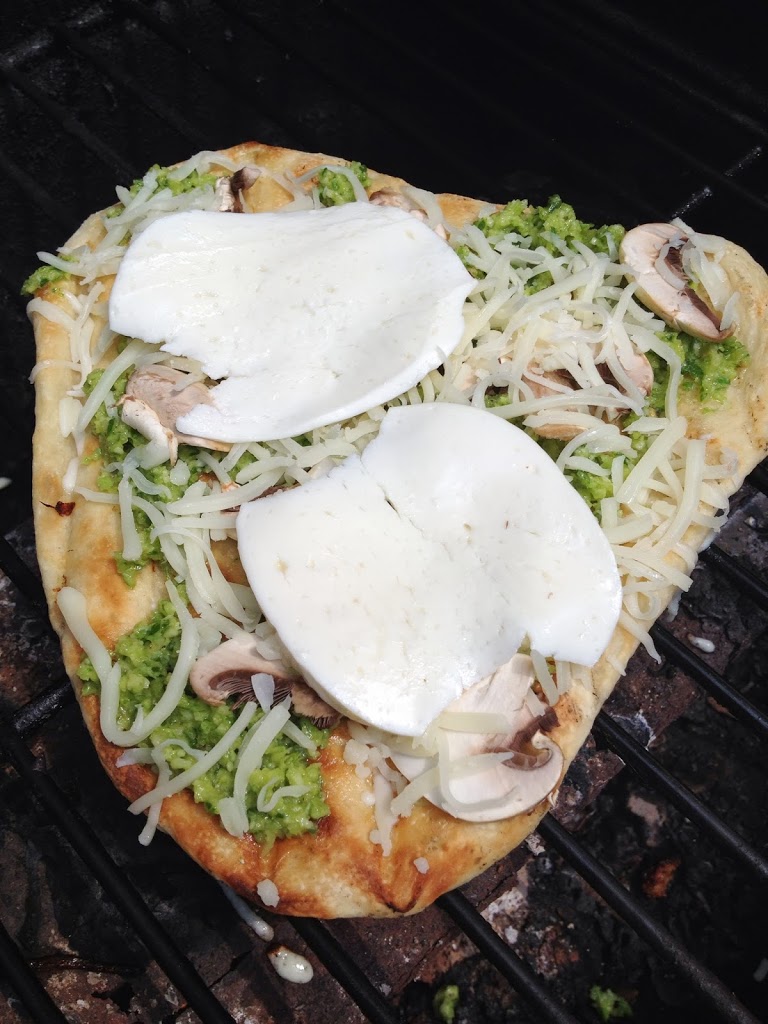 I spread the pesto on grilled pizza dough and topped it with mushrooms and mozzarella cheese. It made a very tasty grilled garlic cheese bread. Let me know what you use your pesto for!??!

One of my favorite restaurants has an appetizer called Bleu Cheese and Caps which is small sautéed mushroom caps served on a bed of large, crunchy croutons topped with melted bleu cheese. I order it every time and eat every last bite! I have adapted the recipe and bake it on flatbread. Preparing the dish on the flatbread allows for it to be served as a finger food that is much easier to eat.
This recipe incorporates two of my very favorite flavors: garlic and rosemary. It is important to use fresh rosemary for its tenderness. When dried, rosemary becomes quite brittle and sharp, and it doesn’t soften when used in cooking. You can use whatever your choice of mushroom is. There are a variety of edible mushrooms. For a stronger flavor that compliments the garlic and rosemary, use a baby Portabella or even a Shiitake. However, white button mushrooms work fine as well. Mushrooms are not just perfect for adding flavor to dishes, they are also known for many health benefits and are a good source of vitamin D and fiber. Mushrooms are like mini-sponges though, so do not wash them under water because they will absorb the water and become mushy when cooked. Just take a damp cloth and wipe them clean.
Caps and Bleu Cheese Flatbread

2 Pieces of Flatbread (pre-packaged or homemade is fine)
2T Olive Oil (I use Garlic Infused Olive Oil from www.theolivetwist.com)
4-6 Mushroom caps, button or baby Portabellas will work, sliced depending on the size
3-5 Garlic cloves, thinly sliced
3/4C Gorgonzola Cheese crumbles
1t fresh Rosemary, chopped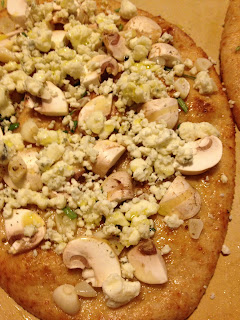
4-6 Mushroom caps, button or baby Portabellas will work, sliced depending on the size
3-5 Garlic cloves, thinly sliced
3/4C Gorgonzola Cheese crumbles
1t fresh Rosemary, chopped

Preheat oven to 350 degrees. Lay the flatbread on a baking sheet. Drizzle heavily with Olive Oil. Layer the mushrooms, garlic and cheese on the bread. Sprinkle with chopped rosemary. Drizzle with olive oil.
Bake for 12-18 minutes until the bread is toasty, the mushrooms and garlic are soft and the cheese is bubbling. Place under the broiler for 2-3 minutes to brown the cheese slightly.

Slice, garnish with a sprig of rosemary and serve. This appetizer is great hot or at room temperature, so it is perfect for parties.
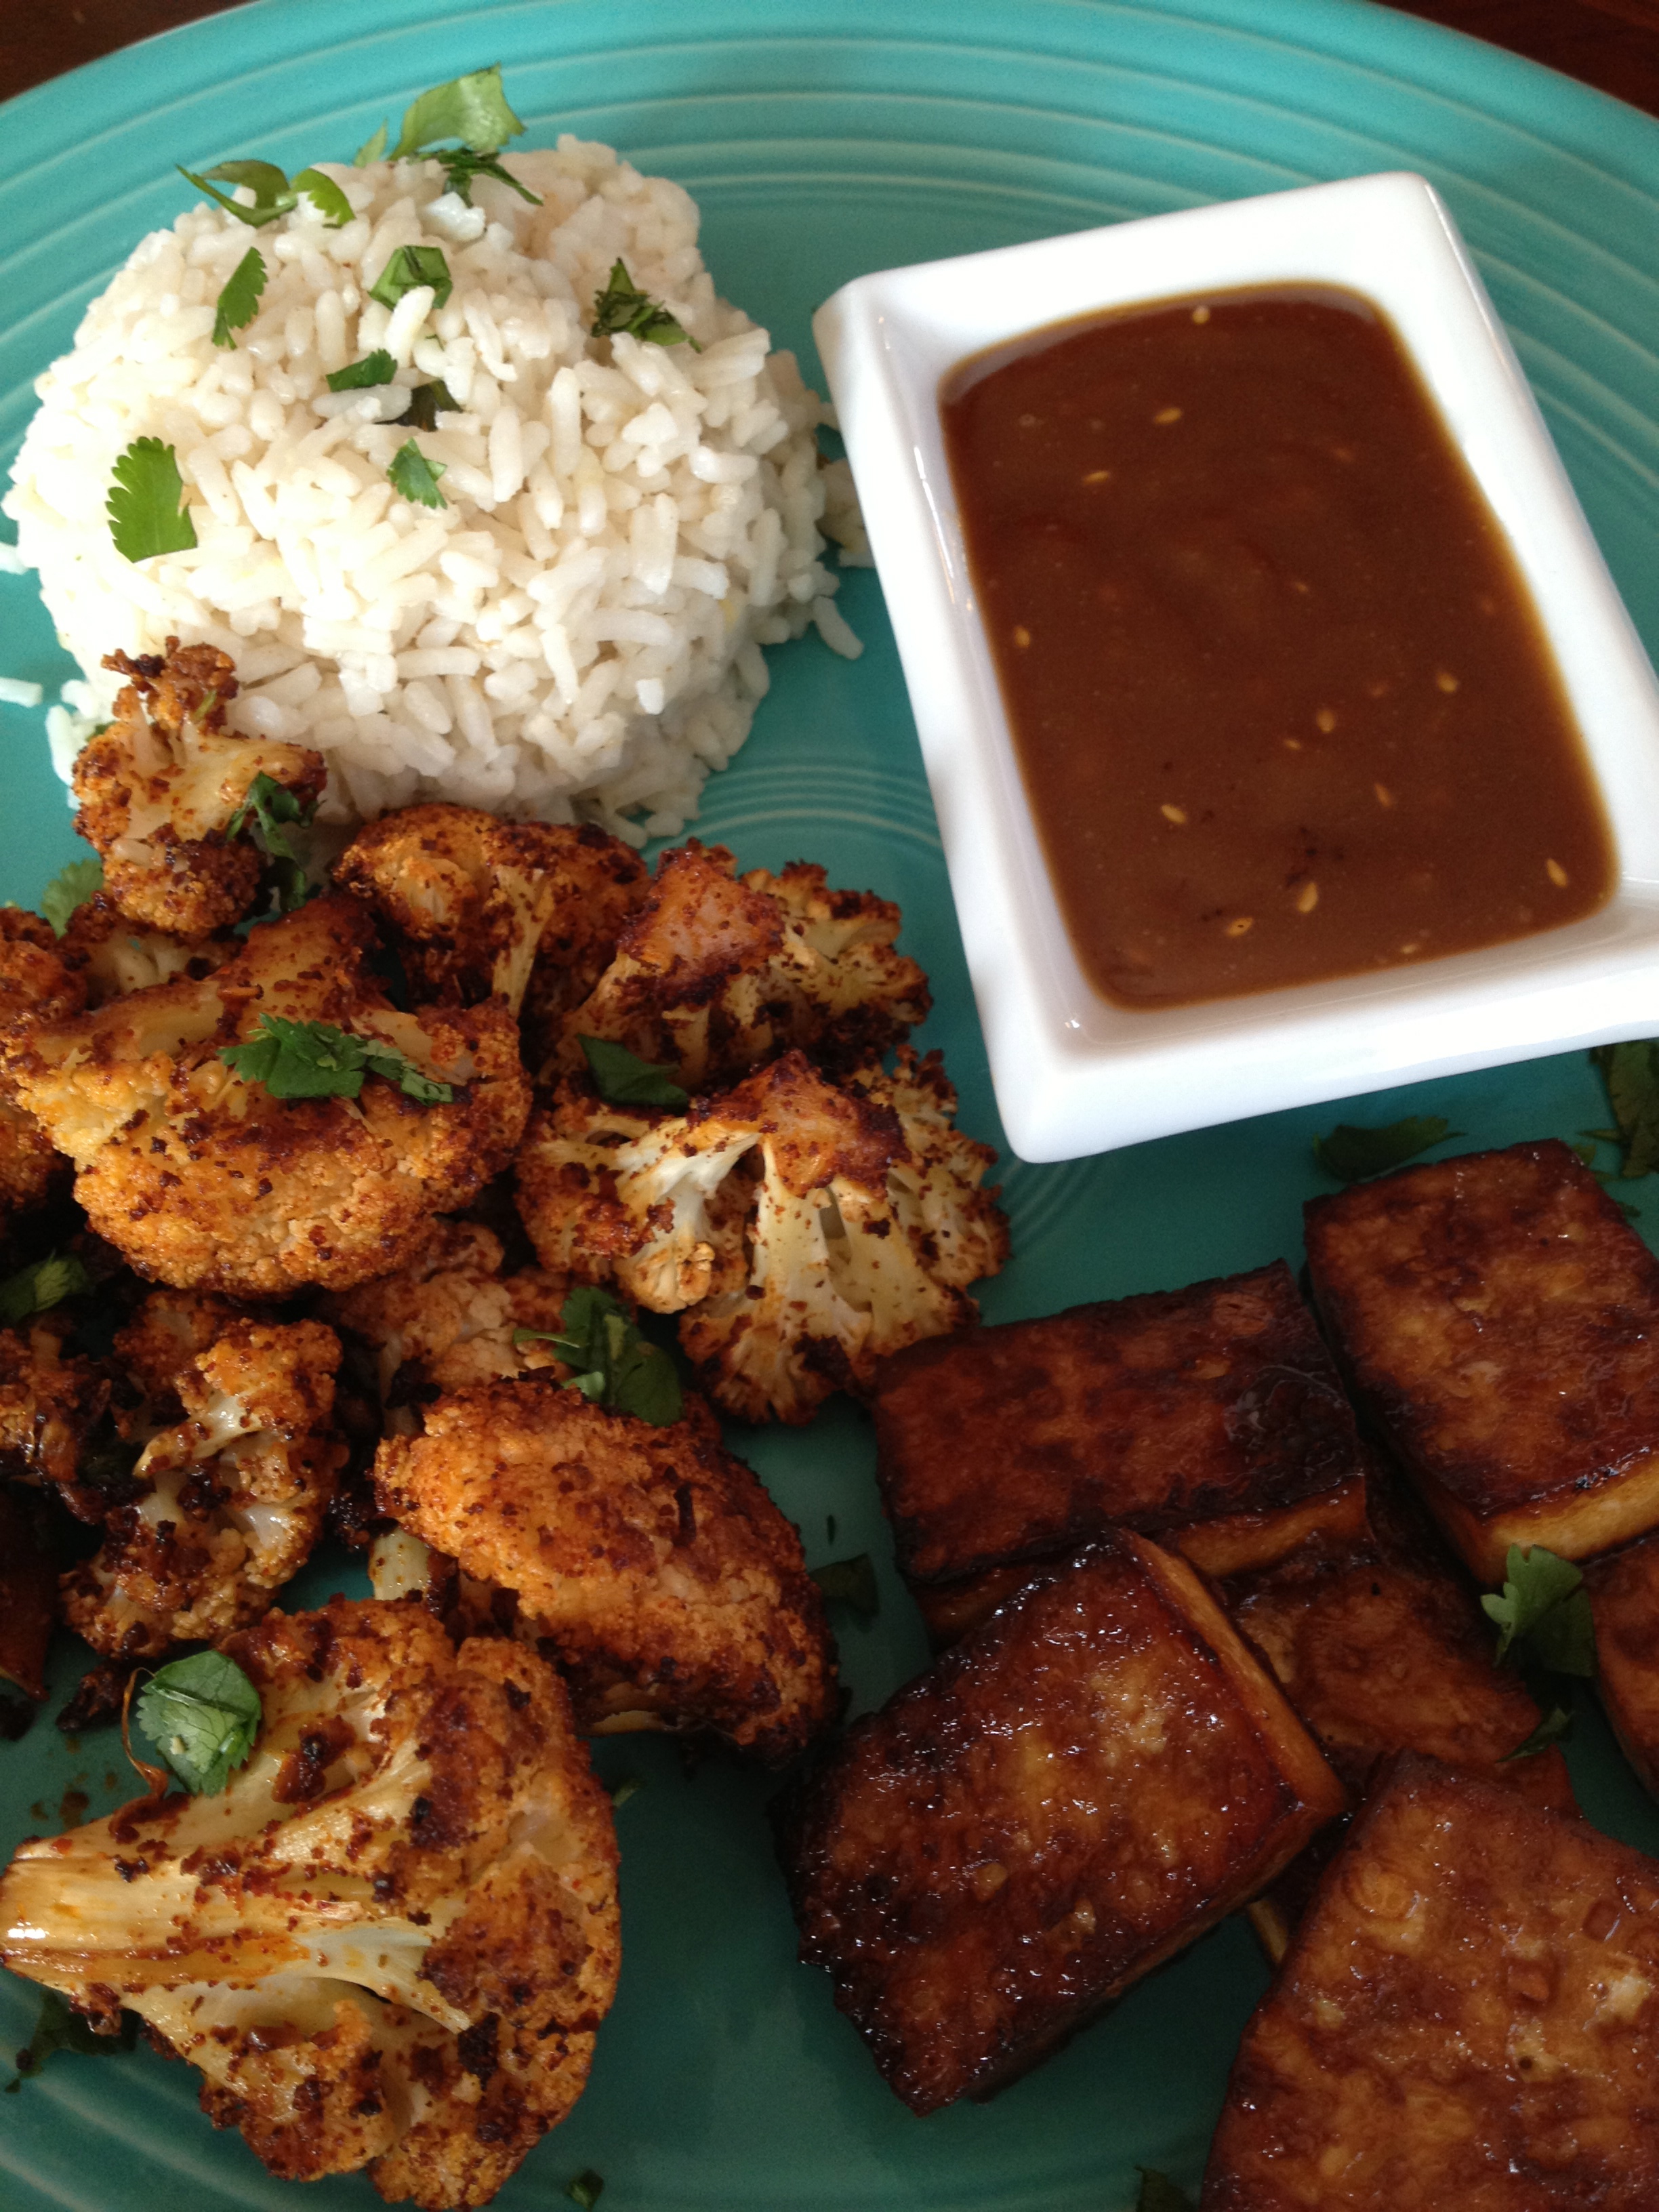

I live in a rural part of northeast Indiana. The nearest Thai restaurant is about 45 minutes away, so when I had a Thai craving it went unsatisfied…until recently. After much searching and adapting, I have put together a Thai inspired feast that is spicy and simple.
I tied together the flavors of the dishes with the crushed red chili pepper and lime. The meal includes Chili Lime Roasted Cauliflower, Chili Lime Grilled Chicken Satay Skewers and Roasted Tofu with a Thai Peanut dipping sauce on Coconut Milk Rice, and Pad Thai noodles. I love the spiciness of Thai, and all of these recipes are plenty spicy. I do not recommend adjusting the heat at all until you’ve sampled first.

First, the base of the Pad Thai, Peanut Sauce and the marinade for the Chicken and Tofu is a spicy sesame oil made by combining 1 C of Sesame Oil and 2 T crushed red chili peppers in a small saucepan and heat over medium heat for 2-3 minutes. Pour through a strainer to remove pepper flakes. Reserve oil for use in the following recipes. And, in case you skipped the last line of the previous paragraph, do not add extra pepper…this will be plenty hot!

Thai Peanut Sauce
1T Peanut Butter
2T Spicy Sesame Oil
2T Soy Sauce
1T Brown Sugar
1t Siracha Sauce
1t Sesame Seeds (I like mine toasted)
Whisk together. Set aside as dipping sauce for chicken, tofu and cauliflower.

Chili Lime Roasted Cauliflower
1 Head of Cauliflower
3 Cloves of Garlic, minced
1T Red Chili Powder
1/2t Crushed Red Pepper Flakes
1t Cumin
4T Olive Oil
1/4C Cilantro, chopped
Juice of 1/2 Lime
Kosher or Sea Salt
Preheat oven to 325 degrees. Clean the cauliflower and cut apart florets. Mix together the remaining ingredients, reserving half of the cilantro for garnish. Toss with cauliflower in a large bowl. Place on a baking sheet. Roast 1- 1 1/2 hours, turning occasionally. Garnish with a squeeze of lime juice and the remaining cilantro.
 Chili Lime Roasted Tofu

1 Tofu block, cut in 1/2 inch cubes
Juice of 1 Lime
1 Clove of Garlic, minced
1t Red Pepper Flakes
3T Spicy Sesame Oil
Mix the ingredients. Place the tofu in a dish and cover with marinade. Refrigerate for 30 minutes. Preheat oven to 400 degrees. Place tofu on a baking sheet and roast for 20 minutes. Turn halfway through cooking time.

Coconut Milk Rice
Basmati Rice
Chicken or Vegetable Broth
Coconut Milk
1t Fresh grated Ginger
1/2t Fresh ground Clove
1T Cilantro, chopped
Prepare rice as directed on package, but substitute equal amounts of broth and coconut milk for the water. Add ginger and clove. Once fluffy, toss in the chopped cilantro.

Chili Lime Chicken Satay Skewers
1lb boneless skinless chicken thighs (you can use breasts if you prefer)
3T Soy Sauce
2T Honey
1T Spicy Sesame Oil
Juice of 1 Lime
2 Cloves Garlic, minced
1-2t Siracha
Red Pepper Flakes
2T Cilantro, chopped
Bamboo Skewers (soak in water for 20 minutes so they won’t burn on the grill)
Mix the ingredients, reserving 1T of cilantro for garnish. Cut the chicken into pieces to skewer. Place the chicken in the marinade and refrigerate for an hour. Skewer the chicken pieces. Grill for 6-8 minutes per side. Garnish with lime juice, lime slices and chopped cilantro.Pad Thai
1/2C Spicy Sesame Oil
4T Brown Sugar
6T Soy Sauce
Splash of Siracha
Juice of 1 Lime
1 box Linguine, Angel Hair pasta or Rice Noodles
2T Olive Oil
1/2C Green Onion, chopped (separate greens from the whites)
1/2C Carrots, grated
1/2C Cilantro, chopped
2 Cloves Garlic, minced
1 Egg (optional)
1/2C Peanuts, roughly chopped
Mix together the first five ingredients. Set aside. Prepare noodles as directed on package. Heat olive oil over medium-high heat. Sauté the white part of the onion, carrots and garlic. Scramble in egg if desired. Reduce heat. Toss in noodles and add sauce. Garnish with chopped peanuts, green onions and cilantro.
This is a lot of food! I actually made the Pad Thai and Chicken Satay skewers with Peanut Sauce for one meal, and then had the cauliflower, tofu and rice for another meal…my meatless meal for the week. Once you have the Sesame Oil and Siracha in your pantry, these actually end up being very economical too. Considerably less than ordering take-out, if you live closer than I do to a Thai restaurant!

Once upon a time, my mom came for a visit. She swooped in the door with a plate wrapped in paper towel and said, “you have to try this…it’s like eating eggplant chips!” They weren’t even warm, but they were crisp and flavorful. Very tasty! So, it was time to experiment a crispy fried eggplant recipe. This fried eggplant is great to just munch on by itself, but it also pairs perfectly with the simple tomato basil sauce in an upcoming post.
Eggplant is a vegetable that has bragging rights for being near the top of the list of “Brain Foods” due to it’s fiber content, vitamins, minerals and antioxidant properties. It is a flavorful and versatile food. Though there are many varieties, the typical eggplant found in America is pear-shaped and purple in color. Eggplant should be firm and the skin smooth and shiny without scars or discoloration. They are very perishable, so plan on using within a few days of purchase. Do not clean or cut prior to storing. Eggplant can be eaten with or without the skin, which can sometimes be bitter. To prepare eggplant for use, cut it with a stainless steel knife and sweat the liquid out of the vegetable by placing it on paper towel and sprinkling it with salt. Let sit for about 30 minutes and then dab the excess liquid off with another paper towel. If you need to, you can rinse to remove the rest of the salt. For this recipe, I leave the salt.


There are so many options for the breading. To keep this recipe simple, store bought crumbs are the easiest though they do have a higher sodium and sugar (corn syrup) content. A benefit of store bought crumbs is that they can be purchased with Italian seasoning. If you don’t have bread crumbs on hand, you can make your own with bread, crackers or even cereal. Just pulse in a food processor or spice grinder. Add Italian seasoning and you have seasoned breadcrumbs with control of the ingredients. If you do not have pre-mixed Italian Seasoning, you can make it by blending dried basil, oregano, thyme, rosemary, and marjoram. Some also include black pepper, garlic and red pepper flakes. For a healthier version of store bought breadcrumbs that have less additives and cook nice and crisp, use Panko breadcrumbs. For this recipe, I add grated Parmesan cheese to the breadcrumbs.

Crispy Fried Eggplant
1 Medium Eggplant with skin on, thinly sliced and sweated
1-2+ T Course ground Kosher Salt or Sea Salt (regular table salt will work)
1 1/2 – 2 C Seasoned Breadcrumbs
Binder for breading (this can be a couple eggs or egg whites beaten with a liquid added such as water or milk, or just milk)
1/4 C Grated Parmesan Cheese
Olive Oil* (to cover the bottom of the pan about 1/4 in)
*Higher quality, extra virgin olive oils have a higher smoke point or can be heated higher without burning. I use my favorite oil from a local shop, The Olive Twist (www.theolivetwist.com).
 Because this is what I would consider a lightly breaded recipe, I don’t use the typical three-step dredging process. Set-up your area like a little assembly line: frying pan with heated olive oil, bowl of seasoned bread crumbs and cheese mixture, bowl of egg/milk, sliced eggplant already sweated. I try to use the wet hand – dry hand method, but typically goof up and use the wrong hand so I end up with fingers that look like Sasquatch fingers. Dip the eggplant in the liquid and then transfer to the breadcrumbs. Cover completely with breadcrumbs by flipping the piece over. Place gently in the heated oil. Because these are so very thinly sliced, they do not take long to cook. Fry a few minutes on each side until a golden brown.
Remove from the pan and place on paper towel to remove excess oil. Remember to constantly change the paper towel to keep the food from reabsorbing the oil and becoming soggy. Sprinkle with salt. This is one of those things that are lucky if they make it to a plate because I eat them as quickly as they come out of the pan! Keep warm on a baking sheet in a low temperature oven.
Serve with your favorite pasta topped with marinara for a perfect Eggplant Parmesan. Sprinkle additional Parmesan cheese or top with melted mozzarella.


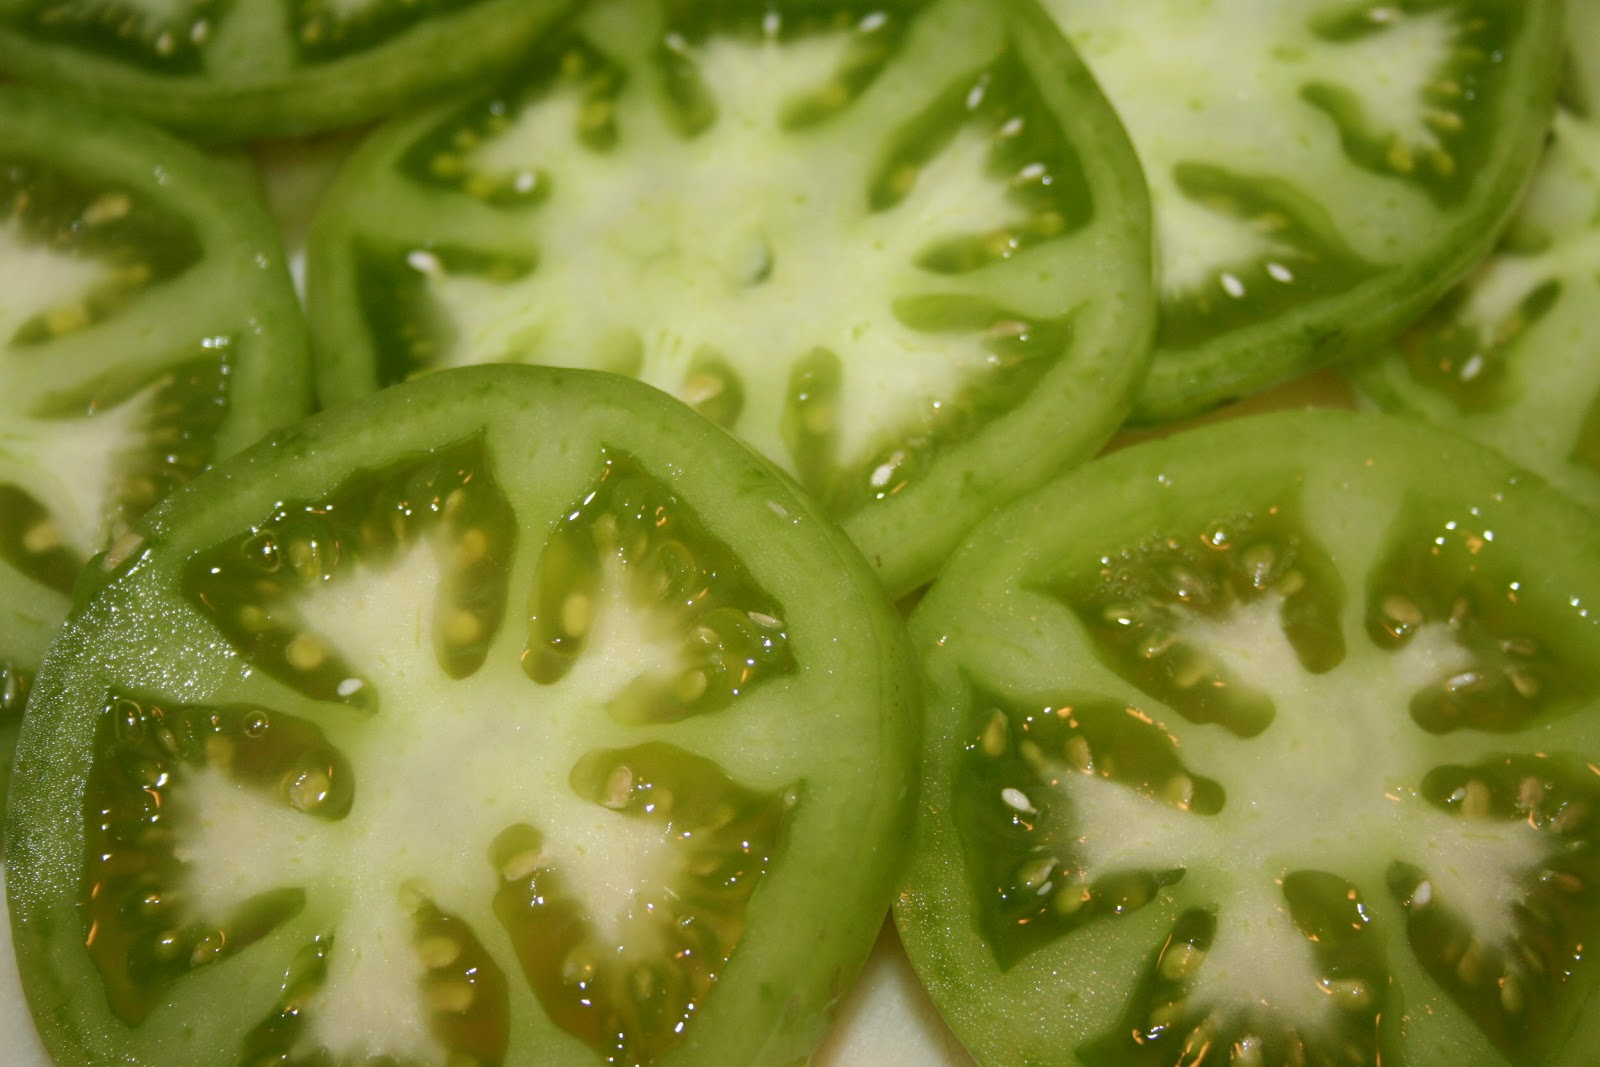
A few years ago I was introduced to beer batter chicken by a friend. It was a favorite, nearly weekly meal for he and his kids. It quickly became a requested meal by my children as well. He had used a box mix to make his batter, but I knew I could put together a batter with pantry items that are always on hand and much less expensive. Beer batter chicken night quickly expanded to beer batter chicken and onion rings, then pickles, then green tomatoes, then mushrooms, and then my favorite, garlic cloves. Now we have Beer Batter Everything night!!
The one thing I liked about the first beer batter chicken that I had, is it was in two-bite pieces, so I still prepare it like that. What I have found is that this is a perfect “eat around the kitchen island” meal. It never makes it to the table. Fried food is best hot out of the oil, crisp and salty. I put a huge serving plate in the middle of the island with a variety of dipping sauces around it, and everyone just grabs and gabs. The minute the first batch comes out of the oil, the plate is descended upon as if by vultures!
 I fry in a frying pan, though some prefer to use an electric fryer. I use a standard vegetable oil, but you can use whatever clear, flavorless oil you prefer. Just remember that it must be able to be heated to 365-375 degrees. It takes about 4 cups of oil to fill the pan so that there is about 1 1/2-2 inches of oil in the pan. A fryer will have a temperature setting. For a frying pan, you can use a deep fat frying thermometer. If you don’t have a thermometer, you can test the oil by placing the handle of a wooden spoon in the oil, if the oil bubbles around the handle, it is ready. Some also recommend tossing a small square of bread in the oil and it will brown in about a minute, or tossing in a single kernel of popcorn in and it will pop when the oil is about 360-365 degrees. I use the more discouraged method of dripping a single drop of water into the oil while standing clear of splatter, if it pops, then the oil is ready. Do not use that method unless you are familiar with what happens, to avoid being burned by the popping oil.
 Beer Batter

1 1/2 – 2 C all-purpose flour
1 lg egg
1 t garlic powder
1/2 t salt (I use garlic salt or spicy seasoned salt)
1/2 t ground pepper
1 1/2 C beer (= 1 12oz bottle beer)
Course ground Kosher or Sea Salt
Whisk all of the ingredients together in a large bowl. Be sure it is well blended. Allow to sit for a few minutes to let the beer bubbles settle.

Be sure that the pieces of food that you drop into the oil are consistent in size so they cook evenly.


Dip the food into the batter and place gently into the oil. Avoid over-crowding the pan. I put about 8-10 pieces in at a time.
 Once you have all of the pieces in the oil, use a long handled utensil to be sure they are all separated and not sticking to the bottom of the pan.
 Turn the pieces half-way through when they begin to turn a golden brown. Depending upon the temperature size of the pieces, and what type of food (meat v/s vegetable), it will take about 5-7 minutes for them to cook.
Remove with a slotted spoon and place on clean paper towel. Be sure to change the towel with each batch to keep the food from re-absorbing the oil and becoming greasy and soggy. Salt generously while still hot, then transfer to a fresh paper towel on the serving plate. If you chose to serve the food all together at the table, you can put it on a baking sheet and place in a 300 degree oven to keep it warm and crisp.

Serve with a variety of dipping sauces: BBQ, honey mustard, Ranch dressing, Buffalo Sauce, ketchup, Bleu Cheese dressing, etc.
Did I mention how much I love fried garlic cloves!?! Be sure to give them a try!! Enjoy!

What!??! Bacon has it’s own holiday??? Of course it does! Every wonderful thing in the world that deserves to be celebrated has a holiday: the day we are born, weddings, historic events and people, days of religious significance…I could go on and on. Some holidays are local or regional, like “Fair Day” in the county where I live. Every country has special days, such as their own Independence Day. Of course, there are the favorites of retail shops and advertisers everywhere: the “Hallmark Holidays” like Sweetest Day (as if single people needed yet another reminder of their status a mere 8 months after Valentine’s Day!). Then there are the fun, wacky, sometimes serious, theme-based daily, weekly and monthly observances. Among my favorites: National Gummy Bear Day (July 15), National Pickle Day (November 14), and Squirrel Appreciation Day (January 21). I bet you are wondering about that last one!?! And, though I truly believe that bacon should be celebrated everyday, there is International Bacon Day (September 1).
So, how did I celebrate Bacon Day last weekend?? With everything bacon, of course! I started the morning filling the house with the amazing aroma of peppered bacon frying (see: http://changingseasonings.blogspot.com/2012/03/can-bacon-really-be-any-tastier-yep.html). Later in the day, I made spicy, cheese-stuffed, bacon-wrapped grilled jalapenos to snack on. Then, for dinner, zesty roasted cabbage drizzled with a maple-balsamic glaze and sprinkled with…you guessed it – bacon!
 Grilled Stuffed Bacon-Wrapped Jalapenos

6-8 large Jalapenos
6-8 slices bacon
1 8oz pkg cream cheese
Optional: favorite cheeses (I used Colby-Jack and Bleu-Jack. String cheese works well too!)
Small skewers
Wash the jalapenos and leave them whole. Make a slice through one side from about a 1/4 in. below the stem to 1/4 in. from the tip. Using a small metal vegetable peeler tip or the handle of a table spoon, scrape out the seeds and veins, being careful not to split the pepper.

Stuff the pepper with the cheese. If using a block cheese in addition to the cream cheese, cut the cheese to size and tuck in the slit in the pepper. Then fill the remainder of the space with the cream cheese. Do not over-fill the pepper or you will have a mess when you cook it. Wrap a slice of bacon around the pepper and secure with a skewer. If you are using wooden skewers, be sure to soak them for about an hour prior to using them so they are less likely to burn. Place the peppers on the grill (you can use a grill pan if necessary) and grill on medium-high. Turn the peppers to evenly roast the peppers and keep the bacon from burning. Cook until the peppers are roasted, the bacon is browned and the cheese is melted.
 Roasted Cabbage with Maple Balsamic Glaze

1 head of cabbage
6 T Balsamic Vinegar (I get my favorite from a local Olive Oil and Vinegar shop: www.theolivetwist.com)
4 T Maple Syrup
Kosher or Sea Salt
Cracked Peppercorn
Olive Oil
3 slices of bacon cooked and crumbled
Wash the Cabbage and peel of any wilted outer leaves. Slice the cabbage in rounds about 1-1 1/2 in. thick. Lay on a baking sheet and drizzle generously with olive oil. Sprinkle with salt and pepper. Roast in the oven at 400 degrees for 40-45 minutes.
Mix the vinegar, maple syrup and a pinch of the salt in a small saucepan over medium heat until boiling. Plate the roasted cabbage and drizzle with the glaze. Top with the crumbled bacon.

The other day, my son asked me what my favorite food is. He was on a mission. He was curious about what my favorite things are: color, car, animal, not because of a deep desire to better understand the things his mom is passionate about, but to try and hack into my computer account. I caught on quickly, and informed him he was very much off base and commended him for his effort. However, I was not able to answer the favorite food question. Being a person who loves to cook and to eat, I have so many foods that I adore. I can’t pick just one thing (no, not even bacon!), though there are definitely tastes that I love such as lemon, garlic, strong herbs like rosemary and cilantro, and the spicy flavors of regional and ethnic foods like Cajun, Caribbean, Mexican and Indian. Even though I can’t name one food that is my absolute favorite, I do have several weaknesses…foods that I just can’t say no to. Two of my biggest weaknesses, bread and cheese. This simple recipe includes both a crusty bread and soft cheese, as well as garlic and fresh herbs. It is quick and easy, and is a versatile appetizer or just a tasty snack.
Bruschetta is an Italian antipasto made from toasted bread rubbed with garlic and drizzled with olive oil. The bread can be topped with roasted peppers, tomatoes, cured meats like chorizo, salami or pepperoni and cheeses. The popular Americanized version of Bruschetta is topped with tomatoes, garlic and basil with mozzarella cheese.

Like so many foods, this recipe is even better when prepared on the grill. This Father’s Day weekend, I’m blogging from one of my dad’s favorite places: our family lake cottage. Being at the lake offers a few challenges to food prep, mostly because I’m not in my own kitchen with my tools. I even forgot to toss my favorite knife into the supply bag with the rest of my ingredients. If you ever used a knife at our lake place, you would understand why that’s a big deal. Most of the knives are probably antiques and can barely cut through soft butter, but I found the sharpest one and made it work. The other catastrophe this trip was that my favorite olive oil fell over in the back of the car during the trip and leaked out of the bottle. My husband’s reaction: “oh man, the truck carpet!” My reaction: “oh man, my olive oil!” Priorities, right!?! Thankfully, I still had enough to cook with, but I will be making a trip to The Olive Twist this week to stock up!
 Grilled Bruschetta with Fire Roasted Tomatoes and Garlic

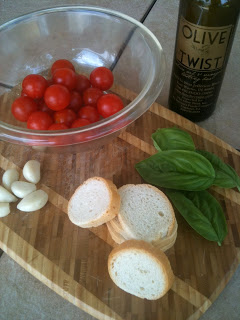
1 package Cherry or Grape Tomatoes
1 8oz pkg Fresh Mozzarella Cheese
1 loaf Crusty Italian Bread cut in 1/2 in slices (our local grocery store sells bags of “day old” bread already sliced)
1 head of Garlic (leave one clove whole to rub bread* and slice the others)
Olive Oil
Fresh Parsley (optional)
6-8 leaves Fresh Basil
Coarse ground Sea Salt and Black Pepper
Mesh grill roasting pan
*I saved myself a step and used Garlic Infused Olive Oil, so I didn’t rub the bread with the garlic.
 |
|||
| Wash tomatoes and slice in half. Peel garlic and slice thin. |
 |
| Roll the Basil leaves to make them easier to slice. |
 |
|
| Slice Basil thin. |
Place the tomatoes, garlic slices, parsley and 1/2 of the basil in a bowl. Drizzle with olive oil. Salt and pepper. Toss together. Preheat grill and grill pan.


 |
| Rub bread with garlic clove. Drizzle olive oil on both sides. |

Reduce the grill to medium-low. Pour the tomato mixture on the grill pan. Gently toss as the bread toasts. Lay the bread directly on the grill rack to toast. Check frequently to be sure not to burn the toasts. Move the pieces around the grill and flip over as necessary.

When the tomatoes start to “burst” and the garlic is lightly browned, remove from the grill and put back into the bowl. Be cautious not to overcook the garlic as it can become bitter. Remove the toast when a deep golden brown on both sides.

Allow the tomato mixture to cool slightly before adding cheese. Cut the fresh Mozzarella into small pieces (about half the size of the tomatoes). Add the cheese, the remainder of the basil and another generous drizzle of olive oil to the bowl and gently toss. Spoon onto the toasts. Garnish the serving plate with whole basil leaves.
When you bite into these tasty treats, the tomatoes will pop in your mouth and the juices and olive oil will run down your hands, so have napkins nearby!
Grilled Bruschetta with Fire Roasted Tomatoes and Garlic
Author: Changing Seasonings
Recipe type: Appetizer
Cuisine: Italian
Prep time:
Cook time:
Total time:
Serves: 18-20 toasts
Ingredients
- 1 package Cherry or Grape Tomatoes
- 1 8oz pkg Fresh Mozzarella Cheese
- 1 loaf Crusty Italian Bread cut in ½ in slices (our local grocery store sells bags of "day old" bread already sliced)
- 1 head of Garlic (leave one clove whole to rub bread* and slice the others)
- Olive Oil
- Fresh Parsley (optional)
- 6-8 leaves Fresh Basil
- Coarse ground Sea Salt and Black Pepper
- Mesh grill roasting pan
Instructions
- Wash tomatoes and slice in half
- Peel garlic and slice thin
- Roll basil leaves and slice thin
- Place the tomatoes, garlic slices, parsley and ½ of the basil in a bowl
- Drizzle with olive oil. Salt and pepper. Toss together
- Preheat grill and grill pan
- Rub bread with garlic clove. Drizzle olive oil on both sides
- Reduce the grill to medium-low
- Lay the bread directly on the grill rack to toast
- Pour the tomato mixture on the grill pan. Gently toss as the bread toasts
- Check frequently to be sure not to burn the toasts
- Move the pieces around the grill and flip over as necessary
- When the tomatoes start to "burst" and the garlic is lightly browned, remove from the grill and put back into the bowl
- Be cautious not to overcook the garlic as it can become bitter
- Remove the toast when a deep golden brown on both sides
- Allow the tomato mixture to cool slightly before adding cheese
- Cut the fresh Mozzarella into small pieces (about half the size of the tomatoes)
- Add the cheese, the remainder of the basil and another generous drizzle of olive oil to the bowl and gently toss
- Spoon onto the toasts
- Garnish the serving plate with whole basil leaves
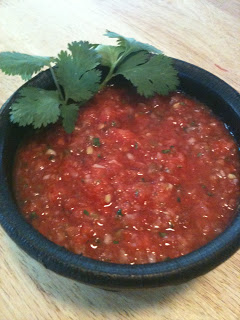

Just in time for Cinco de Mayo, comes another of my favorite herbs: Cilantro! And, how better than to incorporate this fresh and flavorful herb in a recipe than Salsa!?!

The one thing I have found is that people either love cilantro or they really don’t like it…there aren’t too many in between. It has a very distinct flavor that leaves no question about whether it can be found in the recipe. Even if you love it, be cautious because you can use too much of it. Cilantro is the leaf of the plant and coriander is the seed. Even though they come from the same plant, their tastes are very different and they can not be used to replace each other in recipes. Cilantro is wonderful fresh, but can also be found in dried spice form. The best way to store fresh cilantro is to make a new snip on the stems and place the bunch in a cup of water like you would a flower bouquet. Depending upon how quickly you will use it, you can store it on a counter or in the refrigerator. Wash and gently pat dry just before using. The leaves and stem can be used. Cilantro is often found in Mexican and Latin American recipes, but is also found in Middle Eastern, Mediterranean, Indian, South Asian, Chinese, African and Southeast Asian cuisine.
Technically, my salsa is a pico de gallo. What’s the difference, you ask?? The difference between salsa and pico de gallo is whether it is cooked or fresh. Salsa is made with cooked ingredients and pico is made by chopping and mixing fresh ingredients. However, the term “salsa” is pretty much used to describe any sauce, red or green, sweet or spicy, chunky or smooth, that is made from the basic base of tomatoes, onions, garlic, peppers and vinegar. The best part about this sauce is you can make it any way you like it. There are so many variations and things that can be added: corn, black beans, fruits (mango, pineapple and raspberries are some of my favorite!), and peppers (jalapeno, habanero, and chipotle [roasted peppers]). The other aspect you control is the amount of heat. Depending upon which peppers you use, how many of those peppers and whether you leave the seeds and veins intact. TIP: to easily remove the seeds and veins from the peppers, use a grapefruit spoon.

I suppose I really shouldn’t refer to this as a recipe for salsa, but really more as a framework. There are so many variables that influence the exact amount of each ingredient, that really the best thing you can do is add some of each thing, sample and adjust according to your taste. You never know how ripe and flavorful the tomatoes will be so you may need to add tomato paste to spark up the flavor a bit. I always dig to the bottom of the bin at the grocer’s and chose tomatoes that are almost over-ripe. Roma tomatoes are my favorite for cooking because they are more “meaty.” Peppers can vary in heat, so always start with a little then add more if needed…you can’t take the heat back out easily. Also, the longer the salsa sits, the hotter it will become. Salt and sugar work together, so add a bit of both at the same time. And, again, cilantro has a very strong flavor so add sparingly. For the acid, I typically just use white vinegar, but sometimes add a little fresh lemon or lime juice for a different flavor.

Salsa Fresca
8-10 really ripe Roma tomatoes
2-3 jalapeños depending upon size and heat
1/2-1 habenaro (optional…if you like it HOT)
1 large Texas sweet or Vidalia sweet onion
4-5 cloves of garlic (about 4t minced if you use jarred instead of fresh…either works)
a handful cilantro (more or less depending on how much you like that flavor)
1 small can tomato paste (use 1/2-whole can depending on ripeness of tomatoes and for thickening)
1/4 C white vinegar
1/4-1/2 C sugar
1-2 T kosher or sea salt

You can prepare this salsa by hand chopping all the ingredients, and if you like yours more chunky, that is probably what you would want to do. It can also be made using a food processor or even a blender. I prefer mine to be less chunky and thick, so I use my food processor. I have an awesome processor that does large pieces of food in large amounts, so I only have to peel and rough chop the ingredients and toss them in. I can also make a decent sized batch in one processor bowl. However, because of the massive amounts of salsa that are eaten by my family, friends and co-workers, I make multiple bowls and mix them together in one very large bowl before pouring into various containers for distributing and storing. This salsa lasts for quite awhile in the refrigerator. I would like to be able to tell you exactly how long, but it rarely lasts more than a week in my house before being devoured!

Some like it HOT! Mmmm...Salsa fresca!!
Author: Changing Seasonings
Recipe type: Appetizer, Condiment
Cuisine: Mexican
Prep time:
Total time:
Serves: 4 Cups
Fresh Pico de Gallo. Use as a topping for your favorite Mexican dishes or serve with chips.
Ingredients
- 8-10 really ripe Roma tomatoes
- 2-3 jalapeños depending upon size and heat
- ½-1 habenaro (optional...if you like it HOT)
- 1 large Texas sweet or Vidalia sweet onion
- 4-5 cloves of garlic (about 4t minced if you use jarred instead of fresh...either works)
- a handful cilantro (more or less depending on how much you like that flavor)
- 1 small can tomato paste (use ½-whole can depending on ripeness of tomatoes and for thickening)
- ¼ C white vinegar
- ¼-1/2 C sugar
- 1-2 T kosher or sea salt
Instructions
- Place ingredients in a food processor or blender (hand chop if preferred)
- Blend to desired consistency